LAUNCH Tyre Changer (TWC-502RMB)
4
Operation
Attention:
The use of this machine is reserved to specially
trained and authorized personnel. Use appropriate
equipment, tools and personal protective equipment,
such as eye-glasses, ear-plugs and working boots,
when operating the tyre changer. Make sure that the
power, air sources and the oil level in the oil cup are
in accordance with the requirements.
Principles
l To avoid damage when mounting and demounting
tyre, especially the alloy ones, use the tyre lever
offered by manufacturer.
l For easier demounting and better protection of the
tyre and rim, lubricate the area between the rim and
tyre bead, where the bead breaker shoe goes in,
with industrial lubricant or thick soap solution.
l Check for damages (distortions, surface damages,
excessive runout, erosion or overall wear) before
demounting.
l Pay special attention to rotary direction marked on
some flanges or tyres.
l Fit the tyre on the rim of matched size.
l Never ignore the mounting and demounting
requirements of the special wheel.
l When inflating the tyre, make sure the pressure
increases in an even way. Pay attention to status of
the tyre bead.
Demounting Tyre
Preparing
l Deflate the tyre thoroughly.
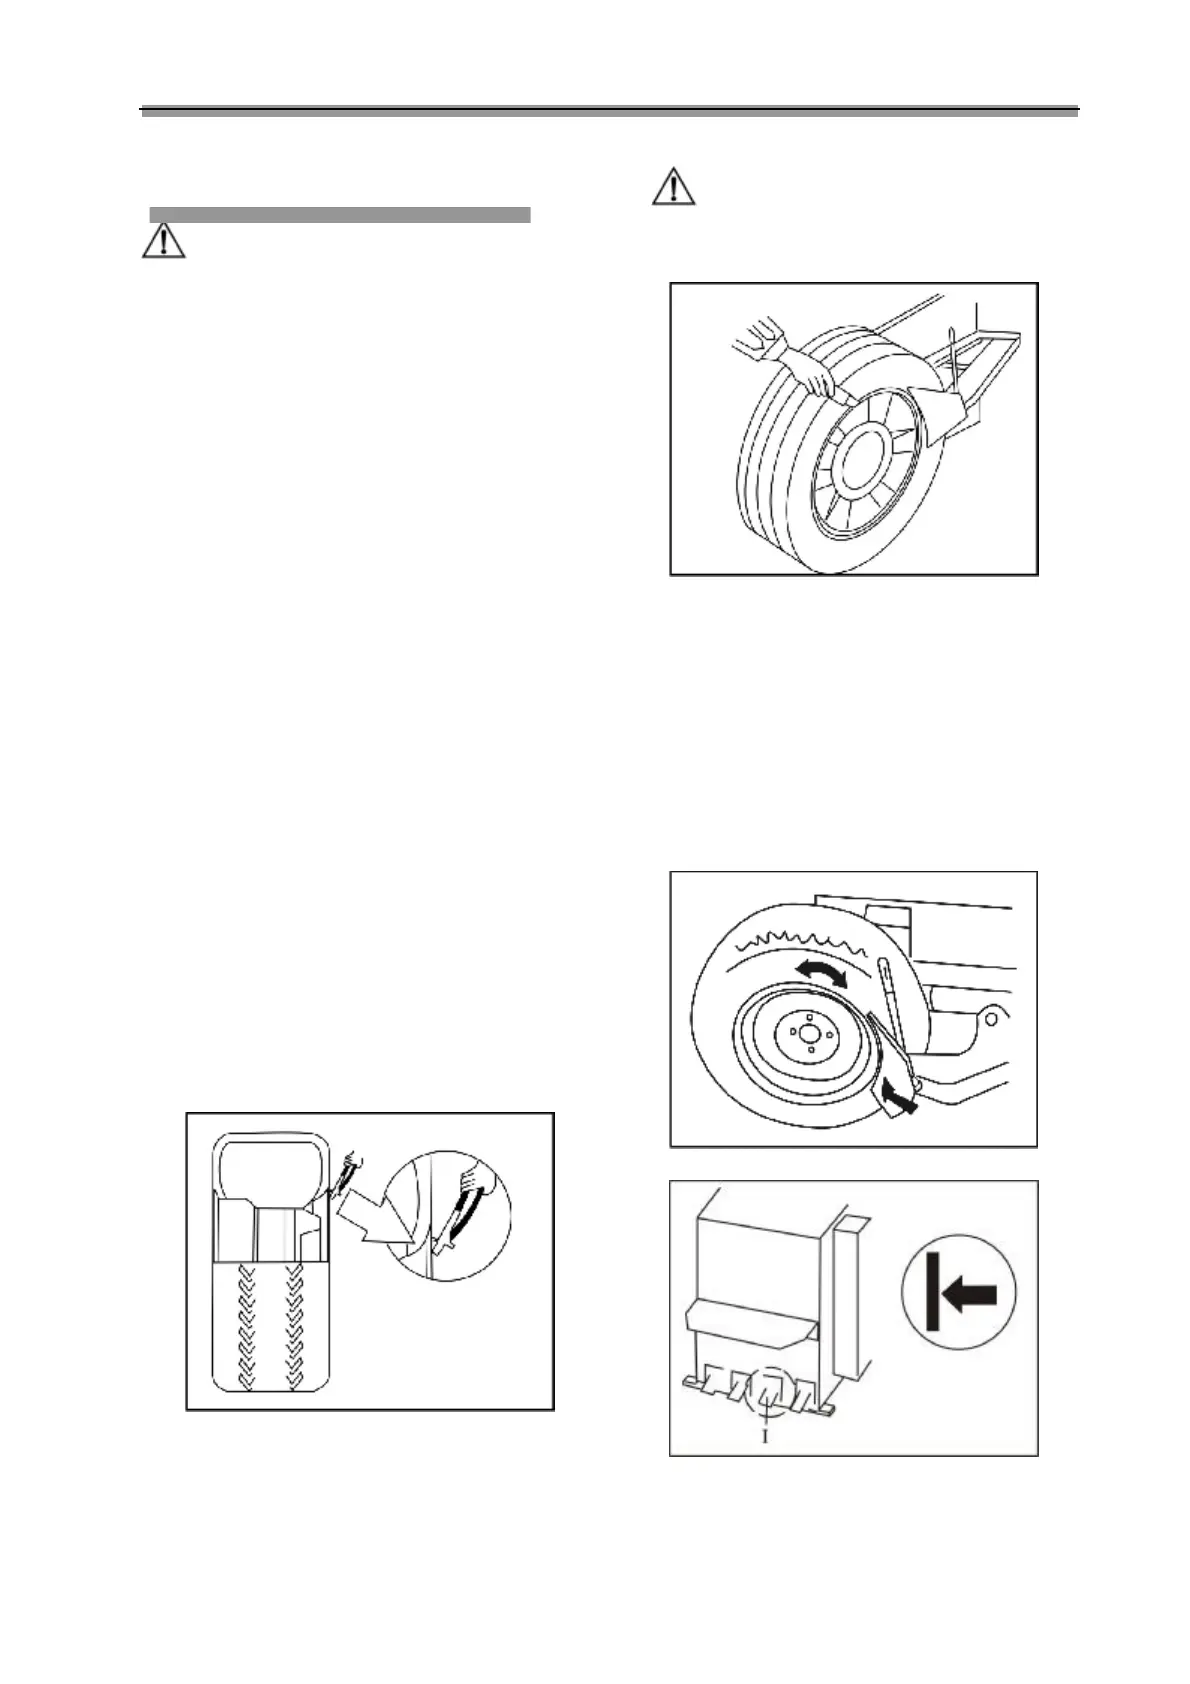
l Remove all the foreign substance and weights from
the rim (Fig. 03).
Fig.03
Demounting
Attention:
Lubricate the bead with a brush dipped in soap
solution before the shoe touches the bead.
Otherwise the tyre bead will be worn (Fig. 04).
Fig.04
l Place the tyre between the bead breaker shoe and
rubber pad and keep the shoe between the tyre
bead and rim, about 1cm to the bead (Fig. 05).
Depress pedal (I)(Fig. 06) to separate the tyre from
rim.
l Repeat the above steps on other part of the tyre to
get the tyre separated thoroughly from the rim.
l Place the wheel on the turntable. For the asymmetric
deep groove rim, keep the narrow rim upward.
l Depress pedal H(Fig.07) to the end to clamp the rim.
Fig.05
Fig.06