25
AIR & FUEL SYSTEM
Air Filter Replacement
(See Figs. 26-29)
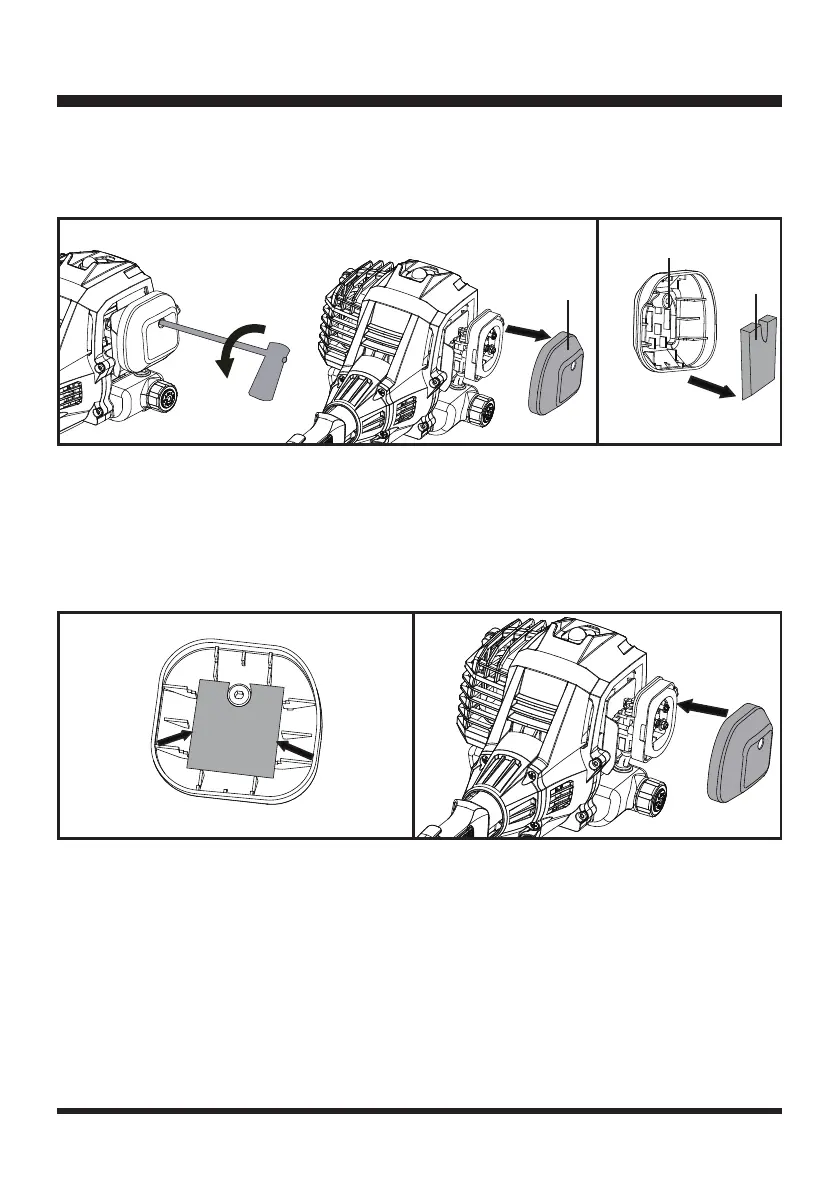
■ Loosen the screw to remove the air lter cover (Fig. 26).
■ Remove the air lter from the air lter cover (Fig. 27).
Carburetor Adjustment
(See Figs. 30-36)
NOTE:
The trimmer head will rotate during carburetor adjustment. Wear protective equipment and
observe all safety instructions.
Adjust the L screw with the carburetor adjustment tool (small) (Fig. 30).
Use the carburetor adjustment tool (big) to adjust the T screw and H screw (Fig. 31).
T screw: adjust the idle speed. To adjust the idle speed, adjust the T screw together with the L screw.
L screw: adjust the low speed ow rate, and assist the T screw to adjust the idle speed.
H screw: adjust the high-speed ow rate and maximum no load speed.
NOTE:
Inspect the lter for damage and replace with a new lter if necessary.
■ Clean the foam lter with warm soapy water and rinse. Air dry the lter.
■ Place the air lter back, ensuring that it is properly seated onto the air lter cover. Installing the lter
correctly will decrease the chances of engine wear caused by dirt entering the engine (Fig. 28).
■ Replace the air lter cover ensuring the air lter is completely covered (Fig. 29).
■ Turn the screw clockwise to secure the air lter cover.
Fig. 29Fig. 28
Fig. 27
Fig. 26
Air Filter Cover
Air Filter Cover
Air Filter

 Loading...