5 Operation
5.1 Operation - Getting Started
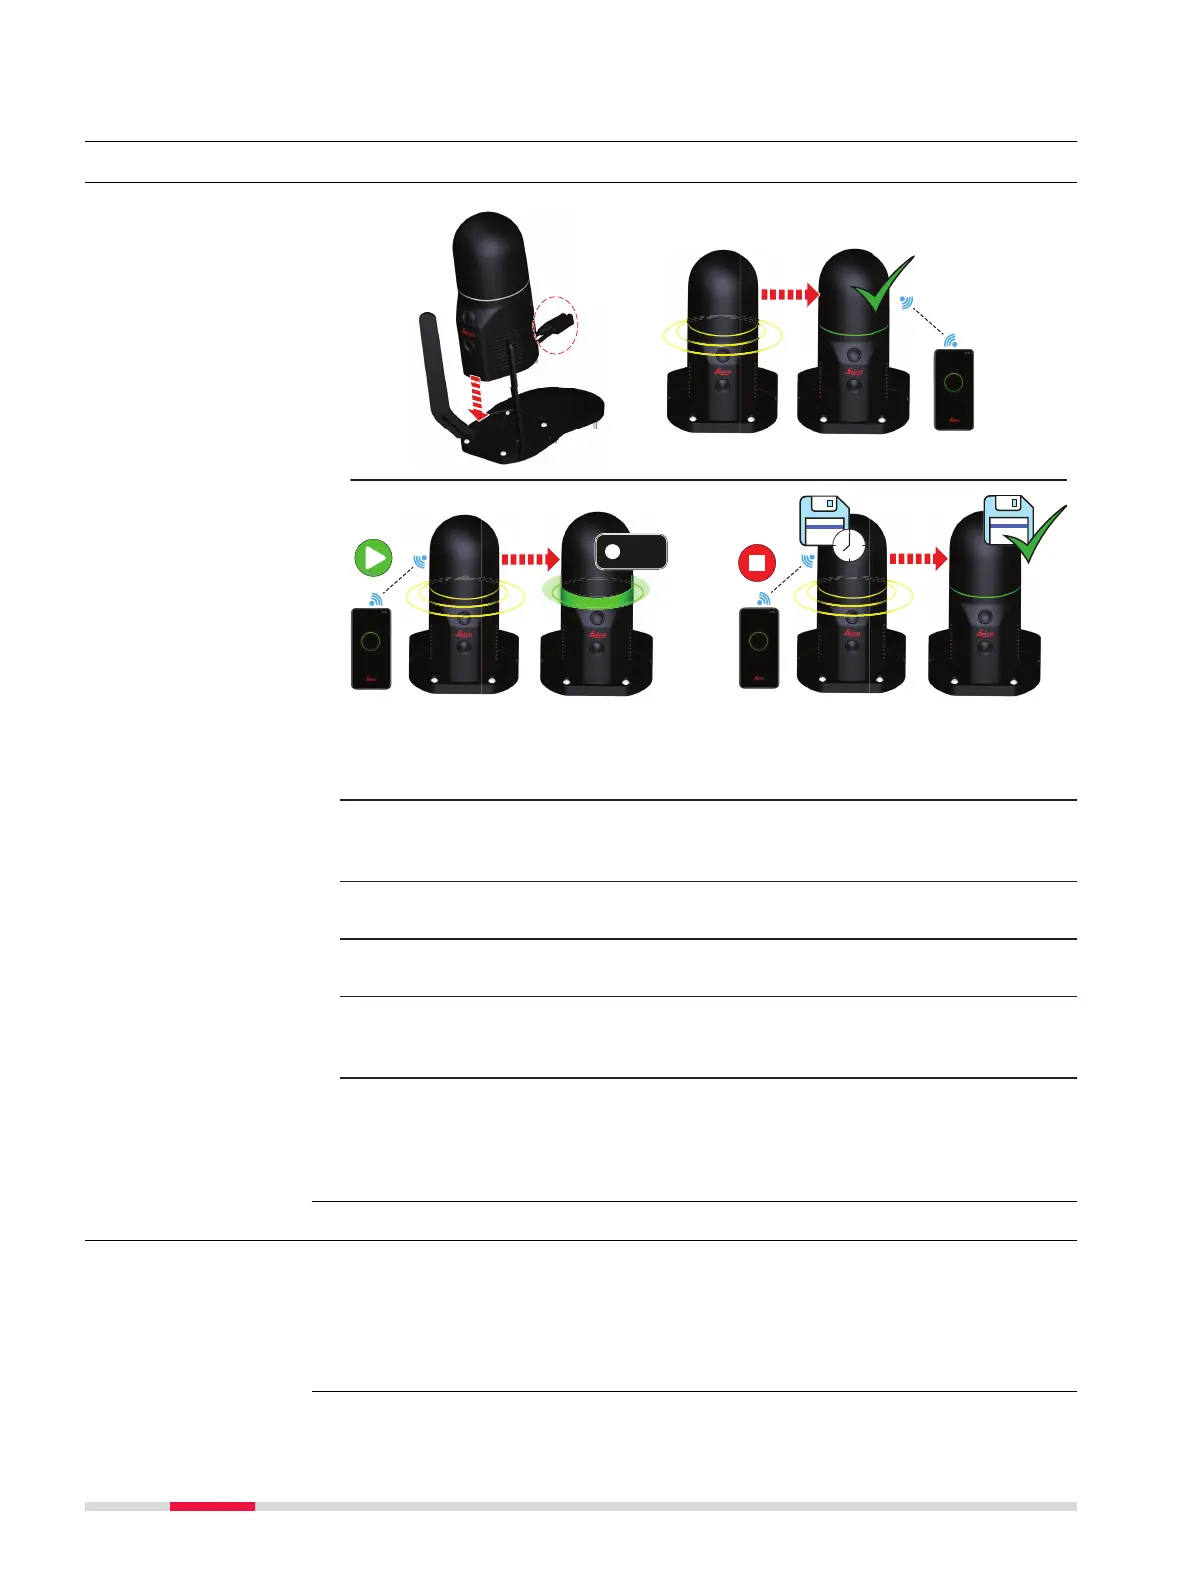
1. Mount the BLK ARC on a carrier.
2. Plug in the power cable and the USB cable.
The ring-shaped LED is blinking yellow to indicate that the BLK ARC is
booting up.
3. When the ring-shaped LED is continuous green, the BLK ARC is ready
to start operation with a connected device.
4. Start the scan from the connected device.
The ring-shaped LED is blinking yellow and the BLK ARC is initializing.
5. When the ring-shaped LED starts pulsating green, the BLK ARC is
initialized and is recording data.
The carrier can start moving and the BLK ARC is collecting the data.
6. Stop the scan from the connected device.
The ring-shaped LED is blinking yellow while data are being saved.
Once data have been saved, the ring-shaped LED is continuous
green.
5.2 Imaging
The BLK ARC can collect two different types of images:
•
A panoramic image using 3 calibrated panoramic cameras. The panoramic
images are automatically taken when the device is in operation.
•
A high resolution image using the detail camera. The high resolution
images can be triggered from a connected device.
Operation,
step‑by‑step
Description
22 Operation
 Loading...