Do you have a question about the Leica Lino L2 and is the answer not in the manual?
Instructions for inserting or replacing batteries in the Leica Lino.
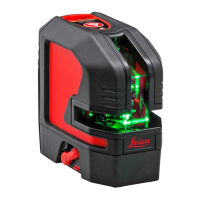
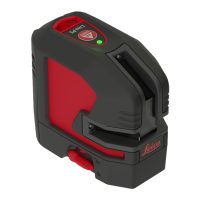
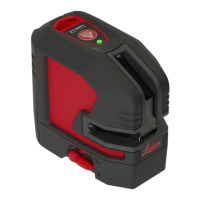
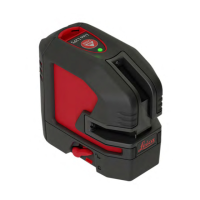
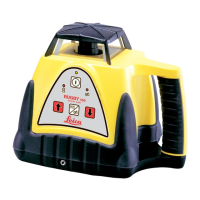
Overview of buttons, switches, and their functions on the Leica Lino.
Explanation of symbols and readings shown on the Leica Lino display.
Procedures for powering the device and activating laser line modes.
Details on automatic levelling and the lock mechanism for transport.
How to use the energy-saving Pulse/Powersave mode.
Visual examples of the Leica Lino used in various work environments.
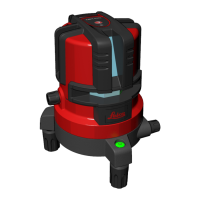
Instructions on how to attach and utilize the wall mount bracket.
Method for verifying the instrument's self-levelling precision.
Procedure to check the precision of the horizontal laser line.
Procedure to check the precision of the vertical laser line.
Steps to verify the accuracy of the vertical plumbing function.
Explanation of common display alerts and status symbols.
Guidelines for proper care, cleaning, and handling of the device.
Instructions for safe transport and information on product warranty.
Comprehensive table detailing technical specifications for all models.
Explanation of hazard symbols and safety warnings used in the manual.
Defines acceptable and unacceptable ways to use the Leica Lino.
Outlines usage limitations and responsibilities of manufacturer and users.
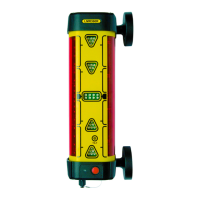
Information on accessory compatibility and potential hazards during use.
Details on the laser class, potential hazards, and eye protection.
Explanation of labels and markings on the Leica Lino laser products.
Diagrams showing the position of labels on different Leica Lino models.
The Leica Lino is a versatile laser tool designed for various leveling and alignment tasks, offering a range of models (L2, L2+, L2P5, P5, P3) to suit different professional needs. At its core, the device projects visible laser beams, which can be horizontal, vertical, or crosslines, as well as plumbing points, to provide accurate reference lines and points for construction, interior finishing, and other applications.
The primary function of the Leica Lino is to project precise laser lines and points for accurate measurement and alignment. Depending on the model, it can project horizontal lines, vertical lines, crosslines (intersection of horizontal and vertical lines), and plumbing points (dots projected upwards and/or downwards). These projections serve as visual guides for tasks such as installing cabinets, hanging pictures, tiling, framing, and setting out points for various installations.
A key feature of the Leica Lino is its self-leveling capability. When placed within its specified grade range, the instrument automatically levels itself, ensuring that the projected laser lines are perfectly horizontal or vertical. This automatic leveling eliminates the need for manual adjustments, saving time and reducing the potential for errors. For applications requiring tilted lines or for safe transport, the device can be locked, deactivating the self-leveling function and fixing the pendulum in place.
Some models are equipped with a Pulse/Powersave mode. This mode is particularly useful for extending battery life when maximum laser line visibility is not required. Additionally, in Pulse mode, the laser lines can be detected over longer distances (beyond 15 meters) or in unfavorable lighting conditions using an optional laser detector, significantly expanding the instrument's operational range.
The device is powered by standard AA batteries, which are inserted into a dedicated compartment. A battery symbol on the display indicates when the battery voltage is low, prompting the user to replace them.
Operating the Leica Lino is straightforward, with a user-friendly interface consisting of a LASER key, a PULSE/POWERSAVE MODE key, and a Lock switch.
To switch on the Lino L2, L2+, and L2P5 models, a brief press of the LASER key is sufficient. For the Lino P3 and P5 models, the Lock switch is moved to the left. Switching off these models involves either pressing and holding the LASER key (L2, L2+, L2P5) or moving the Lock switch to the right (P3, P5).
Once switched on, the LASER key can be pressed repeatedly to cycle through different laser functions, such as horizontal line, vertical line, crossline, or plumbing points, depending on the specific model. The display provides clear indicators for the active laser lines, lock status, pulse/powersave mode, and battery level.
The Lock switch plays a dual role: it enables the self-leveling function when unlocked and fixes the pendulum for transport or for projecting tilted lines when locked. When the pendulum is locked, the self-leveling function is deactivated, and a lock symbol illuminates on the display.
For applications requiring extended range or use in bright environments, the Pulse/Powersave mode can be activated by pressing the PULSE/POWERSAVE MODE key. This mode allows the use of a laser detector to locate the laser beams, even when they are not visible to the naked eye.
The Leica Lino can be mounted on a tripod or used with a wall mount bracket, providing flexibility for various setups. The wall mount bracket allows for easy attachment to different surfaces, enabling precise positioning of the laser lines at desired heights and angles.
Regular checks of the device's accuracy are recommended, especially before critical measuring tasks. Procedures are outlined for checking the accuracy of the leveling, horizontal line, vertical line, and plumbing points. These checks involve marking laser points or lines on walls at specific distances and comparing measurements to ensure they fall within the specified tolerance. If the device is found to be outside tolerance, it is advised to contact an authorized dealership or Leica Geosystems for service.
Proper care and maintenance are essential to ensure the longevity and accuracy of the Leica Lino. The instrument should not be immersed in water. For cleaning, a damp, soft cloth is recommended, and aggressive cleaning agents or solvents should be avoided. The device should be handled with care, similar to sensitive optical instruments, to prevent damage from dropping or violent shaking.
Regularly checking the leveling accuracy of the instrument is a crucial maintenance practice, particularly after any abnormal use or before important measurements. This helps in identifying potential issues early and ensuring reliable performance.
For safe transport, the Lock switch should always be set to the "Locked" position. This secures the internal pendulum mechanism, preventing damage during movement.
Batteries should be removed if the instrument is not going to be used for an extended period to prevent corrosion. Only alkaline or rechargeable batteries should be used, and they must be inserted with the correct polarity. Flat batteries should be disposed of responsibly at designated collection points, in accordance with national and local regulations, rather than with household waste.
The Leica Lino is designed for use in areas permanently habitable by humans and should not be used in explosion-hazardous areas or aggressive environments. Users are responsible for understanding and adhering to all safety instructions, including those related to laser classification and electromagnetic compatibility. Any modifications or opening of the equipment by unauthorized personnel are prohibited and can void the warranty and compromise safety.
| Battery type | AA |
|---|---|
| Battery voltage | 1.5 V |
| Number of batteries supported | 3 |
| Type | Line level |
| Product color | Black, Red |
| Tripod thread | 1/4 \ |
| International Protection (IP) code | IP54 |
| Laser class | 2 |
| Laser diode | 635 nm (\u003C 5 mW) |
| Maximum range | 15 m |
| Color of laser beam | Red |
| Leveling accuracy (±) | 0.3 mm/m |
| Self-leveling range (±) | 4 ° |
| Storage temperature (T-T) | -25 - 70 °C |
| Operating temperature (T-T) | -10 - 40 °C |
| Depth | 91 mm |
|---|---|
| Width | 54 mm |
| Height | 96 mm |
| Weight | 321 g |