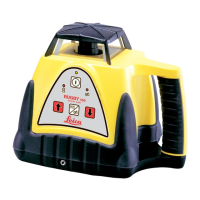
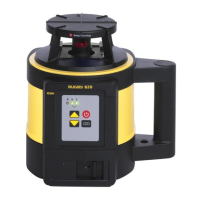
The Leica Rugby 100 is a rotating laser designed for horizontal alignment applications, offering ease of use and robust performance for various job site requirements. It projects a visible red laser beam from its rotating head, making it suitable for tasks such as setting grades, checking levels, and guiding construction machinery when combined with appropriate receivers.
Function Description
The primary function of the Rugby 100 is to establish a precise horizontal laser plane or a laser beam for alignment purposes. It operates in two main modes: automatic self-leveling and manual grade. In automatic mode, the laser self-levels to ensure accuracy, while manual mode allows the operator to introduce a tilt or grade along the main axis. This flexibility makes it suitable for both flat leveling and sloped applications.
A key safety feature is the H.I. Alert (Height of Instrument or Elevation Alert). This function automatically activates when the Rugby 100 is powered on. After the unit has achieved a stable level position for 30 seconds, the H.I. Alert becomes active, reducing the self-leveling range to prevent elevation errors caused by movement of the tripod or other sudden disturbances. If an alert condition occurs, all three LED indicators will flash simultaneously, prompting the user to check the instrument's elevation. The H.I. Alert can be temporarily disabled if necessary, though it is recommended to keep it active for safety and accuracy.
The laser offers two rotation speeds: 10 revolutions per second (rps) and 5 rps. The default startup speed for units with serial numbers above 100-28500 is 10 rps, while older units (below 100-28500) start at 5 rps. The operator can toggle between these speeds or turn the unit off using the Off/On Power Button.
Usage Features
Setting up the Rugby 100 is straightforward. It can be mounted on a 5/8"-11 tripod or placed on a flat, level surface.
In automatic operation, after powering on, the unit will self-level and then begin to rotate. The laser emission indicator will flash during leveling and remain solid once level. The H.I. Alert will become active after 30 seconds, providing an additional layer of protection against elevation changes.
For manual operation, the user first sets up the Rugby 100 and then presses the Automatic/Manual Button to switch to manual mode. In this mode, the Manual Mode Indicator will flash. The two Manual Grade Buttons (up and down arrows) allow the operator to control the tilt of the main axis. Pressing these buttons moves the laser plane in small increments, while holding them down accelerates the movement. This feature is particularly useful for matching existing lines or slopes.
Using manual operation with grade, especially for sloped applications, can be performed by one person but is often easier with two. The Rugby 100 should be positioned at one end of the area to be graded, with the operator facing the control panel. After switching to manual mode, a Rod-Eye receiver is used to take a reading directly in front of the laser (at least three feet/one meter away for optimal results). A second person then moves to a control point at the other end of the job site. The operator adjusts the manual grade using the arrow buttons until the receiver indicates the desired elevation (center bar and/or solid tone).
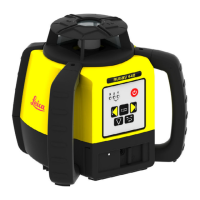
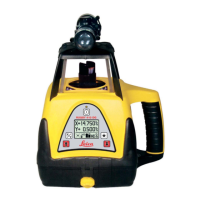
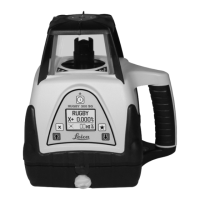
The Rugby 100 also provides clear LED indicators to communicate its status:
- Laser Emission Indicator (yellow): Off when the unit is off, flashing during leveling, and solid when level and the beam is on.
- Low Battery Indicator (red): Off when the battery is okay, slow flashing (1 Hz) for low battery, fast flashing (5 Hz) for very low battery (will turn off soon), and solid for 5 minutes before turning off.
- Manual Mode Indicator (red): Off for automatic self-leveling and flashing for manual mode.
In addition to these, the unit indicates Out of Level Failure by sequentially blinking all three LEDs when set up outside its self-leveling range. An Out of Temperature Range condition is indicated by all three LEDs turning on simultaneously, signifying that the operating environment is outside the specified temperature limits.
Calibration is a critical aspect of maintaining the Rugby 100's accuracy. The unit is factory-calibrated, but regular checks are recommended, especially upon receipt and periodically during use. The calibration procedure involves setting up the laser approximately 100 ft (30 m) from a wall, marking the beam's position at different orientations (Axis 1, Position 1; Axis 1, Position 2; Axis 2, Position 3; Axis 2, Position 4), and verifying that the four marks are within the specified tolerance. If calibration is needed, a qualified individual can enter calibration mode by a specific button sequence (power off, press power button once, then press and hold Up and Down Arrow Buttons while pressing and releasing the power button, then release arrow buttons). In calibration mode, the Low Battery and Manual Mode Indicators blink alternately. The arrow buttons are then used to adjust the beam elevation for each axis. Once adjustments are complete, pressing the Power Button stores the new calibration and turns the unit off.
Maintenance Features
The Rugby 100 is designed for durability, but proper care and maintenance are essential for optimal performance and longevity.
Battery Management:
The unit can be powered by either four D-cell alkaline batteries or an optional NiMH rechargeable battery pack. The NiMH battery pack, when fully charged, provides approximately 35 hours of operation, while alkaline batteries offer about 60 hours. The charge jack for the NiMH pack is located on the front of the Rugby, allowing for convenient charging using the universal charger/adapter.
For NiMH Battery Pack Care, it's important to store batteries in moderate temperatures (0°F to 95°F / -18°C to 35°C) and fully charge them before long-term storage. If stored for more than 60 days, recharging is recommended to extend their useful life. Charging should always occur in moderate temperatures. Exposure to extreme temperatures can degrade battery performance and lead to early failure.
Troubleshooting:
The manual provides a comprehensive troubleshooting guide for common issues:
- Unit not turning on: Check battery charge; replace alkaline batteries or charge the NiMH pack.
- Unit not turning off: The Off/On Power Button also controls head speed; press it a third time to turn off the unit.
- Unit not self-leveling: Ensure the unit is in automatic mode. In manual mode, it will not self-level.
- Elevation alert (all three LEDs flashing): Press the Off/On Button to stop the alert, then press again to restart. Check and adjust the laser's elevation. The H.I. Alert activates 30 seconds after leveling.
- Out of Level Indication (LEDs flashing sequentially): The unit is outside its self-leveling range (± 5°). Reposition the Rugby on a more level surface, turn it off and on again.
- Out of Temperature Range (all three LEDs on): The internal temperature is outside the operating range. Move the laser out of direct sunlight or shield it, allowing it to cool down.
- Reduced distance: Clean the windows on the Rugby and the Rod-Eye receiver to improve laser output.
- Rod-Eye receiver not functioning: Check if the Rugby is rotating, if the Rod-Eye's power/audio is active, if it's within usable range, and if its batteries are dead or low.
Care and Transport:
- Transport: Always use the original Leica Geosystems packaging (case and cardboard box) for dispatching the instrument. In the field, carry the instrument in its case or with the tripod legs splayed and the instrument upright. Never transport it loose in a vehicle to prevent shock and vibration damage.
- Storage: Store the instrument within the specified temperature limits (-40° to 70°C / -40° to 158°F). If damp, unpack and dry the instrument, case, and accessories at no more than 40°C / 108°F before repacking.
- Cleaning Windows: Never touch the glass with fingers. Use only a clean, soft, lint-free cloth, moistened with pure alcohol if necessary. Avoid other liquids that could damage polymer components.
Safety Directions:
The user manual emphasizes the importance of understanding and adhering to safety directions to prevent operational hazards. This includes using the instrument only for its intended purposes, avoiding adverse uses (e.g., unauthorized modifications, use with unapproved accessories, deliberate dazzling), and ensuring proper safeguards at the working site.
Specific warnings are provided regarding:
- Erroneous measurements: Periodically perform test measurements and field adjustments.
- Thunderstorms: Do not work during thunderstorms due to lightning risk.
- Electrical installations: Maintain a safe distance from power cables and electrical railways.
- Charged batteries: Remove batteries from their compartment before transport or disposal to prevent fire hazards. Dispose of fully flat batteries appropriately.
- Accessories: Ensure all accessories (tripod, tribrach) are correctly adapted, fitted, secured, and locked to prevent damage or injury from mechanical shock.
- Charger: Use only the approved charger (GlobTek Part Nr: TR9KC1000PTP-N, Model: GT-4121DA-09-1.5) in dry conditions, and never open it due to hazardous voltages.
- Product disposal: Dispose of the product and batteries according to national regulations to prevent environmental contamination and unauthorized use.
The Rugby 100 is classified as a Class 2/II laser product. Users are warned not to stare into the beam or direct it unnecessarily at other persons. Optical equipment like binoculars or telescopes should not be used to look directly into the beam.
Electromagnetic Compatibility (EMC):
The Rugby 100 complies with electromagnetic compatibility standards, but users are advised that intense electromagnetic radiation (e.g., near radio transmitters, walkie-talkies) could potentially disturb the laser unit or other equipment. It is recommended to use only Leica Geosystems-approved equipment and accessories to ensure compliance and minimize interference. If disturbances occur, users should check the plausibility of results and consider increasing separation between equipment or reorienting receiving antennas. Changes or modifications not expressly approved by Leica Geosystems could void the user's authority to operate the equipment.