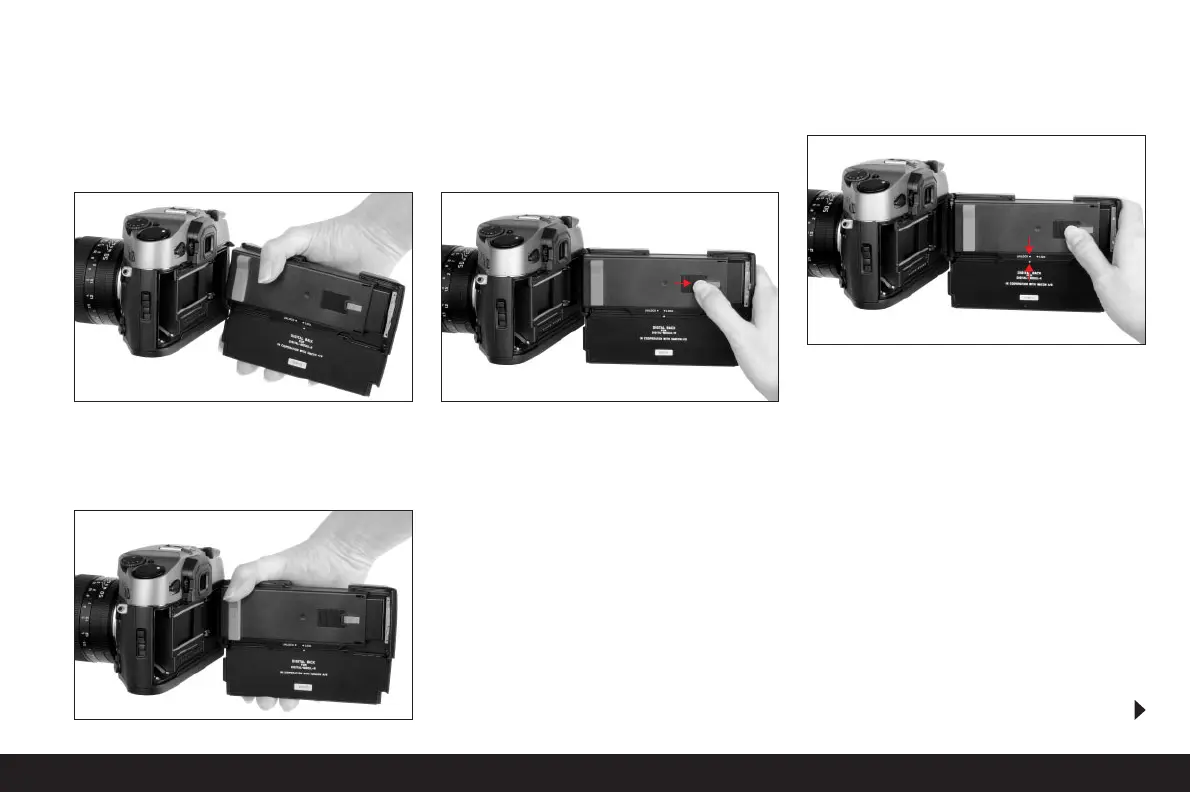
Attaching the digital back
1. Insert the lower rigid joint pin (1.1) on the digital
back, which is held slightly diagonal for this pur-
pose, into the camera’s lower cap bearing (Figure 3).
The camera and digital back should be held at an
angle of approximately 90°.
2. Press the red slider (Cb) on the protective cover
(Ca) – and with it the moving upper joint pin – down-
wards (Figure 4),
3. hold it in place
4. tilt the digital back to the correct position, and
5. allow the upper joint pin (1.2) to engage in the upper
cap bearing by releasing the slider.
6. To unlock the protective cover, press the left-hand
side of the rocker switch (Cc, Figure 5),
7. slide the protective cover (Ca) to the right (approx.
5mm, Figure 6) and carefully remove it vertically
from the rear panel.
Important:
• Wherever possible, the digital back should be
attached and removed in a dust-free environment.
• Take care to avoid touching the sensor surface or
allowing it to become dirty. For example, fingerprints
can cause irreparable damage to the sensor cover
glass.
Detailed guide/ Preparation / 75
3
4
5
 Loading...