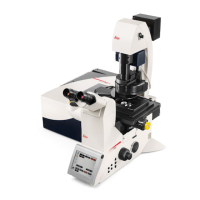
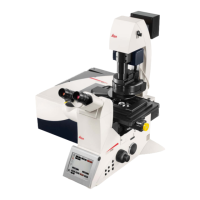
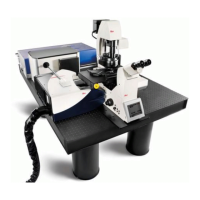
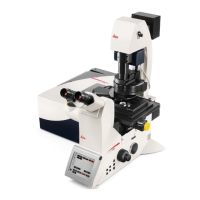
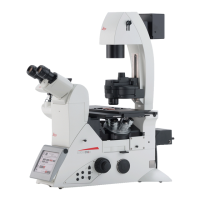
The Leica TCS SP8 is a sophisticated confocal microscopy system designed for advanced fluorescence imaging and research applications. It offers a comprehensive suite of features for acquiring, processing, and analyzing high-resolution images of biological specimens.
Function Description
The core function of the Leica TCS SP8 is to provide high-resolution, three-dimensional imaging of fluorescently labeled samples. It achieves this through confocal microscopy, which uses a pinhole to block out-of-focus light, resulting in sharper images compared to conventional widefield microscopy. The system is highly versatile, supporting various acquisition modes including single images (xyz), z-stacks (xyz), time series (xyt), z-stack time series (xyzt), and lambda scans (xyλ) for spectral imaging.
A key component is the Leica TCS SP8 Scan Head, which incorporates multiple laser sources, including visible line lasers, white light lasers, infrared (IR) lasers, and ultraviolet (UV) lasers, along with electro-optical modulation (EOM) and acousto-optical tunable filters (AOTF) for precise laser control. The acousto-optical beam splitter (AOBS) allows for flexible and efficient light routing. For detection, the system utilizes up to five photo-multipliers (PMT) or four hybrid photo-detectors (HyD), coupled with a prism-based dispersion system for spectral (SP) detection. This spectral detection eliminates the need for emission filters, allowing for continuous adjustment of detection wavelengths and enabling advanced spectral unmixing. The FOV scanner, with an optional tandem scanner, facilitates rapid image acquisition.
The system also supports transmitted light imaging, including brightfield and Differential Interference Contrast (DIC), allowing researchers to combine fluorescence and transmitted light views of their samples.
Usage Features
The Leica TCS SP8 is designed for user-friendly operation through its LAS X software, which provides a structured interface with "Acquire," "Process," and "Quantify" tabs.
Start-Up and Shut-Down: The start-up procedure involves powering on the CTR Control Box, EL6000 fluorescence illumination, Scanner Power, and Laser Power, followed by enabling lasers with a key. The software is then launched, and the machine and microscope configurations are selected. An important step is the optional initialization of the stage, which calibrates its position for features like Tiling and Mark & Find. The shut-down procedure is the reverse, emphasizing closing the software before powering down hardware components.
Laser Control: Lasers can be activated directly from the "Beam Path Settings" window or through the "Configuration" tab via the "Laser" icon. Users can select specific laser lines and adjust their intensity, ensuring only necessary lasers are active to excite target fluorophores.
Beam Path Configuration: The system offers multiple options for configuring the beam path:
- Manual Setting: Users can manually activate lasers, adjust laser intensity, select objectives, choose beam splitters (with an "Autoselect" option), activate detectors, and define emission spectra using sliders. The detection range can be precisely set by entering start and end positions for the gates.
- Dye Assistant: This feature provides suggestions for system configuration based on the spectral characteristics of fluorescent dyes. Users select dyes, detector types, and acquisition options (e.g., "None sequential," "Line sequential," "Frame or stack sequential"), which graphically display yield and crosstalk. The "Edit" function allows fine-tuning of laser lines, detectors, detection range, and color look-up tables (LUTs).
- Load/Save Settings: Customized instrument parameter settings can be saved and loaded for future experiments, streamlining workflow for recurring applications. Users are encouraged to include their name or initials when saving settings for easy identification.
Acquisition Parameters: The "Acquire" tab provides extensive control over image acquisition:
- Format and Speed: Users can set the image format (number of pixels, e.g., 512x512) and scan speed (e.g., 400-600 Hz).
- Bidirectional Scanning: An option for faster acquisition, though it may require phase adjustment.
- Zoom Factor: Adjustable via a slider, specific numeric input, or by activating "Zoom In" and drawing a Region of Interest (ROI).
- Pixel Dwell Time and Frame Rate: These parameters are automatically adjusted based on format and zoom.
- Optimize xy Format: A crucial feature that sets the optimal number of pixels for correct over-sampling, ensuring resolution is preserved based on the objective's numerical aperture (NA).
- Averaging and Accumulation: Settings to reduce noise, with HyD detectors generally requiring less averaging due to their low noise characteristics.
- Rotation: Allows for optical rotation of the image if needed.
- Panning: Enables repositioning of the specimen within the image window.
- Pinhole: Automatically defaults to 1 Airy unit for optimal confocal sectioning, but can be manually adjusted.
Acquisition Modes:
- Z-Stack (xyz): For 3D imaging, users define the beginning and end positions of the stack using the control panel or SmartMove. The number of steps and z-step size can be manually set or optimized automatically.
- Time Series (xyt, xyzt): For live-cell imaging, users select the time-inclusive acquisition mode, set the time interval (with a "Minimize" option for no delay), and define stopping parameters (duration or number of frames).
- Tile Scan: For imaging large areas, the stage must be initialized. Users can define the scan area by marking opposite corners or by specifying the center and dimensions of the tile scan. The "Merge Images" feature automatically stitches and smooths seams after acquisition.
- Mark & Find: Allows users to mark multiple positions of interest on the specimen. The system can then automatically acquire images at these saved coordinates, including Z-positions if using a Z-Galvo stage.
- Region-of-Interest (ROI) Scanning: Users can define specific ROIs within the image and adjust laser intensity and detection settings independently for each ROI, optimizing acquisition for different regions of a sample.
Image Management: The LAS X software organizes acquired and edited images in a project tree structure. Images and series can be copied, moved, exported, and viewed with various options, including opening in new viewers or external software. The software also provides tools for image annotation, such as drawing shapes, inserting numbers, text, scalebars, and crosshairs. Display functions include adjusting contrast (manual or auto), overlaying channels, and showing image galleries.
Maintenance Features
While the manual primarily focuses on operational aspects, some maintenance-related features are implied:
- Cleaning Objectives: The shut-down procedure explicitly mentions cleaning all objectives, indicating a routine maintenance task for users.
- Protecting the Condenser: During stage initialization, a warning advises users to protect the microscope condenser by limiting the stage working area, suggesting a preventative measure to avoid damage.
- Software Updates: Although not detailed, the "Copyright" information and "build" numbers in the software interface imply regular updates and support from Leica Microsystems, which would include software maintenance and bug fixes.
- Dye Database Management: The ability to add emission spectra from lambda scans to the dye database, along with manufacturer-provided data, suggests a mechanism for keeping the system's fluorophore information current and accurate.
The Leica TCS SP8 is a powerful and flexible system, designed to meet the demanding requirements of modern fluorescence microscopy research through its advanced optical components, versatile acquisition modes, and comprehensive software control.