2828
RTJ400 User Guide
Through Dovetail Joint Procedures
Chapter 7
A
7-30 Utilizing the final fit setting you determined in Step 7-26
(not the calculated setting in Step 7-27), the two pin boards are
now ready for routing. Clamp pin board 1 to the frame against
the same sidestop with the marked outside face out
A
and the
bottom end edge flush on the template. Rout the pins.
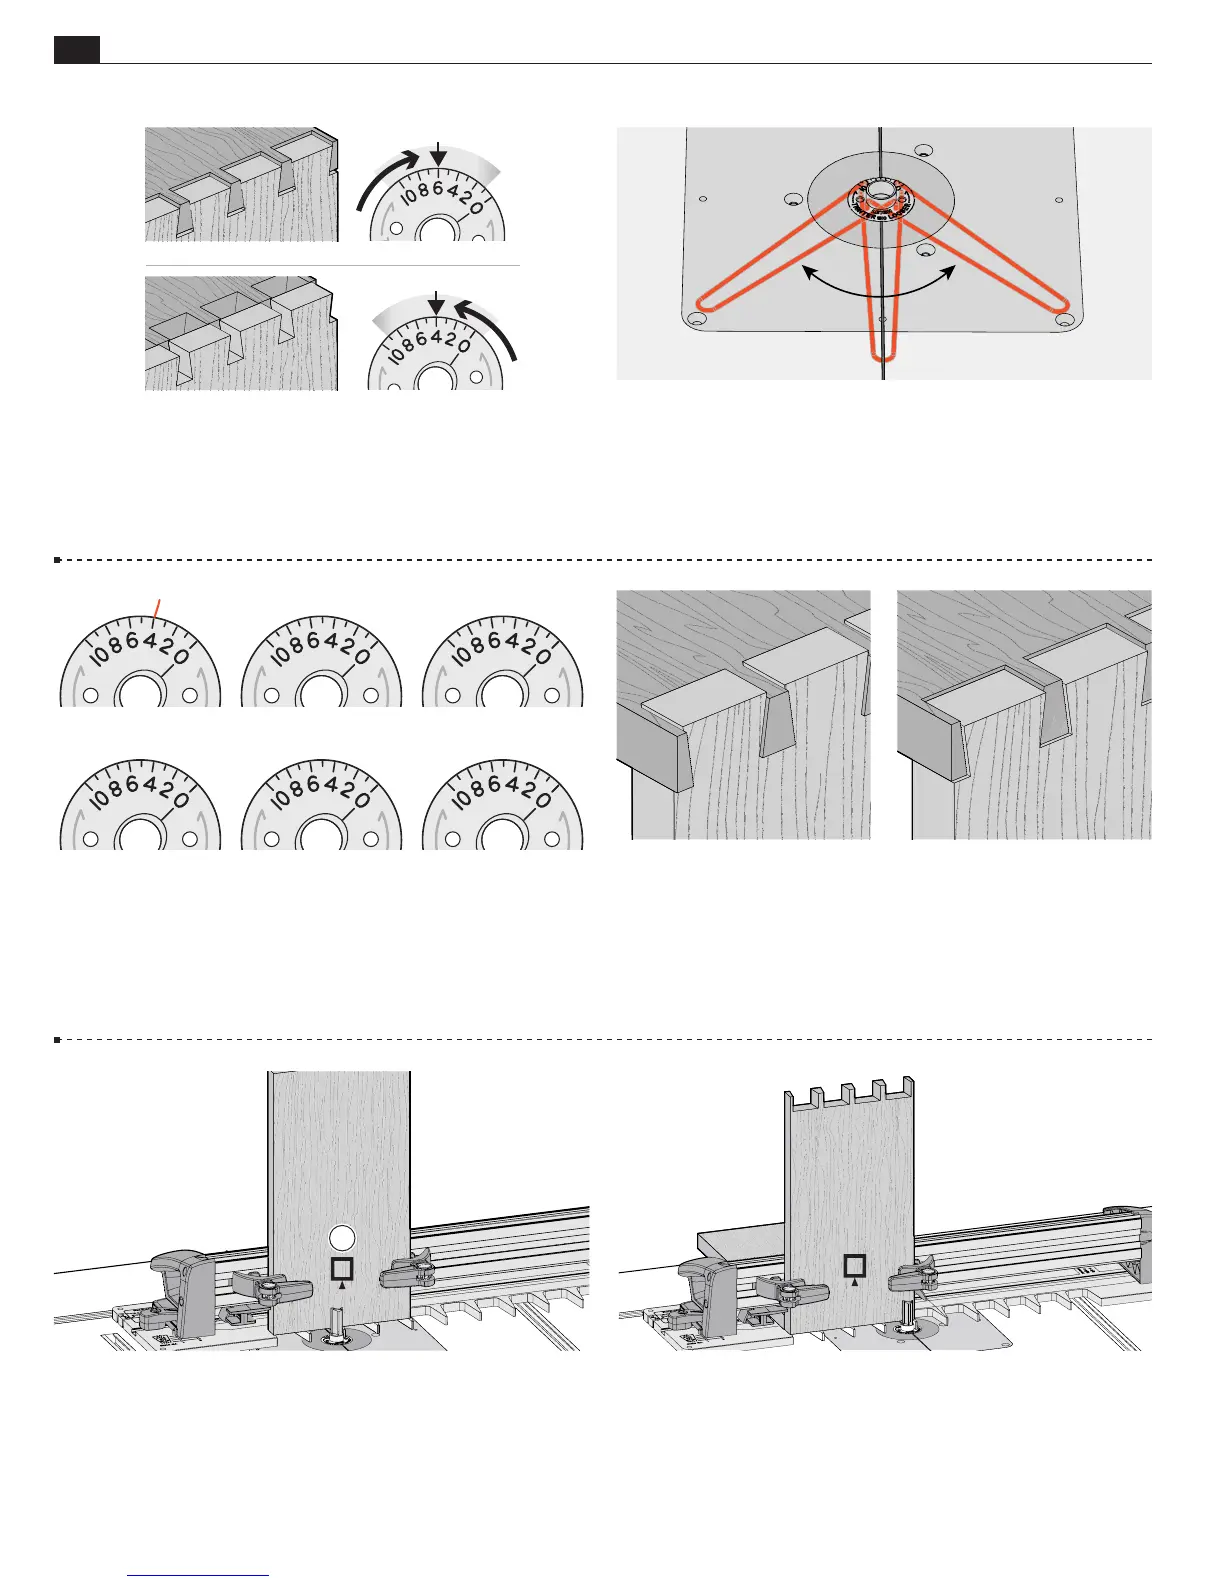
7-28 On the eBushes above, record the settings you used to
achieve perfect joint fit. The first eBush is an example of how to
record your setting.
7-27
Re-tighten the eBush nut after each guide bushing adjust–
ment.
Rout the other end of the test pin board. Once the fit is
correct, add the two eBush settings together and divide by two.
Example: 5 for tails, 3 for pins. (5 + 3 = 8 ÷ 2 = 4). Record
setting “4” on an eBush diagram in the next step. Do not use this
new setting for routing this test box, use
only
for future projects.
7-26 Test for Fit If the joint is too loose, turn the eBush to a
higher number with the pin wrench, as shown in the next step.
If too tight, turn the eBush to a lower number. Each increment
on the eBush changes the joint glue line fit by 0.002" [0.05mm].
Half an increment, a mere 1000th inch!
7-29 Flushness If the joint is over flush, lower the bit, If the
joint is under flush, raise the bit.
Sample
Leigh 80-500 Bit
TOO LOOSE TIGHTEN
OVER FLUSH UNDER FLUSH
TOO TIGHT LOOSEN
7-31 Rotate pin board 1, keeping the marked face of the board
facing out. Rout the pins. Repeat for pin board 2. All four boards
are now complete and ready for assembly.
■