8
8
RTJ400 User Guide
Chapter 1
Assembling the RTJ400
B
B
A
C
C
A
A
A
A
C
A
A
B
C
1-3
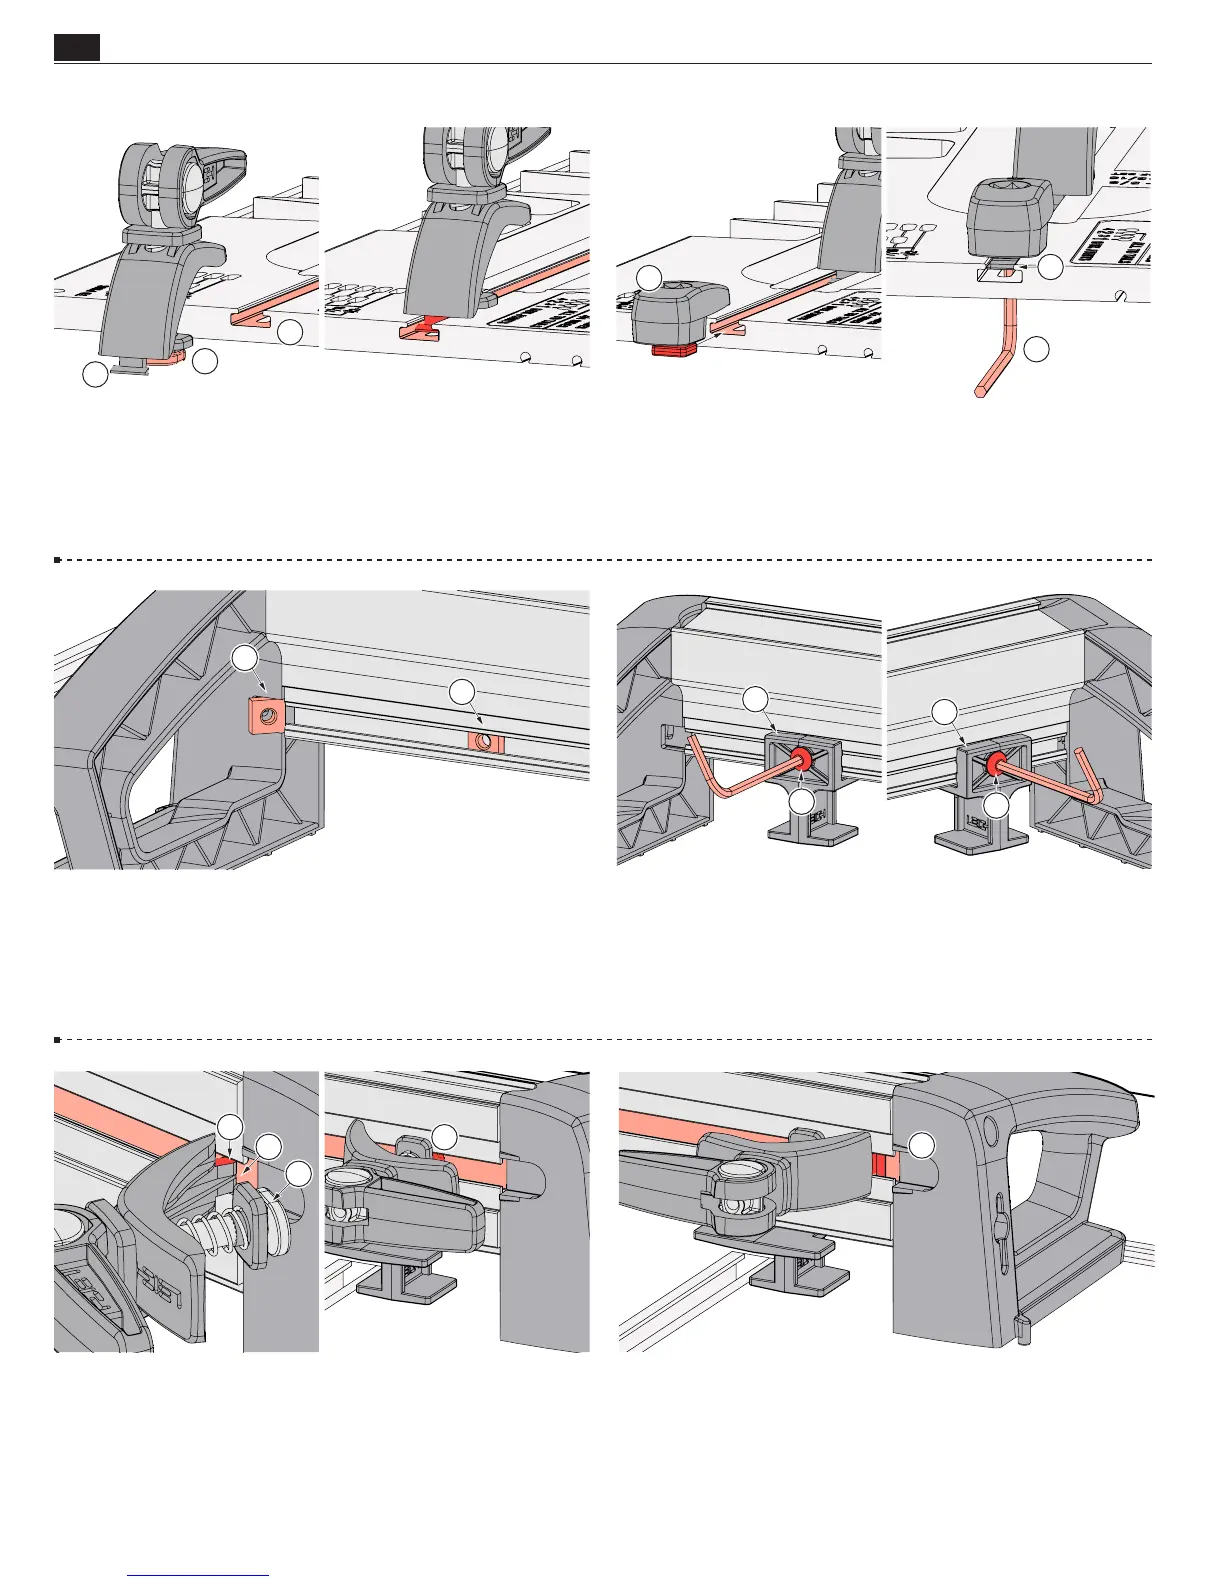
Insert the two square nuts into the rear of the frame
A
and
slide them to each end of the frame.
1-2 Template Latches: Slide a latch
A
into each end of the
template making sure the washer
B
is in the T-slot. Use the hex
key
C
through the slot on the bottom of the template to firmly
tighten the latches, pulling the hex nuts down into each latch
recess. Adjust the latches so they are stiff to slide on the template.
1-6 When installing the second clamp, insert the T-bolt first
and the heel last
A
.
1-4 Sidestops:
Attach the two sidestops
A
to the square nuts
in the frame using the hex socket button head screws
B
, and
lightly tighten one sidestop at each end of the frame.
1-1 Template Clamps: Insert the clamp T-bolt head
A
into
the T-slot at each end of the template
B
followed by the clamp
heel
C
. Make sure the heels are pointing out at both ends of the
template.
1-5 Frame Clamps: Insert the heel
A
of a pre-assembled
clamp assembly into the end of the frame T-slot
B
followed by
the clamp T-bolt
C
, and slide the clamp to the other end of the
frame.
Note: The clamp arm spring washers are under tension.
They may need to be pulled away from the T-bolt to aid in ease
of assembly.
A
B
B