3434
RTJ400 User Guide
Half-Pitch Through Dovetail Joint Procedures
Chapter 8
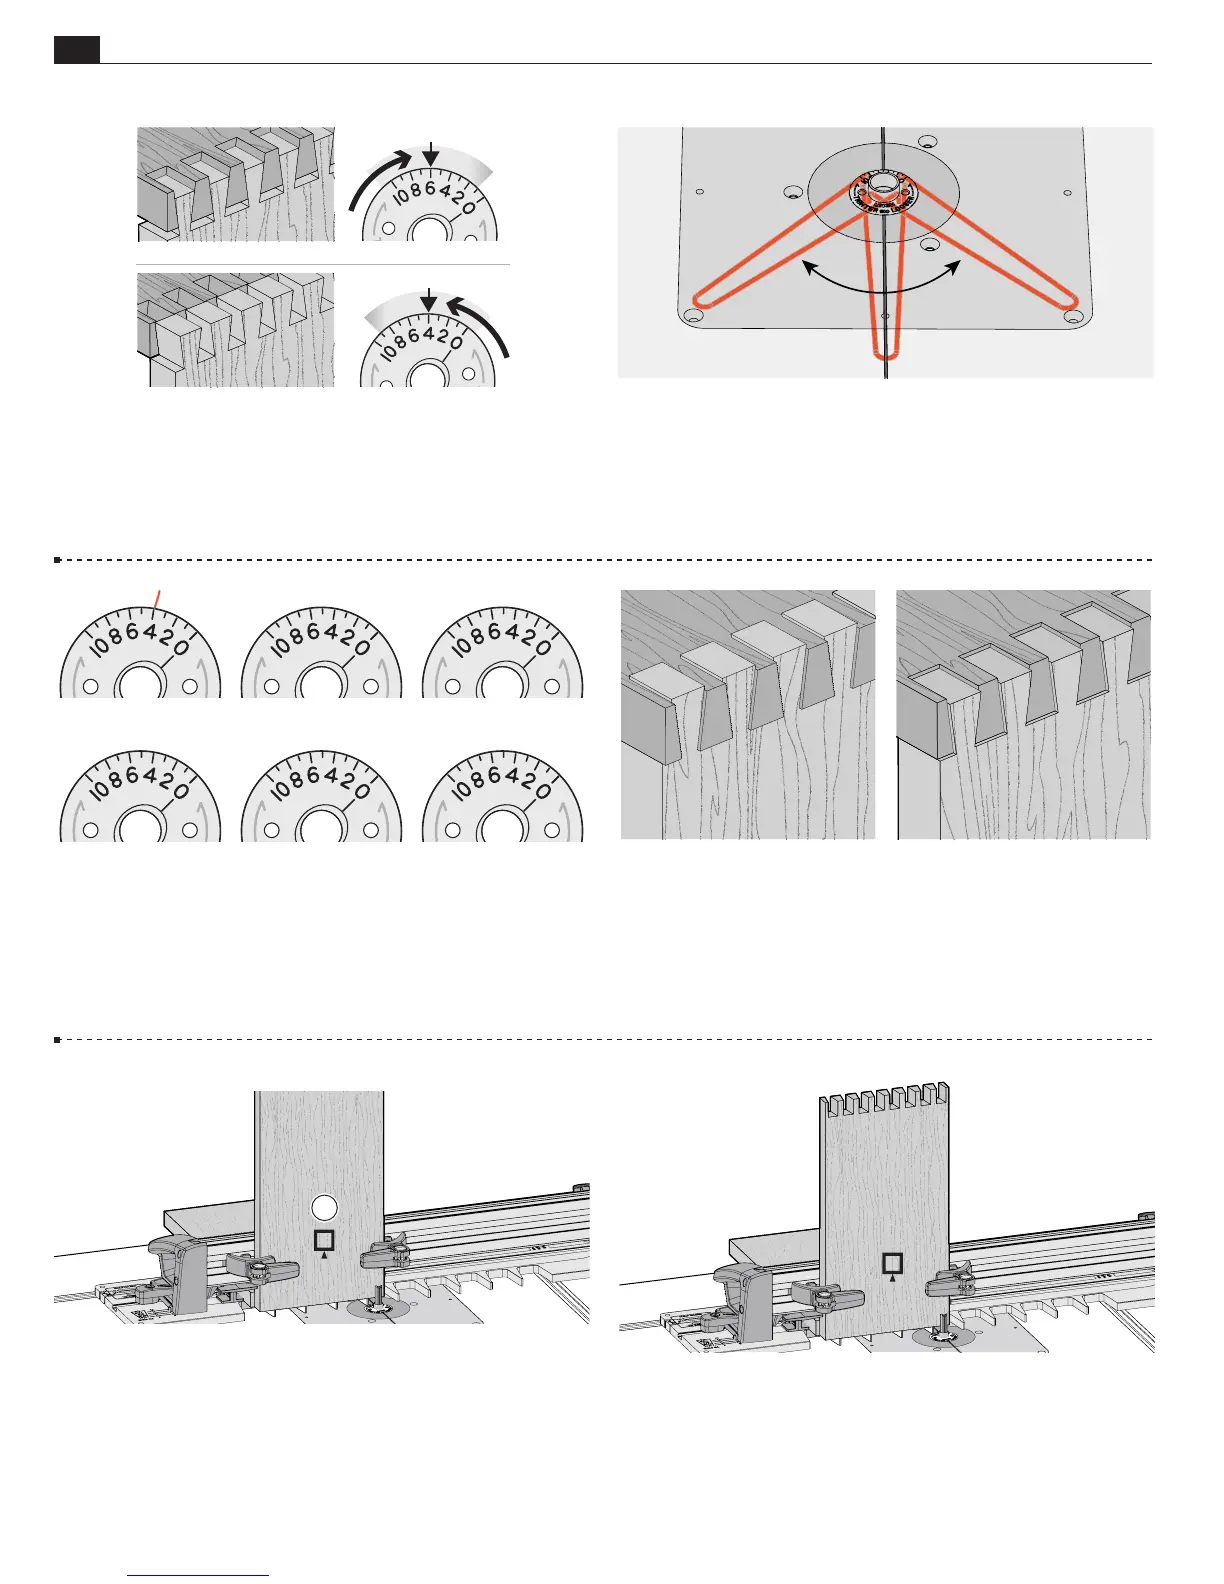
8-28 On the eBushes above, record the settings you used to
achieve perfect joint fit. The first eBush is an example of how to
record your setting.
8-27
Re-tighten the eBush nut after each guide bushing adjust–
ment.
Rout a new pin board. Once the fit is correct, add the two
eBush settings together and divide by two.
Example: 5 for tails,
3 for pins (5 + 3 = 8 ÷ 2 = 4). Record setting “4” on an eBush
diagram in the next step. Do not use this new setting for routing
this test box,
only
for future projects.
8-30 Utilizing the final fit setting you determined from Step
8-26 (not the calculated setting in 8-27), the two pin boards
are now ready for routing. Reposition the frame to column 1.
Clamp pin board 1 to the frame against the sidestop with the
marked outside face out
A
and the bottom end edge flush on
the template. Now rout the first half of the pins. Reposition the
frame to column 2 and finish the pins.
8-31 Rotate pin board 1 and rout the other end, repeating the
steps in reverse order. Repeat routing for pin board 2. All four
boards are now complete and ready for assembly.
■
8-29
Flushness
If the joint is over flush, lower the bit (decrease
depth of cut). If the joint is under flush, raise the bit (increase
depth of cut).
8-26 Test for Fit If the joint is too loose, turn the eBush to a
higher number with the pin wrench as shown in the next step.
If the joint is too tight, turn the eBush to a lower number. Each
increment on the eBush changes the joint glue line fit by 0.002"
[0.05mm]. Half an increment, a mere 1000th inch!
TOO LOOSE TIGHTEN
TOO TIGHT LOOSEN
OVER FLUSH
UNDER FLUSH
Sample
Leigh 80-500 Bit
A