39
39
RTJ400 User Guide
Chapter 9
Half-Blind Dovetail Joint Procedures
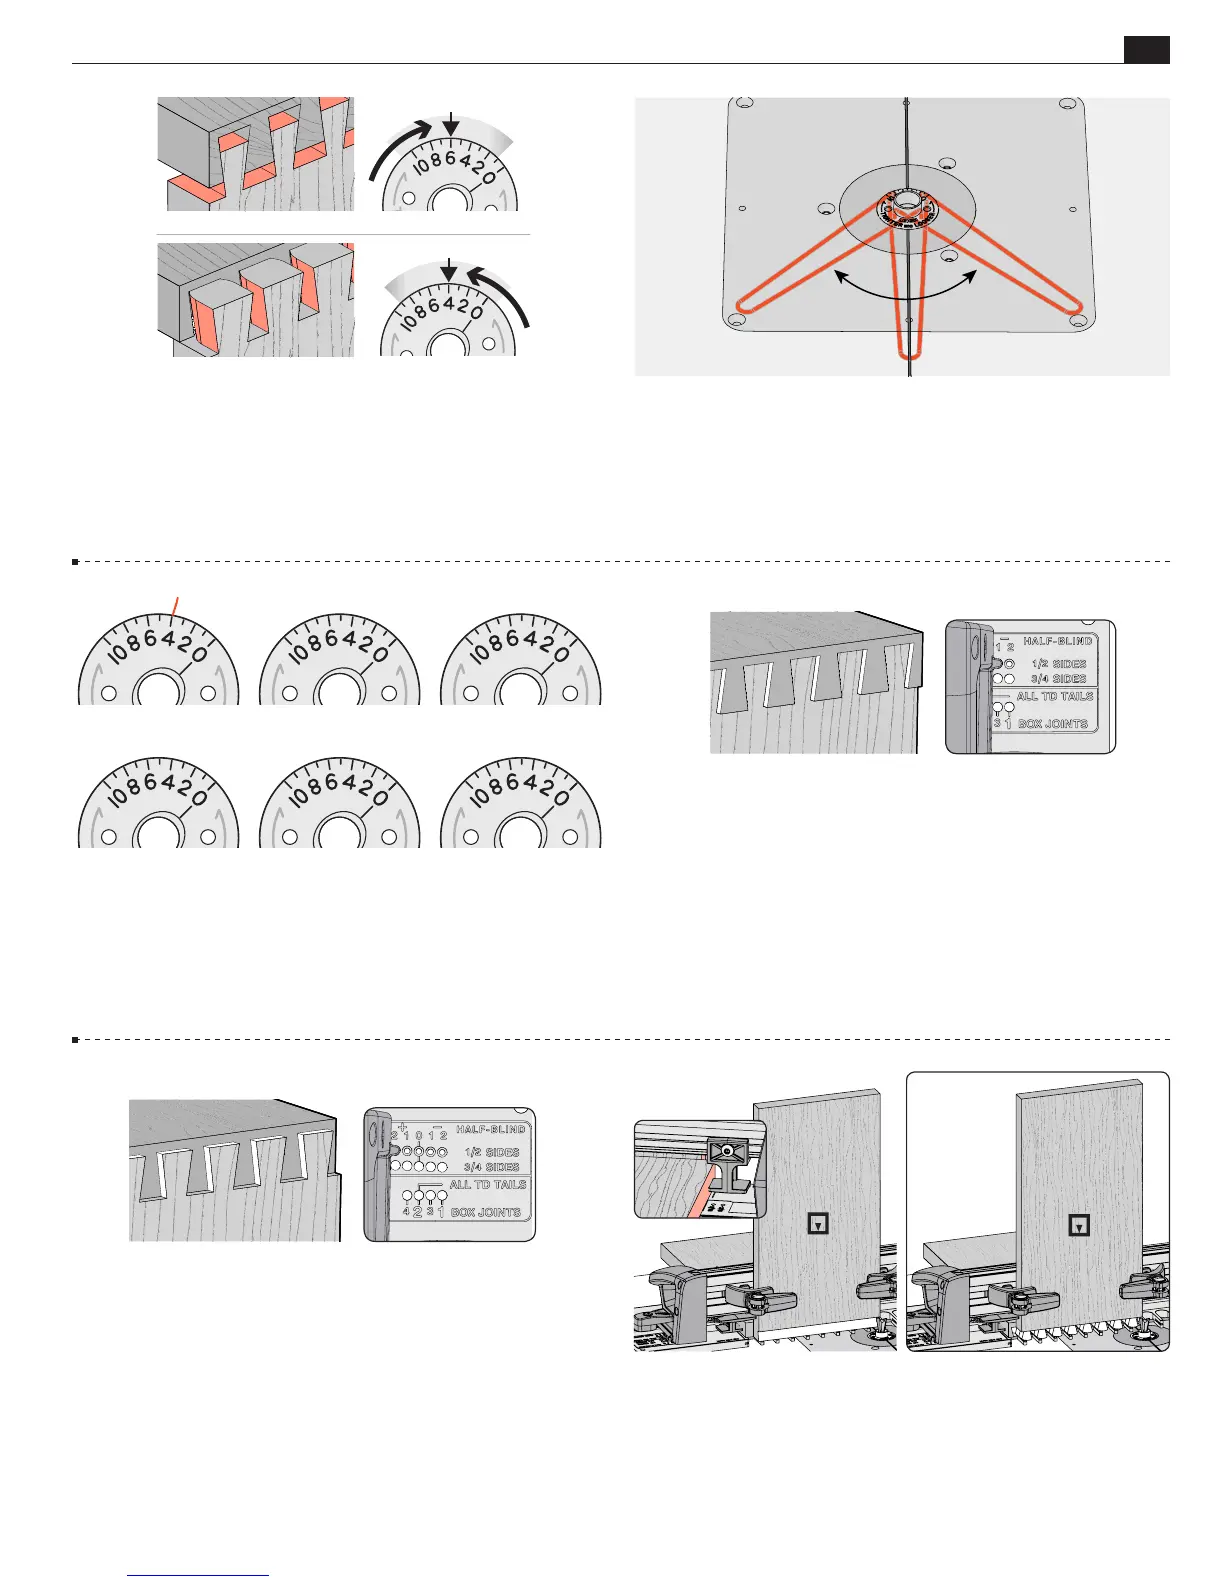
9-20 Test for Fit If the joint is too loose, turn the eBush to a
higher number with the pin wrench as shown in the next step, and
rout two fresh boards.
If the joint is too tight, turn the eBush to
a lower number and
rout two fresh boards
.
9-21
Each increment on the eBush changes the joint glue line
fit by 0.002" [0.05mm]. Half an increment, a mere 1000th inch!
Re-tighten the eBush nut after each guide bushing adjustment.
TOO LOOSE TIGHTEN
TOO TIGHT LOOSEN
9-22 Record your perfect fit eBush setting on one of the drawings
provided above.
OVER FLUSH
9-23 Flushness IMPORTANT NOTE: Do not adjust flushness
until correct joint tightness in previous steps is achieved.
For over flush pins
,
move the frame pin to a minus (“–”) pin
position and rout a new test joint.
You must re-center the
tail board and reposition the sidestop every time a reset for
flushness is made
. Each pin position changes the joint flushness
by 0.013"[0.33mm] Record the pin setting for future use.
Note:
Tail board thickness will not affect flushness.
UNDER FLUSH
9-24 Flushness IMPORTANT NOTE: Do not adjust flushness
until correct joint tightness in previous steps is achieved.
For under flush pins, move the frame pin to a plus (“+”) pin
position and rout a new test joint.
You must re-center the
tail board and reposition the sidestop every time a reset for
flushness is made
. Each pin position changes the joint flushness
by 0.013"[0.33mm] Record the pin setting for future use.
Note:
Tail board thickness will not affect flushness.
Sample
Leigh 120-500 Bit
9-25 Now rout the box. Left: Insert tail board 1 (corner A).
Inset: Insert pin board 1 (corner A) . Right: Rout in all openings.
Tail board 1
and pin board 1
are half complete
.
A
B
A
B
A