7CH Essential Instructions R1.0 2022/11/08
3
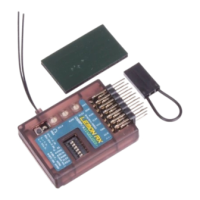
As delivered, the Lemon 7-channel receiver has stabilization disabled and no internal mixes set. Out of the
packet it functions as a standard seven channel DSMX/DSM2™-compatible receiver.
To use the receiver without stabilization, the only setup you might want to do is to change the default No-pulse
failsafe to User-set, as explained in Step 3 on page 3. In the unstabilized state, any other required programming,
such as mixes, will be done in the transmitter as with any other regular receiver.
To activate stabilization, you need to program the receiver using the push buttons, as shown in Step 4, below.
Step 1: Powering the Receiver
The receiver requires a power supply between 4.0v and 8.5v that can deliver the required current to the servos
without dropping below 4v. The most common source is likely to be an ESC (Electronic Speed Controller) which
will supply 5 or 6v to the receiver and servos. Most electric powered planes will use this arrangement and power
will automatically be provided through the Throttle connection to channel 1, however any of the sets of channel
pins can be used to supply power to the receiver.
Step 2: Binding the Receiver
To bind the receiver to a specific model memory in the transmitter, use either one of these two methods:
Binding Using the Bind Button
1. Power ON the receiver (with satellite receiver connected, if used).
2. Hold down the Bind button B for about 3 seconds.
3. Release button B when the red Receiver Status light starts to flash.
4. If a satellite receiver is used, power cycle the receiver at this point by removing power and applying it
again. Both the receiver status light and the satellite light will then flash.
5. Proceed to bind to the transmitter in the normal way (see transmitter instructions).
6. Bind is complete when the red Receiver Status light (and satellite light, if connected) are solid.
Binding Using a Bind Plug
(The traditional, older Spektrum™ method)
1. With receiver power OFF, place a bind plug on the channel 7 pins.
2. Power ON receiver (with satellite receiver connected, if used).
3. The red Receiver Status light and satellite, if connected, will start to flash.
4. Proceed to bind the transmitter in the normal way (see transmitter instructions).
5. Bind is complete when the red Receiver Status light (and satellite light, if connected) are solid.
6. Don’t forget to remove the bind plug.
The receiver is now ready for use with stabilization inactive; however, adding User-set failsafe is recommended.
Step 3: Setting Failsafe
No-pulse mode is the default response of the receiver as supplied if signal is lost for approximately 1 second or
more. The receiver ceases to send pulses on any channel. Servos stay in their current positions, while the ESC,
after a brief delay, will normally shut down power to the motor.