Temporarily plug a servo into each of the Ail, Ele, and Rud outputs and check that they operate normally in
response to the correct transmitter sticks. Power OFF.
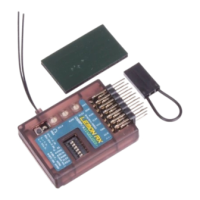
4. Mount the receiver in the plane
The receiver can be mounted upright or inverted and must be aligned with the direction of flight. Either set of
servo connectors can be at the front.
The receiver will not work properly if mounted across the fuselage, on edge, tilted forward or backward, or at an
angle to the centre line. This receiver, unlike some other stabilizers, does not need to be mounted particularly
close to the centre of gravity of the model.
Ensure that the active portions of the two main antennas (the silver section about 31mm long) are well
separated from each other and from conductive items such as wiring, battery, and carbon fibre. They should be
approximately at right angles to each other. Take care not to kink the cables.
The receiver must be firmly mounted to the structure of the aircraft with the double-sided mounting tape
supplied or other vibration-absorbing material. It must not be able to wobble or come loose in flight. Hook-and-
loop material can be used, but only if care is taken to ensure that the firm mounting requirement is met.
Given the dual diversity antenna setup of the Lemon receiver, a satellite receiver is not normally required, but
can be used if desired for extra signal reliability. It should be well separated from the main receiver.
Make sure you can access the three gain pots on the receiver, as you will need to adjust them, perhaps
repeatedly.
5. Connect servos and speed control (ESC), set switches and wing type
Plug the servos and ESC into the appropriate slots on the receiver. Normally, the Stabilization ON/OFF channel
slot (channel 5 or 7) will be empty, as it is used internally by the receiver, as will the Master Gain slot (channel
8).
On the transmitter, set wing type (in the Aircraft Type menu) as shown below; in all cases, the tail type is
Normal, even for a V-Tail model.
Important safety warning: Leave the motor unconnected or remove the propeller when programming or
testing an electric powered model. Electric models can bite!