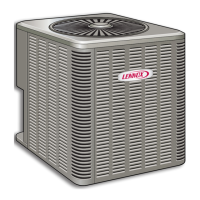
CHARGING INFORMATION FOR 13ACD UNIT SHIPPED WITH DRY NITROGEN CHARGE
This unit is factory shipped with a nitrogen gas holding charge to
prevent moisture infiltration. The 13ACD unit is intended as a replacement
component for an existing (previously installed) system. For best results,
indoor temperature should be between 70ºF (21ºC) and 80ºF (27ºC). Be sure
to monitor system pressures while charging. Charging should be done with
unit operating in the cooling mode.
Initial Weigh-In Charge
7. After evacuation of the outdoor unit, line set, and indoor unit is complete, close
the manifold gauge set valves. Disconnect vacuum pump from center hose of
gauge set.
8. Connect the center hose of the gauge set to a cylinder of HCFC-22 and purge the
hose. Then, place the cylinder upside down on a scale.
9. Open the high side manifold gauge valve and weigh in liquid refrigerant. Refer
to unit nameplate to determine correct weigh-in charge.
10. Close the high side manifold gauge valve when proper charge has been weighed
in.
Optimizing System Charge
NOTE — Refrigerant tank should be turned right-side-up to deliver refrigerant gas
during charge optimizing procedure.
1. Make sure the refrigerant cylinder is right-side-up so that it will deliver gas
during the charge optimizing procedure.
2. Set the thermostat for a cooling demand. Turn on power to the indoor unit and
close the outdoor unit disconnect switch to start the unit.
3. Allow unit to run for five minutes to allow pressures to stabilize.
4. Check and adjust indoor airflow using procedure provided below.
5. Use either approach, subcooling or superheat method (see table 3 and 4) to
optimize system charge. Adjust charge as necessary.
NOTE — Complete procedures for approach, subcooling and superheat methods
are located in the unit installation instruction.
6. Replace the stem and service port caps and tighten.
Adjusting Indoor Airflow
NOTE — Be sure that filters and indoor and outdoor coils are clean before testing.
To determine temperature drop across indoor coil (Delta-T), measure the entering
air dry bulb (DB) and wet bulb (WB) temperatures at the indoor coil. Find Delta-T
in table 1. Measure coil’s leaving air DB and subtract that value from entering air
DB. The measured difference should be within +3ºF (+1.8ºC) of table value; if too
low, decrease the indoor fan speed. If the Delta-T is too high, increase the indoor
fan speed. Repeat charging procedure and Delta-T (air flow adjustment) procedure
until both are correct.
Example: Assume entering air DB - 72, WB - 64, leaving DB - 53. Therefore, Delta-T
should be 15 (per table); delta across coil is 72 - 53 or 19 (which is 4ºF higher than table
value); action necessary: increase fan speed.
Table 5. Superheat (SH) Value RFC System - +5ºF
Unit Capacity
-018 -024 -030 -036 -042 -048 -060
65 26 23 33 22 23 21 30
70 22 23 30 21 22 20 25
Outdoor 75 19 21 26 20 21 19 22
temperature 80 16 18 22 18 20 17 20
(°F) 85 13 16 18 16 19 14 17
90 10 13 14 13 18 11 12
95 7 10 7 10 16 6 7
100 46351421
105 22121111
Charging Temperatures and Pressures
Model -18 -24 -30 -36 -42 -48 -60
Table 6- Normal Operating Pressures
1
°F(°C)
2
TXV System - Liquid Line (+10 psig) / Vapor Line (+5 psig)
65 (18) 138 / 79 148 / 79 147 / 75 155 / 79 147 / 78 144 / 77 152 / 73
70 (21) 148 / 80 160 / 79 159 / 75 169 / 80 158 / 78 152 / 77 164 / 75
75 (24) 160 / 80 174 / 80 172 / 76 183 / 81 172 / 79 163 / 78 177 / 77
80 (27) 174 / 81 188 / 81 186 / 77 199 / 81 189 / 79 179 / 78 192 / 78
85 (29) 188 / 81 203 / 81 201 / 77 215 / 82 205 / 80 195 / 79 208 / 79
90 (32) 204 / 81 220 / 82 216 / 78 233 / 82 222 / 81 212 / 80 225 / 80
95 (35) 219 / 82 236 / 83 233 / 79 252 / 83 241 / 81 229 / 80 243 / 80
100 (38) 236 / 82 253 / 83 250 / 80 271 / 83 259 / 82 245 / 81 261 / 81
105 (41) 253 / 83 272 / 84 268 / 80 291 / 84 279 / 82 265 / 81 280 / 82
110 (43) 272 / 84 291 / 85 287 / 81 311 / 85 299 / 83 287 / 82 299 / 83
115 (45) 291 / 84 311 / 85 306 / 82 331 / 86 320 / 84 309 / 83 320 / 83
°F(°C)
2
Fixed Orifice - Liquid Line (+10 psig) / Vapor Line (+5 psig)
65 (18) 140 / 71 149 / 72 147 / 63 163 / 75 154 / 72 149 / 74 143 / 68
70 (21) 151 / 74 159 / 73 161 / 67 175 / 77 165 / 74 158 / 76 156 / 71
75 (24) 163 /76 172 / 75 176 / 71 187 / 78 173 / 76 169 / 77 169 / 73
80 (27) 176 / 78 186 / 77 190 / 74 202 / 80 189 / 77 180 / 79 183 / 76
85 (29) 190 / 80 200 / 79 206 / 76 217 / 81 202 / 79 192 / 80 198 / 78
90 (32) 205 / 82 216 / 80 222 / 78 232 / 82 217 / 80 206 / 82 213 / 80
95 (35) 220 / 83 232 / 82 239 / 80 248 / 83 233 / 82 222 / 83 228 / 81
100 (38) 236 / 84 247 / 83 256 / 81 266 / 84 248 / 83 238 / 84 245 / 82
105 (41) 252 / 85 265 / 84 273 / 82 279 / 85 265 / 84 255 / 85 262 / 84
110 (43) 269 / 86 280 / 85 291 / 83 302 / 86 283 / 86 273 / 86 279 / 85
115 (45) 288 / 87 303 / 87 309 / 84 320 / 87 298 / 86 292 / 88 297 / 86
Table 7- Approach (APP) Values
3
- TXV System - ºF (ºC) +1ºF (0.5ºC)
All 6 (3.3) 6 (3.3) 8 (4.4) 12 (6.7) 5 (2.8) 6 (3.3) 7 (3.8)
Table 8- Subcooling (SC) Values
4
- TXV System - ºF (ºC) +1ºF (0.5ºC)
All 7 (3.8) 12 (6.7) 9 (5) 10 (5.6) 14 (8) 10 (5.6) 13 (7.2)
1 Typical pressures; indoor evaporator match up, indoor air quantity, and evaporator load will cause the pressures
to vary.
2 Temperature of air entering outside coil.
3 Approach = Liquid Line Temp. minus Outdoor Ambient Temperature
4 Subcooling = Saturation Temp. minus Liquid Line Temp Temperature
 Loading...