Page 8 # 48306B006
Expansion Valve Systems
Expansion valves equipped with Chatleff-type fittings are
available from the manufacturer. See Table 4 for proper
TXV for each unit.
To install an expansion valve (see Figure 9 on page 7):
1. Separate the distributor assembly and remove the
piston orifice and used teflon seal. Insert nozzle end
of the expansion valve along with a new teflon seal
into the distributor and tighten to 20 – 30 ft. lbs. Use
backup wrench on all wrench flats. Overtightening
will crush the teflon seal and may cause a leak.
2. Attach liquid line portion of distributor assembly along
with new teflon seal to the inlet of the expansion
valve. Tighten to 20 – 30 ft. lbs. Use backup wrench
on all wrench flats. Overtightening will crush the
teflon seal and may cause a leak.
3. Connect the external equalizer line to the equalizer
port on the suction line and tighten to 8 ft. lbs.
4. Strap the superheat sensing bulb to the suction header.
If installing an expansion valve on an indoor coil that
previously used a fixed orifice, be sure to remove the
existing fixed orifice. Failure to remove a fixed orifice
when installing an expansion valve to the indoor coil will
result in improper operation and damage to the system.
Manifold Gauge Set
When checking the unit charge, use a manifold gauge set
that is equipped with “low loss” hoses. Do not use a manifold
gauge set with anything other than a “low loss” hose.
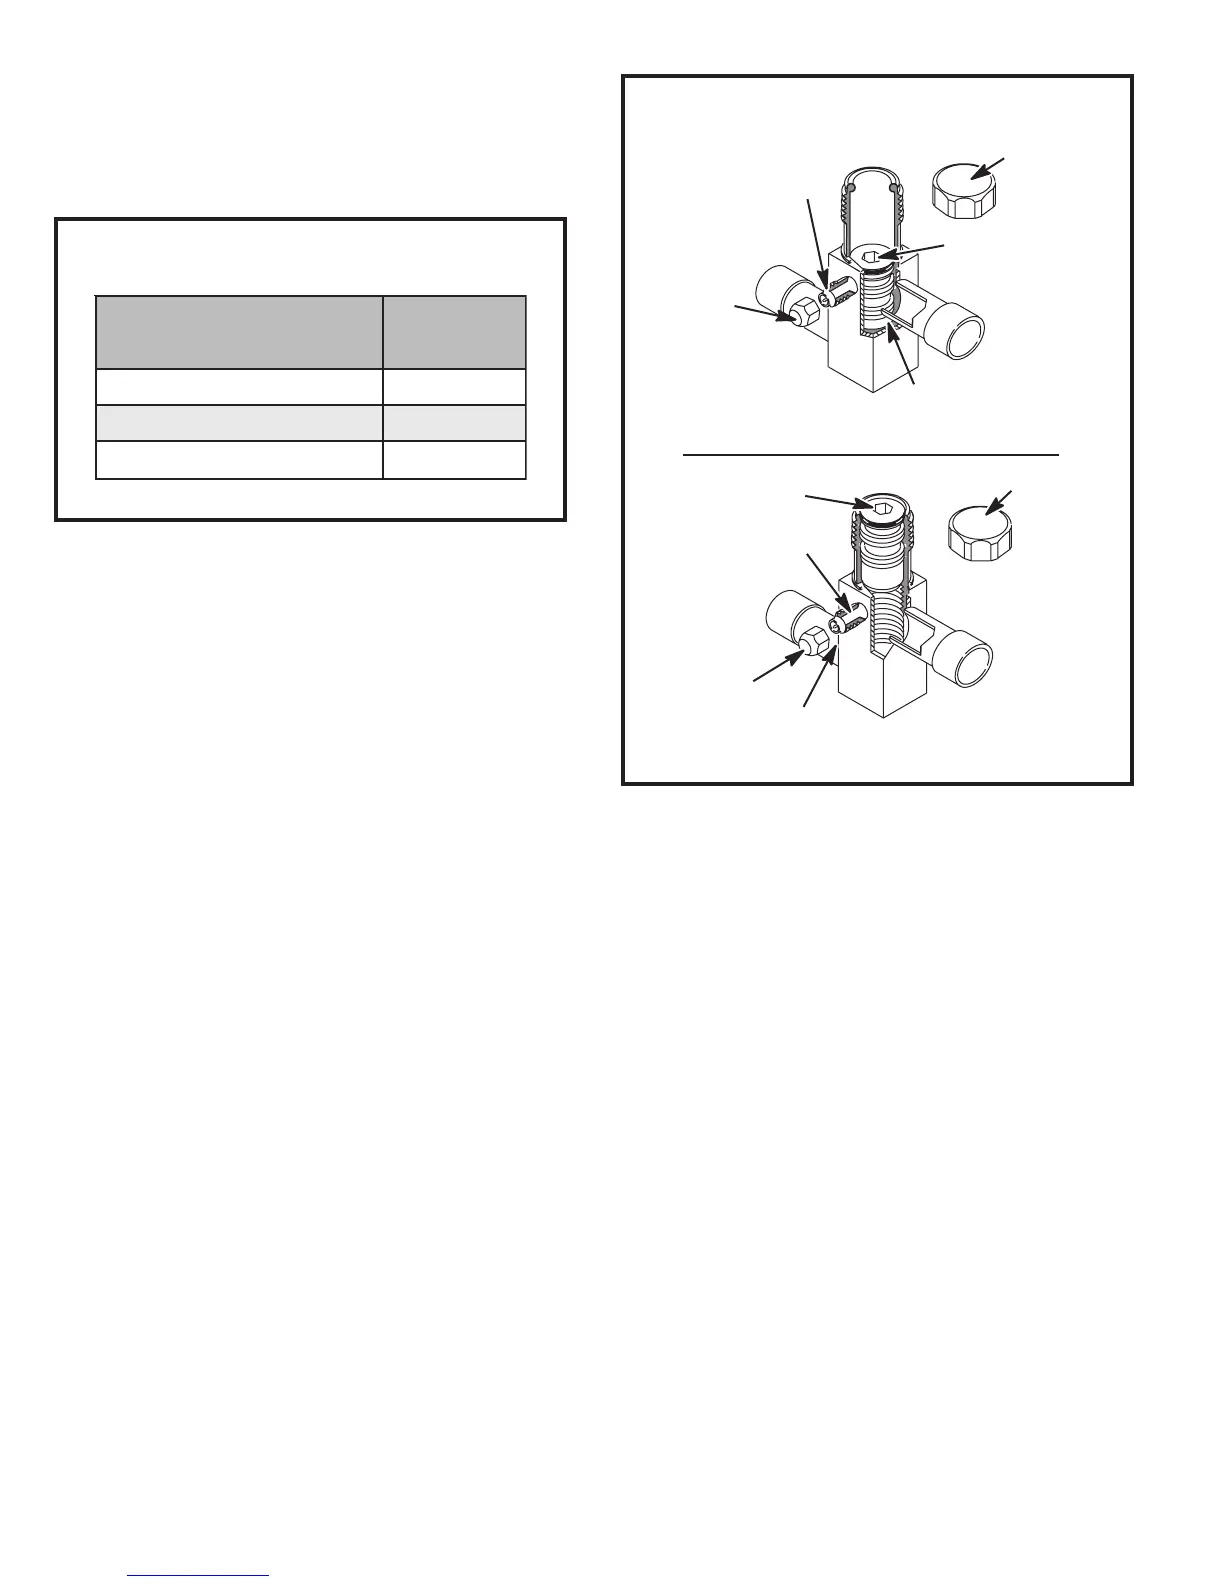
Liquid and Suction Line Service Valves
The liquid line and suction line service valves (see Figure
10) and service ports are used for leak testing, evacuat-
ing, charging, and checking charge.
Each valve is equipped with a service port which has a
factory-installed Schrader valve. A service port cap
protects the Schrader valve from contamination and
serves as the primary leak seal.
To Access the Schrader Port:
1. Remove the service port cap with an adjustable wrench.
2. Connect gauge to the service port.
3. When testing is completed, replace service port cap.
Tighten finger tight, then an additional 1/6 turn.
To Open Liquid or Suction Line Service Valve:
1. Remove stem cap with an adjustable wrench.
2. Use a service wrench with a hex-head extension to
back the stem out counterclockwise as far as it will
go. Use a 3/16" hex head extension for liquid line
service valves and a 5/16" extension for suction line
service valves.
3. Replace the stem cap. Tighten finger tight, then
tighten an additional 1/6 turn.
Figure 10
Service Valve
Valve Closed
Valve Open
Schrader
Valve
Schrader valve open
to line set when valve is
closed (front seated)
Service Port
Service
Port Cap
Insert hex
wrench here
(valve front seated)
To outdoor coil
To indoor coil
To indoor coil
Stem Cap
Service Port
To outdoor coil
Service Port Cap
Stem Cap
Insert hex
wrench here
Table 4
TXV Data
ledoM
traP
rebmuN
63-,03-,42-,81-31PHS210VXT2H
84-,24-31PHS2 20VXT2H
06-31PHS230VXT2H
 Loading...