EasyManua.ls Logo

Lennox Elite EL18XCV Series User Manual

Lennox Elite EL18XCV Series
22 pages
To Next Page IconTo Next Page
Page #1 background imageLoading...
Page #1 background image
©2023 Lennox Industries Inc.
Dallas, Texas, USA
Page 1
THIS MANUAL MUST BE LEFT WITH THE
HOMEOWNER FOR FUTURE REFERENCE
WARNING
Improper installation, adjustment, alteration, service
or maintenance can cause property damage, personal
injury or loss of life. Installation and service must be
performed by a licensed professional HVAC installer or
equivalent, or service agency.
IMPORTANT
The Clean Air Act of 1990 bans the intentional venting of
refrigerant (CFCs, HCFCs and HFCs) as of July 1, 1992.
Approved methods of recovery, recycling or reclaiming
must be followed. Fines and/or incarceration may be
levied for noncompliance.
CAUTION
As with any mechanical equipment, contact with sharp
sheet metal edges can result in personal injury. Take
care while handling this equipment and wear gloves and
protective clothing.
INSTALLATION
INSTRUCTIONS
AIR CONDITIONER
507955-01
9/2023
Elite
®
Series EL18XCV Units
PACKING LIST
OUTDOOR UNIT
WARRANTY
CERTIFICAT E
RAST 6-PIN
CONNECTORS (2)
General
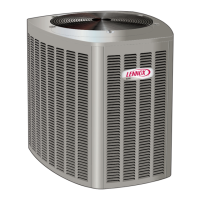
This EL18XCV outdoor air conditioner with all-aluminum
coil is designed for use with HFC-410A refrigerant only.
This unit must be installed with an approved indoor air han-
dler or coil. For AHRI Certied system match-ups and ex-
panded ratings, visit www.LennoxPros.com. The EL18XCV
variable capacity unit may be installed with an S30 commu-
nicating thermostat or a standard 24VAC non-communicat-
ing thermostat. See eld wiring diagrams for wiring details.
These instructions are intended as a general guide and do
not supersede local codes in any way. Consult authorities
having jurisdiction before installation.
NOTICE!
Charging information is given on the charging
procedure sticker on the unit access panel. For more in-
depth information, consult the Installation and Service
Procedures manual on LennoxPros.com or through the
Technical Support department at 800-453-6669.
IMPORTANT: Special procedures are required for clean-
ing the all-aluminum coil in this unit. See page 20 in this
instruction for information.
See
NOTES
See NOTES
NOTES:
Service clearance of 30 in. (762 mm) must be maintained on one of
the sides adjacent to the control box.
Clearance to one of the other three sides must be 36 in (914 mm).
Clearance to one of the remaining two sides may be 12 in. (305mm)
and the final side may be 6 in.(152 mm).
A clearance of 24 in. (610 mm) must be maintained between two units.
48 in. (1219 mm) clearance required on top of unit.
See
NOTES
See NOTES
Control
Box
SETTING THE UNIT – Clearances
Question and Answer IconNeed help?

Do you have a question about the Lennox Elite EL18XCV Series and is the answer not in the manual?

Lennox Elite EL18XCV Series Specifications

General IconGeneral
RefrigerantR-410A
Energy Star CertifiedYes
Climate ZonesSuitable for all climate zones
Cooling Capacity1.5 to 5 tons
Warranty10-Year Limited Warranty on covered components

Summary

Setting the Unit: Clearances

Unit Placement and Mounting

Refrigerant Piping: Introduction and Warnings

Refrigerant Piping: Sizing and Traps

Refrigerant Piping: Metering Device and Flushing

Flushing the Refrigerant Line Set

Describes the steps for flushing the line set and indoor unit coil.

Refrigerant Piping: Brazing Procedures

Brazing Preparation and Safety

Details preparation steps like cutting, deburring, and safety precautions for brazing.

Manifold Gauge Set Connection

Details connecting the manifold gauge set for brazing with nitrogen flow.

Refrigerant Piping: Brazing Execution

Protecting Service Valves During Brazing

Explains how to wrap service valves with water-saturated cloths to protect them.

Brazing and Cooling Process

Details nitrogen flow during brazing and cooling the joints after brazing.

Indoor Expansion Valve Installation

Leak Test and Evacuation: Preparation

Connecting Gauge Set for Leak Testing

Describes how to connect the manifold gauge set for leak testing.

Leak Testing Procedure

Outlines the procedure for testing the line set and indoor unit for leaks.

Leak Test and Evacuation: System Evacuation

Gauge Set and Vacuum Pump Connection

Details connecting the gauge set, vacuum pump, and refrigerant/nitrogen containers.

Evacuation Process and Requirements

Explains the process of evacuating the system to specific micron levels.

Electrical and Wiring Requirements

Outdoor Unitary Control Features

Charge Mode Jumper Functionality

Explains the function and operation of the Charge Mode jumper for service procedures.

Unit Start-Up Procedures

Pre-Start Up Checks

Lists essential checks before starting the unit, including power and wiring.

Service Valve Operation and Refrigerant Charge

Checking Refrigerant Charge

Explains how to check and adjust the refrigerant charge using the charge mode.

Professional Maintenance Details

General System Test Procedures

Describes performing system tests, checking temperatures, pressures, and refrigerant charge.

Start-Up and Performance Checklist

Unit Information and Start-Up Checks

Lists essential information and initial checks for unit start-up.

Cooling Mode Performance Verification

Details calculations for subcooling, approach, and temperature drop in cooling mode.
Related product manuals