Do you have a question about the Lennox XC25 Series and is the answer not in the manual?
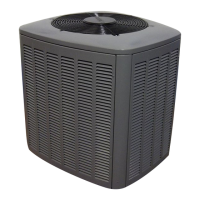
Lists components included with the XC25 outdoor unit.
Important safety precautions for installation and service.
Specifies minimum clearance requirements around the XC25 unit.
Details minimum spacing required between multiple XC25 units.
Outlines required vertical clearance for the XC25 unit.
Guidelines for positioning the outdoor unit away from windows.
Describes how to mount the unit on a ground-level slab.
Details mounting the unit on a slab using feet extenders.
Instructions for stabilizing the unit on sloped or uneven ground.
Warning about potential damage to roofing materials from refrigerant oil.
Caution regarding exhaust gas exposure affecting unit performance.
Safety precautions for handling and storing panels during installation.
California warning about potential chemical exposure from the product.
Warning about sharp sheet metal edges causing personal injury.
Warning about residual mineral oil affecting heat transfer and warranty.
Caution about POI oils absorbing moisture and keeping system closed.
Warning about the dangers of inhaling refrigerant and responsible use.
Hazard warning about using oxygen for purging refrigeration lines.
Warning about using high-pressure gas regulators for pressurization.
Information on scroll compressor vacuum protector behavior.
Guidance on energizing unit with crankcase heater below 60°F.
Guidelines for refrigerant piping sizing for XC25 systems.
Requirement for installing suction traps based on elevation differences.
Method for adjusting refrigerant charge based on line set length and temperature.
Standard line set sizes for up to 50 linear feet.
Guidelines for line set sizing between 51-150 linear feet.
Table for selecting liquid line diameter based on length and elevation.
Procedure for removing a fixed orifice metering device.
Procedure for removing an existing expansion valve.
Setup for connecting gauges and equipment for system flushing.
Detailed steps for flushing the line set and indoor coil.
Steps for accessing service valves and preparing refrigerant lines.
Instructions for removing service port caps and cores.
Connecting manifold gauges for brazing with nitrogen flow.
Health and safety precautions for brazing operations.
Warning about fire danger when bleeding refrigerant and applying heat.
Crucial warning about using water-saturated cloths during brazing.
How to protect service valve seals with water-saturated cloths.
Procedure for flowing nitrogen through the system during brazing.
Steps for brazing the liquid and suction/vapor lines.
Recommended silver alloy brazing rods for copper and brass joints.
Guidance on cooling brazed joints to prevent damage to valve seals.
Final preparation steps after brazing and cooling.
Detailed steps for installing the indoor expansion valve.
Instructions for installing the equalizer line for the expansion valve.
Procedures for correctly positioning and installing the sensing bulb.
Connecting manifold gauge set for leak testing and evacuation.
Procedure for performing a leak test on the connected system.
Connecting the gauge set for the evacuation process.
Steps to evacuate the system to the required vacuum level.
Warning against deep vacuum operation and compressor use for evacuation.
Electrical hazard warning regarding high voltage and stored charge.
Sizing circuits and installing disconnect switches according to codes.
Precautions to protect electronic controls from electrostatic discharge.
Guidelines for installing the room thermostat at the proper location.
Details of master control jumpers, terminals, and their functions.
Explanation of various input and output signals for the control system.
Guidelines for routing low-voltage control wires and thermostat connections.
Instructions for routing high-voltage wiring and ground connections.
Requirement to set thermostat for accurate charging.
Information source for unit alarms and error codes.
Details on operating the outdoor control display and buttons.
How to configure the outdoor unit using the iComfort Wi-Fi® thermostat.
Safety precaution to turn off power before service or maintenance.
Warning about water exposure corroding unit parts.
Recommendations for maintaining the outdoor coil for optimal operation.
General routine maintenance tasks for the system, including filter checks.
Reference to the thermostat manual for operation instructions.
Checklist of items to verify before calling for service.
Section for recording initial operating parameters like amps and volts.
Parameters to check during cooling mode operation.
Parameters to check during heating mode operation.
Calculations for subcooling, approach, and coil temperature drop.
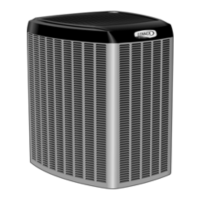
The Lennox XC25 System is a high-efficiency air conditioner designed for residential use, offering advanced cooling and heating capabilities. This outdoor unit is an integral component of a complete HVAC system, requiring an iComfort Wi-Fi® thermostat and an iComfort™-enabled air handler or furnace for optimal operation. The system utilizes HFC-410A refrigerant, a more environmentally friendly option, and incorporates variable capacity compressor technology for precise temperature control and energy efficiency.
The primary function of the Lennox XC25 is to provide cooling and, when paired with a compatible indoor unit, heating for residential spaces. Its variable capacity compressor allows it to adjust its output based on demand, maintaining a consistent indoor temperature with fewer fluctuations than traditional single-stage systems. This technology contributes to improved comfort and reduced energy consumption. The unit is designed to work seamlessly with the iComfort Wi-Fi® thermostat, which provides intelligent control and monitoring of the entire HVAC system. The thermostat allows users to manage settings remotely, receive system alerts, and optimize performance through smart features.
The XC25 system's operation involves a refrigerant cycle where HFC-410A absorbs heat from the indoor air and releases it outdoors during cooling, or vice versa during heating. The variable speed compressor enables the system to operate at different capacities, from low-speed, energy-saving modes to high-speed, rapid cooling or heating. This adaptability ensures that the system can efficiently meet diverse comfort needs while minimizing operational noise.
Installation of the XC25 system requires careful attention to clearances and piping to ensure proper function and longevity. The unit should be installed on a level surface or a slope with a maximum tolerance of 2 degrees (2 inches per 5 feet) away from the building structure. Specific clearances are required around the unit for maintenance access and airflow, including 30 inches to the access panel, 36 inches to one side, 12 inches to two sides, and 6 inches to the final side. Minimum clearance above the unit is 48 inches. When installing multiple units, a minimum clearance of 24 inches between them is necessary.
The system's refrigerant piping is a critical aspect of installation. For new installations or when replacing an existing system, the line set must be flushed according to industry standards, especially if the previous system used mineral oil or if contaminants are present. Polyol ester (POE) oils, used with HFC-410A, absorb moisture quickly, so it's crucial to keep the refrigerant system closed until connections are ready. The manual provides detailed guidelines for line set sizing and application, considering factors like total equivalent length, linear length, liquid lift, and vapor riser length. For line sets up to 50 linear feet, standard sizes are recommended. For lengths between 51 and 150 linear feet, specific tables guide the selection of liquid and vapor line sizes, and a crankcase heater is required. Line sets over 150 linear feet are not recommended.
Brazing procedures for connecting the refrigerant lines must be performed with caution, using water-saturated cloths to protect service valve seals and flowing nitrogen through the lines to prevent oxidation. After brazing, the system must undergo a leak test and evacuation to ensure a tight, moisture-free system. This involves pressurizing the lines with a trace amount of HFC-410A and nitrogen, checking for leaks with a detector, and then evacuating the system to a deep vacuum of 500 microns or less.
Electrical wiring must conform to local codes and the National Electric Code (NEC) in the U.S.A. or the Canadian Electrical Code (CEC) in Canada. The unit requires a 24VAC transformer (40 VA minimum) for low-voltage control power. The iComfort Wi-Fi® thermostat requires four wires between the thermostat and the furnace/air handler control, and four wires between the outdoor unit and the furnace/air handler control. Any unused wires in the cable should be bundled with a wire nut and connected to the C terminal to prevent electrical noise. High voltage wiring should be trimmed and secured away from low voltage wiring.
Routine maintenance is essential for the XC25 system to ensure peak performance and longevity. Homeowners can perform some basic tasks, while others require a licensed HVAC professional.
For homeowners:
For HVAC professionals:
Before any service or maintenance, the electrical power to the unit must be turned OFF at the disconnect switch. It's important to wait at least 5 minutes after power removal, as electrical components may hold a charge. Electrostatic discharge (ESD) precautions should be followed to protect the unit's electronic controls during service.
| Compressor Type | Variable Speed |
|---|---|
| Cooling Capacity | Up to 5 tons |
| Sound Rating | As low as 59 dB |
| Energy Star Certified | Yes |
| Refrigerant | R-410A |
| Stages of Cooling | Variable |
| SEER Rating | 26 |
| Warranty | 10-Year Limited Warranty on covered components |