EasyManua.ls Logo

Lennox XC21 Series

Lennox XC21 Series
58 pages
To Next Page IconTo Next Page
Loading...
Page 1
2010 Lennox Industries Inc.
Revised October 12, 2010
XC21
Service Literature
Corp. 1007−L2
XC21 (HFC−410A) SERIES UNITS
(non−icomfortt and icomfortt ENABLED)
THIS SERVICE MANUAL IS APPLICABLE TO BUILD
XC21−XXX−230−04 OR LATER.
NOTICE
A thermostat is not included and must be ordered
separately.
D The Lennox icomfort Touch thermostat must be used
in communicating applications.
D In non−communicating applications, the Lennox
ComfortSense
®
7000 thermostat may be used, as well
as other non−communicating thermostats.
In all cases, setup is critical to ensure proper system
operation.
Field wiring examples for non−communicating
applications begin on page 24.
See the icomfort Toucht thermostat Quick Start Guide
for communicating and partial communicating field wiring
connections.
WARNING
Improper installation, adjustment, alteration, service or
maintenance can cause personal injury, loss of life, or
damage to property.
Installation and service must be performed by a licensed
professional installer (or equivalent) or a service agency.
Accessories
For update−to−date information, see any of the following
publications:
S Lennox XC21 Engineering Handbook
S Lennox Product Catalog
S Lennox Price Book
TABLE OF CONTENTS
Model Number Identification 2. . . . . . . . . . . . . . . . . . . .
Typical Serial Number Identification 2. . . . . . . . . . . . . .
Specifications 2. . . . . . . . . . . . . . . . . . . . . . . . . . . . . . . . .
Electrical Data 3. . . . . . . . . . . . . . . . . . . . . . . . . . . . . . . .
Unit Dimensions 4. . . . . . . . . . . . . . . . . . . . . . . . . . . . . .
Unit Parts Arrangement 5. . . . . . . . . . . . . . . . . . . . . . . .
Operating Gauge Set and Service Valves 6. . . . . . . . .
Unit Placement 8. . . . . . . . . . . . . . . . . . . . . . . . . . . . . . .
Removing and Installing Panels 11. . . . . . . . . . . . . . . . .
New or Replacement Line Set 12. . . . . . . . . . . . . . . . . .
Brazing Connections 14. . . . . . . . . . . . . . . . . . . . . . . . . . .
Flushing the System 17. . . . . . . . . . . . . . . . . . . . . . . . . . .
Leak Testing the System 19. . . . . . . . . . . . . . . . . . . . . . .
Evacuating the System 21. . . . . . . . . . . . . . . . . . . . . . . . .
Electrical 22. . . . . . . . . . . . . . . . . . . . . . . . . . . . . . . . . . . . .
Field Control Wiring 24. . . . . . . . . . . . . . . . . . . . . . . . . . .
Air Conditioner Control (A175) Jumpers
and Terminals 26. . . . . . . . . . . . . . . . . . . . . . . . . . . . . . . . .
Unit Start−Up 27. . . . . . . . . . . . . . . . . . . . . . . . . . . . . . . . . .
System Refrigerant 27. . . . . . . . . . . . . . . . . . . . . . . . . . .
Operating and Temperature Pressures 31. . . . . . . . . .
System Operations 32. . . . . . . . . . . . . . . . . . . . . . . . . . . .
System Status, Fault and Lockout LED Codes 36. . . .
Component Field Configuration and
Troubleshooting 41. . . . . . . . . . . . . . . . . . . . . . . . . . . . . . .
Maintenance 49. . . . . . . . . . . . . . . . . . . . . . . . . . . . . . . . . .
SunSource
®
Home Energy System 50. . . . . . . . . . . . . .
Checklists 50. . . . . . . . . . . . . . . . . . . . . . . . . . . . . . . . . . . .
Unit Wiring Diagrams 52. . . . . . . . . . . . . . . . . . . . . . . . . .
Unit Sequence of Operations 54. . . . . . . . . . . . . . . . . . .
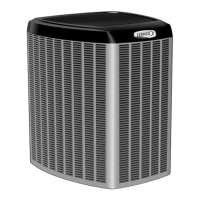
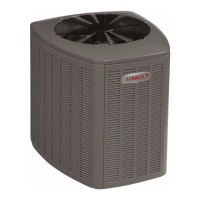
The XC21 is a high efficiency residential split−system air
conditioner unit, which features a one−stage scroll
compressor, icomfortt control and HFC−410A refrigerant.
Units are available in 2, 3, 4 and 5−ton sizes. This model
series is designed for use with an expansion valve
metering device only. Refer to the XC17 Engineering
Handbook for ordering the correct indoor coil expansion
valve.
This model is also SunSourcet ready beginning with
XC21−XXX−230−05 build.
This document provides information only on build
XC21−XXX−230−04 and later which features the new air
conditioner control hardware and other enhancements.
Refer to Corp. 0504−L2 for earlier model version service
related information.
Question and Answer IconNeed help?

Do you have a question about the Lennox XC21 Series and is the answer not in the manual?

Lennox XC21 Series Specifications

General IconGeneral
SEER RatingUp to 21.00
Sound RatingAs low as 69 dB
Energy Star CertifiedYes
RefrigerantR-410A
Cooling Capacity2 to 5 tons
Warranty10-year limited warranty on compressor and covered components

Summary

Electrical Data

Operating Gauge Set and Service Valves

SERVICE VALVES ANGLE AND BALL

Unit Placement

STABILIZING UNIT ON UNEVEN SURFACES

New or Replacement Line Set

REFRIGERANT LINE SET

Information on installation or replacement of existing refrigerant line sets.

Brazing Connections

Flushing the System

CONNECT GAUGES AND EQUIPMENT FOR FLUSHING PROCEDURE

Procedure for connecting gauges and equipment for the flushing process.

FLUSHING LINE SET

Detailed procedure for flushing the line set and indoor unit coil.

TYPICAL CHECK EXPANSION VALVE INSTALLATION PROCEDURE

Leak Testing the System

IMPORTANT

Notes regarding leak detection capability for HFC refrigerants and EPA regulations.

CONNECT GAUGE SET

TEST FOR LEAKS

Evacuating the System

CONNECT GAUGE SET

Steps for connecting the gauge set for system evacuation.

EVACUATE THE SYSTEM

Procedure to evacuate the line set and indoor unit to a specific vacuum level.

Electrical

SIZE CIRCUIT AND INSTALL DISCONNECT SWITCH

Guidelines for sizing circuits, installing disconnect switches, and wiring.

INSTALL THERMOSTAT

Instructions for installing the room thermostat at the recommended height and location.

Field Control Wiring

Air Conditioner Control (A175) Jumpers and Terminals

Unit Start-Up

GAUGE SET CONNECTIONS FOR TESTING AND CHARGING

Procedures for connecting the gauge set for system testing and charging.

System Refrigerant

ADDING OR REMOVING REFRIGERANT

AIRFLOW

WEIGH IN

CALCULATING SYSTEM CHARGE FOR OUTDOOR UNIT VOID OF CHARGE

Method for calculating total refrigerant charge when the system is void of refrigerant.

APPROACH

SUBCOOLING

TEST AND CHARGE METHOD

Procedure for testing and charging the system using the subcooling method.

Operating and Temperature Pressures

System Operation

COMPRESSOR ANTI-SHORT CYCLE DELAY

Explanation of the compressor's anti-short cycle delay function.

HIGH (S4) AND LOW (S87) PRESSURE SWITCHES

Description of the high and low pressure switches and their operation.

HIGH DISCHARGE LINE TEMPERATURE SENSOR (RT28)

Details on the high discharge line temperature sensor and its fault conditions.

E33 JUMPER (TEST) PINS

System Status, Fault and Lockout LED Codes

DS11 AND DS14 - SYSTEM STATUS, FAULT AND LOCKOUT LED CODES

Explanation of LED codes indicating system status, faults, and lockouts.

DS15 AND DS13 - COMPRESSOR FAULT AND LOCKOUT LED CODES

Explanation of LED codes indicating compressor faults and lockouts.

System fault and lockout LED (DS11 DS14) alarm codes

Field Configuration and Testing

Figure 21. Fan Motor Control OneTwo Stage and EDA LED Sequence of Operation

Figure 22. Fan Control, Wiring, Jumper Settings, Testing and LED Location

Figure 23. Testing for External Power to Fan Motor Control

Fan Motor (B4) Test Procedure

AIR CONDITIONER CONTROL (A175) UNIT NOMINAL CAPACITY CODE CONFIGURATION

Figure 26. Main Control (A175) Unit Nominal Capacity Code Configuration

Illustrates the process for configuring the unit's nominal capacity code via LEDs.

Maintenance

Start-Up and Performance Checklist

Unit Wiring Diagrams

Figure 29. Typical XC21 Wiring (with icomfort enabled, Surge Protection and Fan Motor Control (A177) Rewired) (XC21-XXX-230-05 build)

Figure 30. Typical XC21 Wiring (with icomfort enabled, New Fan Motor with built-in surge protection and External Surge Protection Device Removed (XC21-XXX-230-06 build)

Unit Sequence of Operations

Figure 31. One-Stage and Two-Stage Cooling Sequence of Operation

Figure 32. Low Pressure (S87) Switch Sequence of Operation

Figure 33. High Pressure (S4) Switch Sequence of Operation

Figure 34. High Discharge Temperature (RT28) Sensor Sequence of Operation

Related product manuals