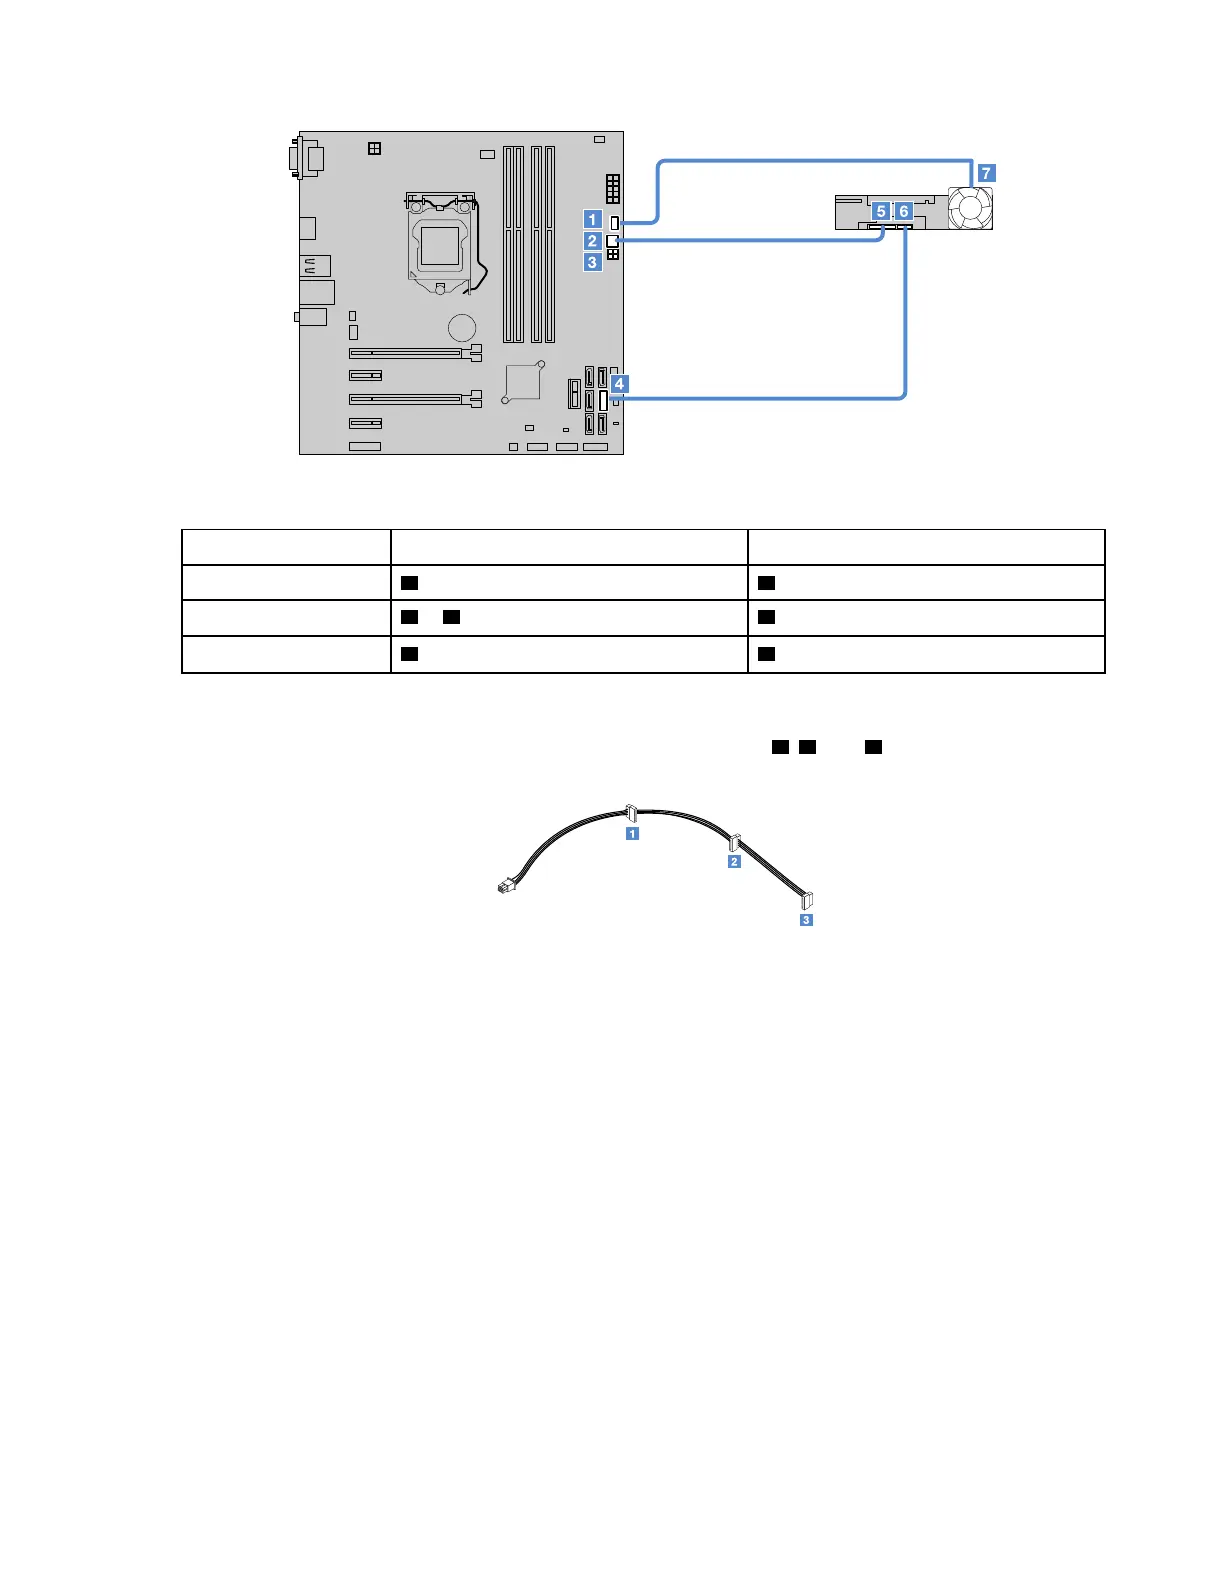
Figure 47. Connecting cables to the drive and convertor kit
Cable From the system board To the drive and convertor kit
HDD fan cable
1 HDD fan connector 7 HDD fan on the rear of the convertor kit
1-to-3 power cable
2 or 3 4-pin power connector 5 Power connector on the drive
Signal cable
4 SATA connector 3 6 Signal connector on the drive
Notes:
• The 1-to-3 power cable provides three SATA power connectors
1 , 2 , and 3 . You can connect any
one of the SATA connectors to the drive.
• If your server has no drive installed in drive bay 3, connect the signal cable from the drive to the SATA
connector 2 on the system board. See “System board components” on page 19.
Slim optical drive and storage drive in drive bay 5
Drive bay 5 of your server supports one of the following:
• Primary optical drive
For instructions on how to remove or install the optical drive, see “Optical drive” on page 46.
• Slim optical drive and storage drive (2.5-inch/3.5-inch hard disk drive or 2.5-inch solid-state drive)
The slim optical drive and storage drive are installed in a Lenovo ThinkServer TS150 3.5" HDD to 5.25"
Tray Convertor with Slim ODD Kit (hereinafter called HDD and slim ODD convertor kit).
– “Removing a slim optical drive and storage drive from drive bay 5” on page 63
– “Installing a slim optical drive and storage drive into drive bay 5” on page 65
For information about drive bays and installation rules, see “Internal drives” on page 44.
Removing a slim optical drive and storage drive from drive bay 5
To remove a slim optical drive and storage drive from drive bay 5, do the following:
1. Prepare your server. See “Preparing your server and removing the server cover” on page 41.
Chapter 5. Replacing hardware 63