Mechanical installaon
Important notes
•
Install the product according to the informaon in the chapter "Standards and operang condions".
(Siehe Projekerungshandbuch)
•
The technical data and the data regarding the supply condions can be found on the nameplate and in
this documentaon.
•
Ambient media − especially chemically aggressive ones − may damage sha sealing rings, lacquers and
plascs.
•
Lenze oers special surface and corrosion protecon in this case.
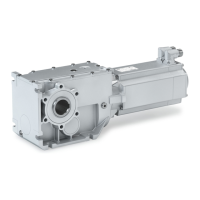
Transport
The transport weights can be found in the shipping documents!
The motors mounted on the gearbox are somemes equipped with ears. These are exclusively
intended for mounng the motor on/removing the motor from the gearbox and must not be used
for the complete geared motor!
CAUTION!
Danger from pping or falling loads!
Standing beneath suspended loads is prohibited!
▶
Use addional appropriate liing aids, if required, to achieve a direcon of loading which is as vercal as
possible (highest load carrying capacity). Secure liing aids against shiing!
▶
Screw in the transport aids completely. They must have even and full-surface contact!
▶
Transport aids must be loaded vercally in the direcon of the screw axis! Diagonal or lateral tension
reduces the load carrying capacity! Observe data in standard DIN 580!
Preparaon
How to prepare the product for mounng:
•
Protect sha sealing rings from contact with solvents.
•
Remove protecon covers from shas.
•
Thoroughly remove ancorrosion agents from the sha and from ange faces.
•
Draw the transmission elements onto the output sha only by using the centering thread.
•
Align the output sha and transmission elements exactly to avoid tensions.
•
Mount belt pulleys, sprockets, or gear wheels as close as possible to the sha shoulder in order to keep
the bending load of the sha and the bearing forces at a minimum level.
•
Tighten all screw connecons with the specied torques and secure them with standard screw locking
adhesive.
•
Check paint for damage and repair professionally.
Mechanical installaon
Preparaon
44
 Loading...