Friedrich Leutert GmbH & Co. KG 15
Engine Indicators Type 50 and Type 30 - Operating Instructions
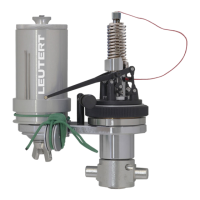
5 Changing the Spring
Remove spring cap at the upper end of the piston rod. Unscrew the
spring. Place the new spring over the piston rod so that the small ball
on the spring engages with the corresponding slot of the piston rod,
and firmly tighten the spring by hand only, and replace, and tighten
the spring cap also firmly by hand (do not use tools).
After verification of the indicator diagram it is very important to
note all necessary data on the diagram, such as piston size of the
indicator, spring number, engine number etc.
After every operation the indicator must be thoroughly cleaned,
oiled and replaced in its box. The instrument should be cleaned with
a lint-free rag, the cylinder only with the cylinder cleaner stored in
the box. The sliding surfaces of the cylinder and piston rod guide
should be lubricated with top-quality, non-viscous cylinder oil (oil
bottle stored in the box).
The links of the recording mechanism, and the drum bearings should
also be lubricated occasionally with the same oil after removing the
drum cover.
Carbon deposits on the piston or cylinder should never be scratched
off, but always be removed by washing them with benzene or
petroleum.
6 Changing the Piston Rod
CAUTION: The recording mechanism must be handled with
extreme care; slightest damage may lead to substantial
recording errors. The links must never be disassembled and
should always be sufficiently lubricated with cylinder oil.
To exchange the piston rod, the upper part has to be removed by
unscrewing the ring nut as described on page 12.
Unscrew the spring cap and remove the coupling pin by gripping its
flat head with the small accessory pliers.
The piston rod can now be removed from the upper part.
When inserting the new piston rod, make sure that the coupling pin
is inserted into the link with the larger bore and into that side of the
piston rod which is marked by a punched spot.
 Loading...