8
ENFRDECZSKFREEFREE PL
CAUTION: If a cable-actuated seat post is inserted too far into the seat-tube,
the housing can be damaged and cause the seat post to not function properly.
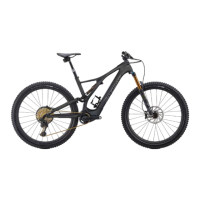
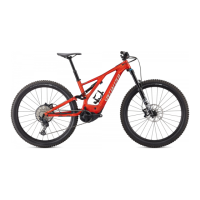
6.3. DERAILLEUR HANGER
The Levo frame uses the SRAM UDH (Universal Derailleur Hanger) at the rear dropout.
This hanger must be installed following SRAM’s installation instructions. Please refer to the
installation steps in section 14, or refer to the SRAM UDH User Manual.
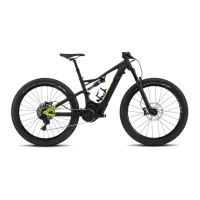
6.4. SPEED SENSOR
The Levo is equipped with a Speed Sensor magnet, located on the rear hub/disc rotor
interface. Dirt and/or metal debris may accumulate on the Speed Sensor magnet. Too much
accumulation may result in interruptions in motor support and/or inaccurate speed readings.
Regularly check your Speed Sensor magnet for an accumulation of dirt and/or metal debris,
and clean accordingly. The frequency of the cleaning depends on your riding conditions, ride
frequency and/or brake pad material. Removing metal debris may require the use of a magnet
stronger than the Speed Sensor magnet.
When assembling the rear brake disc, the Speed Sensor Magnet must be installed on the
rotor. Four of the six bolts are standard rotor bolts. The remaining two bolts (M5 x 0.8 pitch x
15 mm length, with a countersunk flat head) attach the Speed Sensor Magnet to the rotor.
INFO: The Levo is equipped with a Seat post stopper located on the rear of the
seat tube, the stopper is designed to stop the seatpost from being inserted too
far and impacting the motor.
TECH TIP: The fit between the seatpost and the seat tube must allow the
seatpost to slide into the seat tube smoothly and without twisting, but not so
loosely that there’s excessive side-to-side play/wiggle. Any fit and/or torque
issues should be inspected by your Authorized Specialized Retailer. If the
seatpost does not fit properly or moves in the frame even though it is torqued
to spec, you should have it inspected by your Authorized Specialized Retailer.
TECH TIP: Do not apply grease to the contact surfaces between the seatpost
and the seat tube. Grease reduces friction, which is critical to proper seatpost
grip. Specialized recommends the application of carbon assembly compound
(fiber paste), which can increase friction between carbon surfaces. Please
visit your Specialized Authorized Retailer for additional information.
TECH TIP: The specified ream depths are listed in the table in Fig.6.1. The
tolerance of the ream depth can vary from frame to frame. Install a regular
34.9 seatpost in the seat tube to verify the actual ream depth of the frame.
INFO: The seat tube is designed for a 34.9 mm post but a smaller diameter
seatpost can be used with a shim.
WARNING! Failure to follow the seatpost and frame insertion requirements
(Fig. 6.1) may result in damage to the frame and/or seatpost, which could
cause you to lose control and fall.
If the seatpost is cut short, the min/max mark on the seatpost may no longer
be accurate. Before cutting the seatpost, note the min/max depth required by
the seatpost manufacturer.
WARNING! For general instructions regarding the installation of the seatpost,
refer to the appropriate section in the Owner’s Manual. Riding with an
improperly tightened seatpost can allow the saddle and seatpost to slide
down, which can damage the frame and cause you to lose control and fall.
WARNING! Inspect the seatpost and seat tube to ensure that there are
no burrs or sharp edges. Remove any burrs or sharp edges using fine-grit
sandpaper.