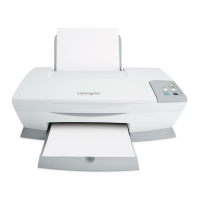
This document is the User's Guide for the Lexmark 1200 Series All-In-One device, dated February 2006. The Lexmark 1200 Series All-In-One is a multifunction device capable of printing, scanning, copying, and faxing.
Important Technical Specifications
The Lexmark 1200 Series All-In-One is available in machine types 4476-005, 4476-006, 4476-007, and 4476-008.
Noise emission levels (1-meter average sound pressure, dBA):
- Printing: 44 dBA
- Scanning: 38 dBA
- Copying: 44 dBA
- Idling: 0 dBA
The device is designed to meet strict global safety standards and is approved for use with specific Lexmark components. Lexmark does not recommend the use of refilled cartridges as they can affect print quality and cause damage, voiding the warranty for failures caused by such use.
Usage Features
The Lexmark 1200 Series All-In-One is operated through a combination of its physical control panel and dedicated software.
Physical Components:
- Paper guide: Slides next to paper to ensure proper feeding.
- Paper support: Lifts to load paper into the All-In-One.
- Control panel: Features buttons for direct operation, including Scan and Copy functions.
- Top cover: Lifts to place items on the scanner glass.
- Paper exit tray: Extends to hold paper as it exits.
- Scanner unit: Lifts to access the print cartridges.
- USB cable: Connects the device to a computer.
- Power cord: Connects the device to an electrical outlet.
Software Components:
The device comes with a suite of software for comprehensive control:
- Lexmark 1200 Series All-In-One Center: The primary interface for scanning, copying, and faxing. It includes:
- Scan section: Allows users to select a program to send scanned images to, choose image types, and define how scans will be used. Offers "See More Scan Settings" for advanced options.
- Copy section: Enables selection of quantity, color, quality, adjustment of scanned area size, and lightening/darkening of copies. Offers "See More Copy Settings" for advanced options.
- Creative Tasks section: Provides various project ideas such as enlarging/reducing images, repeating images on a page, printing multi-page posters, emailing images, faxing via PC modem, saving images/documents, editing scanned text (OCR), and modifying images with a photo editor.
- Preview section: Displays a preview of the image to be scanned or copied, allowing users to select a specific region.
- Print Properties: Controls the printing function, allowing users to change settings based on the project type. Accessible from most programs' Print menus. Key tabs include:
- Quality/Copies: Adjusts quality/speed settings (e.g., Normal, Quick Print, Better, Best), and customizes multiple copy printing (collated or normal). Allows printing color images in black and white.
- Paper Setup: Selects paper type (e.g., plain paper, photo/glossy paper, labels, iron-on transfers, banner paper, greeting card stock, Hagaki cards, envelopes, transparencies), paper size, and orientation (portrait or landscape).
- Print Layout: Defines the layout for printing and duplexing (two-sided printing).
- "I Want To" menu: A task wizard within Print Properties that helps select correct print settings for projects like banners, photographs, or posters.
- Save Settings menu: Allows users to name and save up to five custom Print Properties settings.
- Options menu: Provides access to Quality Options, Layout Options, Printing Status Options, and direct links to the Lexmark Solution Center.
- Lexmark Solution Center: A valuable information resource for troubleshooting, maintenance, and ordering supplies. It includes:
- Printer Status tab: Displays the All-In-One's status (e.g., Busy Printing) and ink levels.
- How To tab: Offers guidance on scanning, copying, faxing, printing, finding/changing settings, using basic features, and creating projects like banners and iron-on transfers.
- Troubleshooting tab: Provides tips for current status issues and general All-In-One problems.
- Maintenance tab: Guides users on installing new print cartridges, viewing shopping options, printing test pages, cleaning for horizontal streaks, aligning for blurry edges, and other ink problems.
- Contact Information tab: Provides details on how to contact Lexmark via phone, email, or the web.
- Advanced tab: Allows changing the appearance of the Printing Status window, turning voice notification on/off, changing network settings, and viewing software version information.
- Lexmark Photo Editor: Software for editing graphics.
Printing:
- Supports various paper types including plain paper (up to 100 sheets), labels (25 sheets), iron-on transfers (25 sheets), photo/glossy paper (25 sheets), transparencies (10 sheets), banner paper (20 sheets), greeting card stock (10 sheets), Hagaki cards (10 sheets), and envelopes (10 sheets).
- For transparencies and photos, individual removal as they exit is recommended to prevent ink smearing due to longer drying times.
- Envelopes with holes, perforations, cutouts, deep embossing, metal clasps, string ties, metal folding bars, or exposed flap adhesive should not be loaded.
- Paper is loaded against the right side of the paper support, print side facing the user. The paper guide is then squeezed and slid to the left edge of the paper.
- Printing tasks are initiated via the "File > Print" menu in applications, leading to the Print Properties dialog box.
Scanning:
- Items are placed facedown on the scanner glass, aligning the upper left corner with an arrow.
- Scanning is performed through the Lexmark All-In-One Center, with options to preview, select scan areas, adjust settings, and send scanned images to software programs or creative tasks.
- Lowering scanning resolution can help with slow scanning or computer freezes.
Copying:
- Supports both color and black-and-white copies using the control panel buttons (Color Copy or Black Copy).
- Items are placed facedown on the scanner glass, aligning the upper left corner with an arrow.
- Copy settings can be adjusted in the Lexmark All-In-One Center, including quantity, color, quality, and options to reduce or enlarge the image (e.g., "Fit to page").
Faxing:
- Faxing is done using the computer modem.
- Items are placed facedown on the scanner glass, aligning the upper left corner with an arrow.
- Faxing is initiated from the Creative Tasks section of the Lexmark All-In-One Main Page.
- Requires the computer to be on and connected to a phone line.
Maintenance Features
- Replacing Print Cartridges:
- The Lexmark 1200 Series uses black cartridges (10N0016, 16, 17) and color cartridges (10N0026, 26, 27).
- The process involves lifting the scanner unit, waiting for the cartridge carrier to move to the loading position, lifting cartridge lids, removing old cartridges (and storing them in an air-tight container or disposing of them), removing stickers/tape from new cartridges (without touching gold contacts), inserting new cartridges securely, snapping lids closed, and lowering the scanner unit.
- The Maintenance tab in the Lexmark Solution Center provides shopping options for new cartridges.
- Troubleshooting:
- A troubleshooting checklist helps identify common issues like power cord connections, device power status, USB cable connection, cartridge installation, paper loading, software installation, and default printer settings.
- The Lexmark Solution Center offers extensive troubleshooting hints and tips.
- Power light issues: Check power cord connections and press the Power button.
- Alignment page not printing: Verify cartridge installation and secure placement.
- Software installation issues: Reconnect USB, unplug/replug power, restart computer, or reinstall software. For incomplete installations, check Device Manager for unknown Lexmark devices and reinstall.
- Slow printing: Close unused programs, adjust Quality/Speed settings to Normal or Quick Print, or try printing smaller files.
- Dark/smudged prints: Remove paper to dry, adjust Quality/Speed settings, or use the "Clean to fix horizontal streaks" function in the Lexmark Solution Center.
- Jagged vertical lines/uneven edges: Adjust Quality/Speed settings to Better or Best, and use the "Align to fix blurry edges" function in the Lexmark Solution Center.
- White lines in graphics/solid black areas: Use the "Clean to fix horizontal streaks" function in the Lexmark Solution Center to clean clogged print cartridge nozzles.
- Paper jams: Follow on-screen instructions, use inkjet-designed paper, load paper correctly, and ensure the paper guide is against the left edge.
- Scanning not successful: Reinstall software if communication issues persist.
- Slow scanning/computer freezes: Lower scanning resolution in the Lexmark All-In-One Center.
- Edge of copy not printing: Ensure original item is properly oriented on glass, and use the "Fit to page" feature in the Lexmark All-In-One Center.
- Control panel copy button not working: Ensure computer is on and software is properly installed.
- Fax function not working: Ensure computer is on and connected to a phone line, and check if memory is full.
- Removing and Reinstalling Software:
- If software malfunctions or communication errors occur, the software can be uninstalled via "Start > Programs > Lexmark 1200 Series > Uninstall Lexmark 1200 Series," followed by a computer restart and reinstallation from the CD.
- Use only the power supply and power cord provided by Lexmark.
- Connect the power supply cord to an easily accessible electrical outlet near the product.
- Avoid setting up or making electrical/cabling connections during a lightning storm.
- Refer all service or repairs, other than those in the operating instructions, to a professional service person.
- The product is designed, tested, and approved to meet safety standards with specific Lexmark components. Lexmark is not responsible for the use of other replacement parts.