EasyManua.ls Logo

Lexmark XC2335 - User Manual

Lexmark XC2335
17 pages
Print Icon
To Next Page IconTo Next Page
Loading...
Quick Reference
Copy
Making copies
1
Load an original document into the ADF tray or on the scanner
glass.
Note: To avoid a cropped image, make sure that the original
document and output have the same paper size.
2
From the home screen, touch Copy, and then specify the
number of copies.
If necessary, adjust the copy settings.
3
Copy the document.
Note: To make a quick copy, from the home screen, touch
.
Copying on both sides of the paper
1
Load an original document into the ADF tray or on the scanner
glass.
2
From the home screen, touch Copy > Settings > Sides.
3
To uc h 1 sided to 2 sided or 2 sided to 2 sided.
4
Copy the document.
Copying multiple pages onto a single
sheet
1
Load an original document into the ADF tray or on the scanner
glass.
2
From the home screen, touch Copy > Settings > Pages per
Side.
3
Enable the setting, and then select the number per side and
page orientation.
4
Copy the document.
E-mail
Configuring the email SMTP settings
Configure the Simple Mail Transfer Protocol (SMTP) settings to
send a scanned document through e-mail. The settings vary with
each e
mail service provider.
Before you begin, make sure that the printer is connected to a
network and that the network is connected to the Internet.
Using the Embedded Web Server
1
Open a web browser, and then type the printer IP address in
the address field.
Notes:
View the printer IP address on the printer home screen.
The IP address appears as four sets of numbers
separated by periods, such as 123.123.123.123.
If you are using a proxy server, then temporarily disable
it to load the web page correctly.
2
Click Settings > E
mail.
3
From the E
mail Setup section,
configure
the settings.
Notes:
For more information on the password, see the list of
e
mail service providers.
For e
mail service providers that are not on the list,
contact your provider and ask for the settings.
4
Click Save.
Using the Settings menu in the printer
1
From the home screen, touch Settings > E
mail > E
mail Setup.
2
Configure the settings.
Notes:
For more information on the password, see the list of
e
mail service providers.
For e
mail service providers that are not on the list,
contact your provider and ask for the settings.
Email service providers
AOL Mail
Comcast Mail
Gmail
iCloud Mail
Mail.com
NetEase Mail (mail.126.com)
NetEase Mail (mail.163.com)
NetEase Mail (mail.yeah.net)
Outlook Live or Microsoft 365
QQ Mail
Sina Mail
Sohu Mail
Yah o o ! M a i l
Zoho Mail
Notes:
If you encounter errors using the settings provided, then
contact your e
mail service provider.
For e
mail service providers that are not on the list, contact
your provider.
AOL Mail
Setting Value
Primary SMTP
Gateway
smtp.aol.com
Primary SMTP
Gateway Port
587
Use SSL/TLS Required
Require Trusted
Certificate
Disabled
Reply Address Yo u r e mail address
SMTP Server
Authentication
Login / Plain
DeviceInitiated Email Use Device SMTP Credentials
Device UserID Yo u r e mail address
Device Password App password
Note: To create an app password,
go to the
AOL Account Security
page, log in to your account, and
then click Generate app password.
1
Question and Answer IconNeed help?

Do you have a question about the Lexmark XC2335 and is the answer not in the manual?

Summary

Copying Documents

Making Copies

Instructions for creating single or multiple copies of documents.

Email Configuration

SMTP Settings

Setting up Simple Mail Transfer Protocol (SMTP) for sending scanned documents via email.

Sending Scanned Documents

Sending an Email

Process for sending scanned documents via email after SMTP configuration.

Scanning to Computer

Instructions for scanning documents directly to a computer.

Fax Setup and Usage

Printer Fax Setup Overview

Overview of fax setup, including analog and fax server methods.

Analog Fax Setup

Configuring the printer for faxing using a traditional analog phone line.

Software and Driver Installation

Printer Software Installation

Guide to installing the necessary software and print drivers for the printer.

Network Connectivity

Wi-Fi Network Connection

Procedure for connecting the printer to a wireless network.

Wi-Fi Direct Configuration

Setting up the printer's Wi-Fi Direct feature for peer-to-peer wireless connections.

Clearing ADF Paper Jams

Clearing Door A Paper Jams

Clearing Fuser Paper Jams

Clearing Duplex Unit Paper Jams

Clearing Tray Paper Jams

Clearing Manual Feeder Paper Jams

Clearing Multipurpose Feeder Paper Jams

Overview

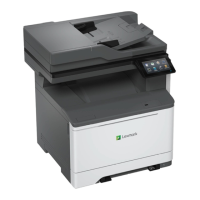
This document provides a comprehensive guide for operating and maintaining a multi-function printer, covering various tasks from basic copying and scanning to advanced email and fax functionalities, as well as troubleshooting common issues like paper jams and software installation.

Function Description

The device is a multi-function printer capable of copying, emailing, scanning, printing, and faxing documents. It supports both analog fax and fax server functionalities. For email, it allows users to send scanned documents directly via various email service providers, including AOL Mail, Comcast Mail, Gmail, iCloud Mail, Mail.com, NetEase Mail (mail.126.com, mail.163.com, mail.yeah.net), Outlook Live or Microsoft 365, QQ Mail, Sina Mail, Sohu Mail, Yahoo! Mail, and Zoho Mail. The device can also scan documents to a computer, supporting both Windows and Macintosh operating systems. Printing capabilities include standard document printing, as well as confidential and held jobs, with support for mobile printing via AirPrint and Wi-Fi Direct.

Usage Features

Copying:

  • Basic Copying: Load an original document into the Automatic Document Feeder (ADF) tray or on the scanner glass, select "Copy" from the home screen, specify the number of copies, adjust settings if needed, and then copy. A quick copy option is also available.
  • Two-Sided Copying: Load the original, go to "Copy > Settings > Sides," select "1 sided to 2 sided" or "2 sided to 2 sided," and then copy.
  • Multiple Pages per Sheet: Load the original, go to "Copy > Settings > Pages per Side," enable the setting, select the number of pages per side and orientation, and then copy.

Emailing:

  • Configuration: SMTP settings can be configured via the Embedded Web Server or the printer's Settings menu. This involves entering the Primary SMTP Gateway, Port, SSL/TLS settings, Reply Address, and SMTP Server Authentication details. Specific instructions and app password generation steps are provided for various email service providers.
  • Sending an Email: Load the document, touch "E-mail" from the home screen, enter recipient information, configure scan settings if necessary, and send.

Scanning:

  • Scanning to a Computer (Windows): Install the print driver, open "Windows Fax and Scan," click "New Scan," select a scanner source, adjust settings, scan, and save.
  • Scanning to a Computer (Macintosh): Ensure the printer is added, open "Image Capture" or "Printers & Scanners," select the printer, click "Scan > Open Scanner," choose save location, original size, enable "Document Feeder" if using ADF, configure settings, and click "Scan."

Faxing:

  • Analog Fax Setup: Configure via the control panel ("Settings > Fax > Fax Setup > General Fax Settings") or the Embedded Web Server.
  • Fax Server Setup: Open a web browser, type the printer IP, click "Settings > Fax," select "Fax Server" from the Fax Mode menu, click "Fax Server Setup," enter the To Format field (e.g., [#]@myfax.com), configure Reply Address, Subject, or Message fields if needed, and save. SMTP settings must be configured for this feature.
  • Sending a Fax (Control Panel): Load the document, touch "Fax" from the home screen, enter information, adjust settings, and send.
  • Sending a Fax (Computer - Windows): Open the document, open the Print dialog, select the printer, click "Properties, Preferences, Options, or Setup," click "Fax > Enable fax > Always display settings prior to faxing," enter recipient number, configure settings, and send.
  • Sending a Fax (Computer - Macintosh): Open the document, choose "File > Print," select the printer with "Fax" in its name, enter recipient number, configure settings, and send.

Printing:

  • From a Computer: Open the document, open the Print dialog, adjust settings, and print.
  • From a Mobile Device (AirPrint): Select a document, tap "Print," select a printer, adjust settings, and print.
  • From a Mobile Device (Wi-Fi Direct): Select a document, tap "Print," select a printer, adjust settings, and print.
  • Confidential and Held Jobs (Windows): Open the document, click "File > Print," select the printer, click "Print and Hold," select "Use Print and Hold," assign a user name, select job type (Confidential, Repeat, Reserve, or Verify), enter a PIN for confidential jobs, click "OK" or "Print," and then release the job from the printer home screen.
  • Confidential and Held Jobs (Macintosh - AirPrint): Open the document, choose "File > Print," select the printer, choose "PIN Printing," enable "Print with PIN," enter a four-digit PIN, and click "Print."
  • Confidential and Held Jobs (Print Driver): Open the document, choose "File > Print," select the printer, choose "Print and Hold," choose "Confidential Print," enter a four-digit PIN, click "Print," and then release the job from the printer home screen.

Maintenance Features

Attaching Cables:

  • LINE port: Connects to an active telephone line (RJ-11) for faxing.
  • Power cord socket: Connects to a grounded electrical outlet.
  • USB printer port: Connects to a computer.
  • USB port: Attaches a keyboard or compatible option.
  • Ethernet port: Connects to a network.
  • Safety Warnings: Emphasizes caution regarding electrical shock, potential injury from fire, and potential damage from touching cables or the printer during active operation.

Replacing a Toner Cartridge:

  • Open door B, remove the used cartridge, unpack the new cartridge, insert it until it clicks, and close the door.

Loading Trays:

  • General: Remove the tray, adjust guides to match paper size, flex, fan, and align paper edges, load the paper stack with the printable side faceup, and insert the tray.
  • Manual Feeder: Adjust edge guides, load a sheet with the printable side facedown.
  • Multipurpose Feeder: Open the feeder, adjust guides, flex, fan, and align paper edges, load paper with the printable side facedown (for one-sided) or faceup (for two-sided), and feed until it's pulled in.
  • Paper Loading Guidelines: Ensure paper lies flat, do not overload, do not slide paper, use recommended paper, avoid wrinkled or bent paper, and ensure guides are positioned correctly.

Installing Software:

  • Printer Software: Obtain the installer package (CD or website), run it, and follow instructions.
  • Fax Driver: Obtain the installer package from the website, run it, and follow instructions.

Updating Firmware:

  • Open a web browser, type the printer IP, click "Settings > Device > Update Firmware," and then either "Check for updates now" or "Upload the flash file."

Adding Printers to a Computer:

  • Windows: Install the print driver, open the printers folder, click "Add a printer or scanner," and then select the printer from the list or add it using a TCP/IP address/hostname.
  • Macintosh: Open "Printers & Scanners."

Connecting to Networks:

  • Wi-Fi Network: From the home screen, touch "Settings > Network/Ports > Wireless > Setup On Printer Panel > Choose Network," select a network, and type the password.
  • Wi-Fi Direct (Configuration): From the home screen, touch "Settings > Network/Ports > Wi-Fi Direct," and configure settings like "Enable Wi-Fi Direct," "Wi-Fi Direct Name," "Wi-Fi Direct Password," "Show Password on Setup Page," and "Auto-Accept Push Button Requests."
  • Wi-Fi Direct (Computer - Windows): Open printers folder, click "Add a printer or scanner," click "Show Wi-Fi Direct printers," select the printer, note the PIN from the printer display, and enter it on the computer.
  • Wi-Fi Direct (Computer - Macintosh): Click the wireless icon, select the printer Wi-Fi Direct name, and type the password.
  • Wi-Fi Direct (Mobile Device - Android): Go to settings, enable Wi-Fi, tap "Wi-Fi Direct," select the printer, and confirm the connection.
  • Wi-Fi (Mobile Device): Go to settings, tap "Wi-Fi," select the printer Wi-Fi Direct name, and enter the password.

Clearing Jams:

  • Identifying Jam Locations: The manual provides a diagram indicating common jam locations: Automatic Document Feeder, Door A, and Trays.
  • Paper Jam in ADF Top Cover: Remove original documents, open door C, remove jammed paper, and close door C.
  • Paper Jam in ADF Output Bin: Remove original documents, lift the ADF tray, remove jammed paper, and place the ADF tray back.
  • Paper Jam in Door A (Below Fuser): Open door A, remove jammed paper.
  • Paper Jam in the Fuser: Open door A, open the fuser access door, remove jammed paper, and close door A.
  • Paper Jam in the Duplex Unit: Open door A, remove jammed paper, and close door A.
  • Paper Jam in Trays: Remove the tray, remove jammed paper, and insert the tray.
  • Paper Jam in Manual Feeder: Remove jammed paper.
  • Paper Jam in Multipurpose Feeder: Remove paper from the feeder, close it, remove the tray, remove jammed paper, insert the tray, open the multipurpose feeder, and reload paper.
  • Warnings: Cautions are provided for hot surfaces (fuser area) and potential damage from electrostatic discharge. Notes on Jam Assist and Jam Recovery features are also included.

Lexmark XC2335 Specifications

General IconGeneral
Print TechnologyLaser
FunctionsPrint, Copy, Scan, Fax
Print Speed (Black)35 ppm
Print Speed (Color)35 ppm
Print Resolution1200 x 1200 dpi
Copy Speed (Black)35 cpm
Copy Speed (Color)35 cpm
Copy Resolution600 x 600 dpi
Scan Resolution600 x 600 dpi
Fax Resolution300 x 300 dpi
Fax Speed33.6 kbps
Standard Paper Capacity250 sheets
Duplex PrintingYes
ConnectivityUSB, Ethernet, Wi-Fi
Operating System CompatibilityWindows, Mac, Linux
Processor1 GHz
Copier Reduce/Enlarge25% - 400%
Network ConnectivityEthernet, Wi-Fi
Mobile PrintingApple AirPrint, Google Cloud Print

Related product manuals