This document serves as the owner's manual for the LG IPS LED Monitor, models 22MP55D, 22MP55A, 23MP55D, 23MP55A, and 24MP55D. It provides comprehensive instructions for assembling, operating, customizing, and troubleshooting the monitor, ensuring users can maximize its features and maintain its longevity.
Function Description
The LG IPS LED Monitor is designed to provide a high-quality visual experience for various applications, including general computing, text-based tasks, photo viewing, video playback, and gaming. As an IPS (In-Plane Switching) LED monitor, it offers superior color accuracy and wider viewing angles compared to traditional TN (Twisted Nematic) panels, making it suitable for tasks requiring consistent image quality. The LED backlighting contributes to energy efficiency and a slim design.
The monitor supports both analog (D-SUB) and digital (DVI-D) input signals, allowing connectivity with a wide range of personal computers. It is a Plug & Play device, meaning that when connected to a PC and powered on, the computer automatically recognizes the monitor without requiring complex configuration. This simplifies the initial setup process for users.
A key feature of this monitor is its "Self Image Setting" function, which automatically adjusts display settings to optimal levels when the monitor is first connected to a PC, particularly in Analog Mode. This ensures a good out-of-the-box experience. Additionally, an "AUTO" function is available to improve resolution and address issues like blurry screens, blurred letters, screen flicker, or tilted screens, especially after changing screen resolution or using the device.
The monitor also incorporates several advanced display modes and settings to enhance user comfort and productivity. These include "Reader Mode" for a paper-like viewing experience, "SUPER ENERGY SAVING" for reduced power consumption, "Picture Mode" with presets for different content types (Custom, Text, Photo, Cinema, Game), and "SUPER RESOLUTION+" for optimizing image quality. Furthermore, "DUAL DISPLAY" and "DUAL WEB" functions are available to improve multitasking and web browsing efficiency, although these require the installation of the DUAL SMART SOLUTION program.
Usage Features
The monitor's user interface is designed for intuitive navigation through its On-Screen Display (OSD) menu, accessible via buttons located on the bottom switch panel.
Assembly and Setup:
- Unpacking: The manual details the items included in the product box, such as the CD (Owner's Manual/Card), D-SUB Cable (optional), DVI-D Cable (optional for certain models), Power Cord, AC-DC Adapter, Stand Body, and Stand Base. Users are advised to check for missing accessories and contact their dealer if necessary.
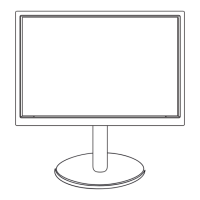
- Attaching/Detaching the Stand Base: Clear instructions are provided for securely attaching the stand body and base to the monitor, as well as detaching them. Users are cautioned to place the monitor screen-side down on a cushioned surface during these procedures to prevent damage.
- Mounting on a Table: The monitor should be lifted and tilted into an upright position on a table, maintaining a minimum 10 cm space from the wall for proper ventilation. The AC-DC Adapter and Power Cord are then connected to a wall outlet, and the monitor is powered on using the bottom switch panel button.
- Mounting on a Wall: For wall mounting, users are instructed to attach a VESA-compatible wall mounting interface (optional parts) to the back of the set. Specific VESA standards, screw dimensions, and clearances (10 cm on each side and from the wall) are provided to ensure proper ventilation and secure installation. Warnings are given against overtightening screws, using unauthorized mounts, or installing on slanted walls, as these can cause damage or injury.
- Kensington Security System: The monitor includes a connector for a Kensington security system, allowing users to secure the monitor to a table and prevent theft. This system is optional, and users can refer to the Kensington manual or website for installation details.
- Adjusting the Monitor Angle: The monitor can be tilted from +20 to -3 degrees to achieve an optimal viewing angle. Users are cautioned not to hold the bottom frame or press the screen when adjusting the angle to avoid injury or damage.
Connecting to a PC:
- D-SUB Connection: Instructions are provided for connecting the monitor to a PC using a D-sub 15-pin signal cable for analog video transmission.
- DVI-D Connection: For digital video signals, users can connect the monitor to a PC using a DVI cable.
- Macintosh Connectivity: For Apple Macintosh users, a separate plug adapter is required to convert the 15-pin high-density D-SUB VGA connector to a 15-pin 2-row connector.
- Multiple PC Connections: The monitor supports connecting two PCs simultaneously using D-SUB and DVI-D cables.
- Accessing the Menu: The OSD menu is accessed by pressing the MENU button on the bottom panel.
- Navigation: Options are set using the left/right/up/down buttons, and the EXIT button is used to leave the OSD menu. The up arrow button returns to the upper menu or allows setting other menu items.
- OSD Locked/Unlocked: This feature allows users to lock current control settings to prevent inadvertent changes. Pressing and holding the MENU button for several seconds toggles between "OSD Lock" and "OSD Unlock."
- Main Menu Options:
- Brightness/Contrast: Adjusts the screen's brightness and contrast.
- Wide/Original: Switches between full-screen mode (Wide) or original input image signal ratio (Original). This function is active only if the input resolution is lower than the monitor's native 16:9 ratio.
- Reset: Restores all factory default settings.
- Next Menu Options:
- Picture:
- Sharpness: Adjusts the clarity of the screen.
- Color:
- Gamma: Sets gamma values (Gamma 0, 1, 2) to control the display of whitish or blackish images.
- Color Temp: Selects screen color temperature (Warm, Medium, Cool) or allows custom adjustment of Red, Green, and Blue levels.
- Six Color: Customizes hue and saturation for six primary and secondary colors (Red, Green, Blue, Cyan, Magenta, Yellow).
- Color Reset: Resets color settings to factory defaults for the current input device.
- Display:
- Horizontal/Vertical: Adjusts image position.
- Clock: Minimizes vertical bars or stripes and changes horizontal screen size.
- Phase: Adjusts display focus, removes horizontal noise, and sharpens characters.
- Others:
- Language: Selects the OSD menu language.
- Power Indicator: Turns the power indicator LED on or off.
- Reader Setting:
- Reader 1: Adjusts the screen for newspaper-like viewing (brightness can be controlled in OSD).
- Reader 2: Adjusts the screen for cartoon-like viewing (brightness can be controlled in OSD).
- Reader Off: Disables Reader Mode.
- Note: Activating Reader Mode automatically sets Picture Mode to Custom and Super Energy Saving to Off.
- FUNC. Setting:
- SUPER ENERGY SAVING:
- High/Low: Enables energy-saving modes with different efficiency levels by adjusting screen brightness.
- Off: Disables Super Energy Saving.
- Note: Activating Super Energy Saving automatically sets Picture Mode to Custom and Reader Mode to Off.
- Picture Mode:
- Custom: Allows user adjustment of color mode elements.
- Text: Optimized for text-based tasks.
- Photo: Optimized for viewing pictures.
- Cinema: Optimized for video playback.
- Game: Optimized for gaming.
- Note: Selecting a non-Custom Picture Mode automatically sets Reader Mode to Off and Super Energy Saving to Off.
- SUPER RESOLUTION+:
- Off: Disables Super Resolution+.
- Low/Middle/High: Optimizes picture quality for smooth, natural, or crystal-clear images, effective for various content types like slow-moving pictures, still images, UCC, SD video, or high-quality video/games.
- DUAL DISPLAY: (Requires DUAL SMART SOLUTION program)
- Clone: Uses the secondary monitor as a clone of the primary.
- Extended: Uses the secondary monitor as an extension of the primary.
- Off: Disables Dual Display.
- DUAL WEB: (Requires DUAL SMART SOLUTION program)
- On: Divides the screen in half for efficient web browsing, helping arrange and move windows, and controlling divided window ratios.
- Off: Disables Dual Web.
Proper Posture:
The manual includes an illustration and guidelines for maintaining proper posture while using the monitor, emphasizing adjusting the monitor and user's posture for optimal viewing angle, placing hands gently on the keyboard with bent elbows, and adjusting monitor location to avoid reflections.
Maintenance Features
The manual provides crucial information for maintaining the device's safety and product life span, as well as troubleshooting common issues.
Safety and Product Life Span:
- Approved Accessories: Users are advised to use only approved accessories to ensure safety and product longevity. Damages or injuries from unapproved accessories are not covered by the warranty.
- Power Cord Disconnection: Always disconnect the power cord before moving or installing the monitor to prevent electric shock.
- Screen Handling: Avoid pressing the screen with fingers for extended periods, as this can cause temporary distortion.
- Image Burn Prevention: To prevent image burn, avoid displaying fixed images on the screen for long periods; use a screensaver if possible.
- Cable Connection: Ensure signal input cables are properly connected and screws are tightened clockwise.
- Temperature and Flicker: If the monitor flickers when turned on in a cold state, it is normal. Some red, green, or blue spots may appear on the screen, which is also normal.
Troubleshooting:
The manual offers solutions for common problems without requiring service calls.
- No Image Appears:
- Check power cord connection to the outlet.
- Press the Power button.
- Adjust brightness and contrast.
- If in power saving mode, move the mouse or press a keyboard key.
- Turn on the PC.
- "OUT OF RANGE" Message: This indicates the PC's signal is outside the monitor's horizontal or vertical frequency range. Users should refer to the 'Specifications' section and reconfigure their display settings.
- "NO SIGNAL" Message: If the monitor displays "No-Signal" for 5 minutes, it enters DPM (Display Power Management) mode.
- "OSD LOCKED" Message: If the MENU button is pushed and "OSD LOCKED" appears, it means the control settings are secured. To unlock, press and hold the MENU button for several seconds until "OSD UNLOCKED" appears.
- Display Image is Incorrect (Position, Bars/Stripes, Noise, Color):
- Display Position: Press the AUTO button to automatically adjust the image to the ideal setting.
- Vertical Bars or Stripes: Press the AUTO button to minimize these.
- Horizontal Noise/Unclear Characters: Press the AUTO button to adjust focus, remove noise, and sharpen characters.
- Mono or Abnormal Color: Check signal cable connection and tighten if necessary. Ensure the video card is properly inserted. Set color depth to higher than 24 bits (true color) in Control Panel > Display > Settings.
- Screen Blinks: Check if the screen is set to interlace mode and change it to the recommended resolution.
- "Unrecognized monitor, Plug&Play (VESA DDC) monitor found" Message:
- Install the display driver from the supplied CD or LG's website (www.lg.com).
- Verify if the video card supports Plug&Play functionality.
The manual emphasizes that product specifications and contents may change without prior notice due to function upgrades. It also clarifies that power consumption levels can vary based on operating conditions and monitor settings, and that ENERGY STAR® measurements are based on specific test standards.