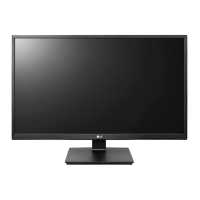
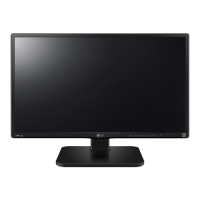
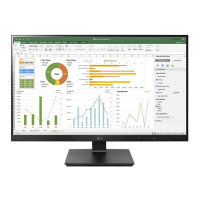
This document is an owner's manual for an LG IPS LED Monitor, specifically models 24BK750Y and 27BK750Y. It provides comprehensive instructions for assembling, preparing, using, customizing settings, troubleshooting, and maintaining the monitor.
The monitor functions as a display device, utilizing IPS (In-Plane Switching) technology for wide viewing angles and consistent color reproduction, and LED backlighting for energy efficiency and vibrant visuals. It is designed to connect to various sources, including PCs and AV devices, and supports multiple input types such as DVI-D, HDMI, and DisplayPort. The monitor also features USB ports for connecting peripherals and a headphone jack for audio output.
Usage Features:
The monitor offers a range of ergonomic and display customization features to enhance user experience.
Assembly and Preparation:
The manual details the steps for attaching the stand base, which includes securing the stand body to the base. It emphasizes caution during assembly to prevent injury and damage to the screen. For mounting on a table, it advises leaving a 100 mm (3.94 inches) space from the wall for proper ventilation and connecting the power cord securely. The manual also includes instructions for using a cable holder to manage cables, ensuring a tidy setup.
Ergonomic Adjustments:
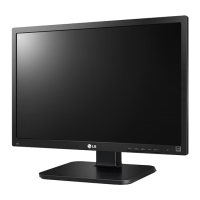
- Height Adjustment: The monitor's height can be adjusted up to 5.9 inches (150 mm) for comfortable viewing. Users are cautioned to use both hands and avoid placing fingers between the screen and the base during adjustment.
- Angle Adjustment (Tilt): The screen angle can be tilted forwards or backwards (from -5° to 25°) to optimize the viewing experience. Again, users are advised to avoid touching or pressing the screen area and to not put fingers inside the stand during adjustment.
- Pivot Feature: This allows the monitor to rotate 90° clockwise and -90° counter-clockwise, enabling vertical display orientation. To use this feature, the monitor must first be raised to its maximum height. The manual provides Windows screen pivot shortcut keys for easy rotation. A warning is included to ensure the stand base does not make contact with the monitor during rotation to prevent scratching.
- Swivel Stand: The monitor can swivel 45° clockwise and 45° counter-clockwise, offering flexibility in screen positioning without moving the entire base. Additionally, the monitor head can be slightly rotated up or down (up to 3°) to adjust its horizontal level.
Connectivity:
The monitor supports various connections:
- PC Connection:
- DVI-D: Transmits digital video signals.
- HDMI: Transmits digital video and audio signals. The manual recommends using certified HDMI cables (High-Speed HDMI®/™ Cable or High-Speed HDMI®/™ Cable with Ethernet) to avoid compatibility issues or display errors. It also notes that connecting HDMI to a PC might cause compatibility problems and suggests connecting HDMI for PC media playback.
- DisplayPort: Transmits digital video and audio signals. The manual highlights the DisplayPort Multi-Stream Transport (MST) function, allowing connection of up to 4 monitors. To enable MST, the PC graphics card must be DP1.2 certified, and the DisplayPort 1.2 setting in the monitor's OSD menu must be enabled. The default setting is DP1.1a (Disable DisplayPort 1.2).
- AV Device Connection: HDMI is used to connect AV devices, transmitting digital video and audio signals.
- Peripheral Connection:
- USB Type A ports (SS1, SS2): For connecting peripheral devices like keyboards, mice, or USB drives. The SS1 port supports "Quick Charge" for mobile phones, though charging speed may vary. Users are advised to install the latest Windows OS service pack and to use USB hubs or hard disk drives with external power if needed.
- USB Type B port: Connects the monitor to the PC to enable the USB downstream ports.
- Headphone Jack: For connecting headphones or external speakers. Straight headphones are recommended to avoid issues with connecting other devices.
The monitor features an On-Screen Display (OSD) menu, accessible via buttons on the monitor, to customize various settings.
- Activating the Main Menu: Press the Menu button, navigate using directional keys (<, >, v, ^), and press Menu again to exit.
- Quick Settings:
- Brightness/Contrast: Adjusts the color contrast and brightness of the screen.
- Ratio: Sets the screen aspect ratio (Wide or Original).
- SMART ENERGY SAVING: Enables energy-saving functions (High, Low, Off) by adjusting luminance.
- Picture Mode: Offers predefined modes (Custom, Reader 1, Reader 2, Photo, Cinema, Game, Color Weakness) optimized for different content types.
- Picture Adjust:
- SUPER RESOLUTION+: Enhances picture quality (High, Middle, Low, Off) for various video types.
- Sharpness: Adjusts screen sharpness.
- Black Level: Sets the offset level for HDMI input, controlling the darkest color the monitor can display.
- Response Time: Adjusts the screen's response time (High, Middle, Low, Off) for fast-moving pictures.
- DFC (Digital Fine Contrast): Automatically adjusts brightness.
- Black Stabilizer: Controls black contrast for better visibility in dark scenes, useful for gaming.
- Color Adjust:
- Gamma: Adjusts the gamma value, affecting image darkness or lightness.
- Color Temp: Selects color temperature (Warm, Medium, Cool, Custom).
- Red/Green/Blue: Allows customization of individual color channels.
- Six Color: Fine-tunes hue and saturation for six primary colors.
- Reset: Returns color settings to default.
- Sound: Adjusts headphone/speaker volume and selects audio input source.
- General:
- Language: Selects OSD menu language.
- Power LED: Turns the power indicator on/off.
- Automatic Standby: Sets the monitor to automatically switch to standby mode after a period of inactivity (default 4 hours, can be disabled).
- DisplayPort 1.2: Enables/disables DisplayPort 1.2 for MST functionality.
- Quick Charge: Enables/disables the quick charge function for USB port 1.
- OSD Lock: Prevents incorrect key input by disabling OSD controls (except Brightness, Contrast, Volume, Input, and OSD Lock itself).
- Reset: Returns all settings to their default values.
Maintenance Features:
The manual provides important information for maintaining the monitor and troubleshooting common issues.
Troubleshooting:
The troubleshooting section addresses various problems:
- No image: Checks power cord connection and power indicator status.
- "Out of Range" message: Indicates the PC's video signal is outside the monitor's supported frequency range, requiring adjustment of display settings.
- "NO SIGNAL" message: Suggests a disconnected signal cable or the monitor entering DPM (Display Power Management) mode.
- OSD controls not working: Indicates OSD Lock might be enabled.
- Incorrect display image (mono, abnormal color, blinking): Advises checking signal cable connection, video card insertion, color settings (24 bits true color), and interlaced mode settings.
- "Unrecognized monitor, Plug&Play (VESA DDC) monitor found" message: Recommends installing the display driver from the LG website and verifying Plug&Play support from the video card.
- Screen flickering: Suggests changing the resolution if HDMI 1080i 60/50 Hz is selected, to the recommended 1080P resolution.
General Cautions:
- Always use genuine LG components and supplied cables to ensure safety and performance.
- Avoid touching the monitor screen when moving or lifting to prevent damage.
- Do not apply foreign substances or excessive force when assembling or tightening screws.
- Unplug the power cord before moving or installing the monitor to prevent electric shock.
- When installing to a wall, ensure proper ventilation space (at least 100 mm from the wall and sides). Use a genuine LG wall mounting bracket and VESA-standard screws (under 8mm length from the back cover surface).
- The monitor is set to automatically turn off after 4 hours of inactivity if no display adjustments are made, a feature related to ErP Directive compliance in Europe. This can be disabled in the OSD menu.