User Manual | 2013 version 1.2 | LGZ Broadcasting Tech
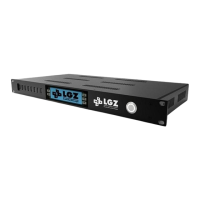
Set Standard (picture 3)
The “>>>” symbol shows what format
is currently selected. Press OK to set
the formats you want to use.
There are 3 available input formats: SD576i, HD720p50 and HD1080i50.
Use the arrows to highlight the INPUT FORMAT you want to use. Press OK to activate it. The
“>>>” arrows shows the one currently active. You can on the right hand side of the screen see a
video preview of the input and audio bars of channels 1 and 2.
Then use the up and down arrows to select if you wish to save your data in SD or HD. The device
can downconvert live from HD to SD so you can save space. You can not upconvert from SD to
HD.
In SD you can approximately record 43 min per GB and in HD approximately 14 min per GB.
The data streams are recording at 3mbps respectively 8 mbps.
More standards will become available with updates (until all supported by Blackmagic are
available)
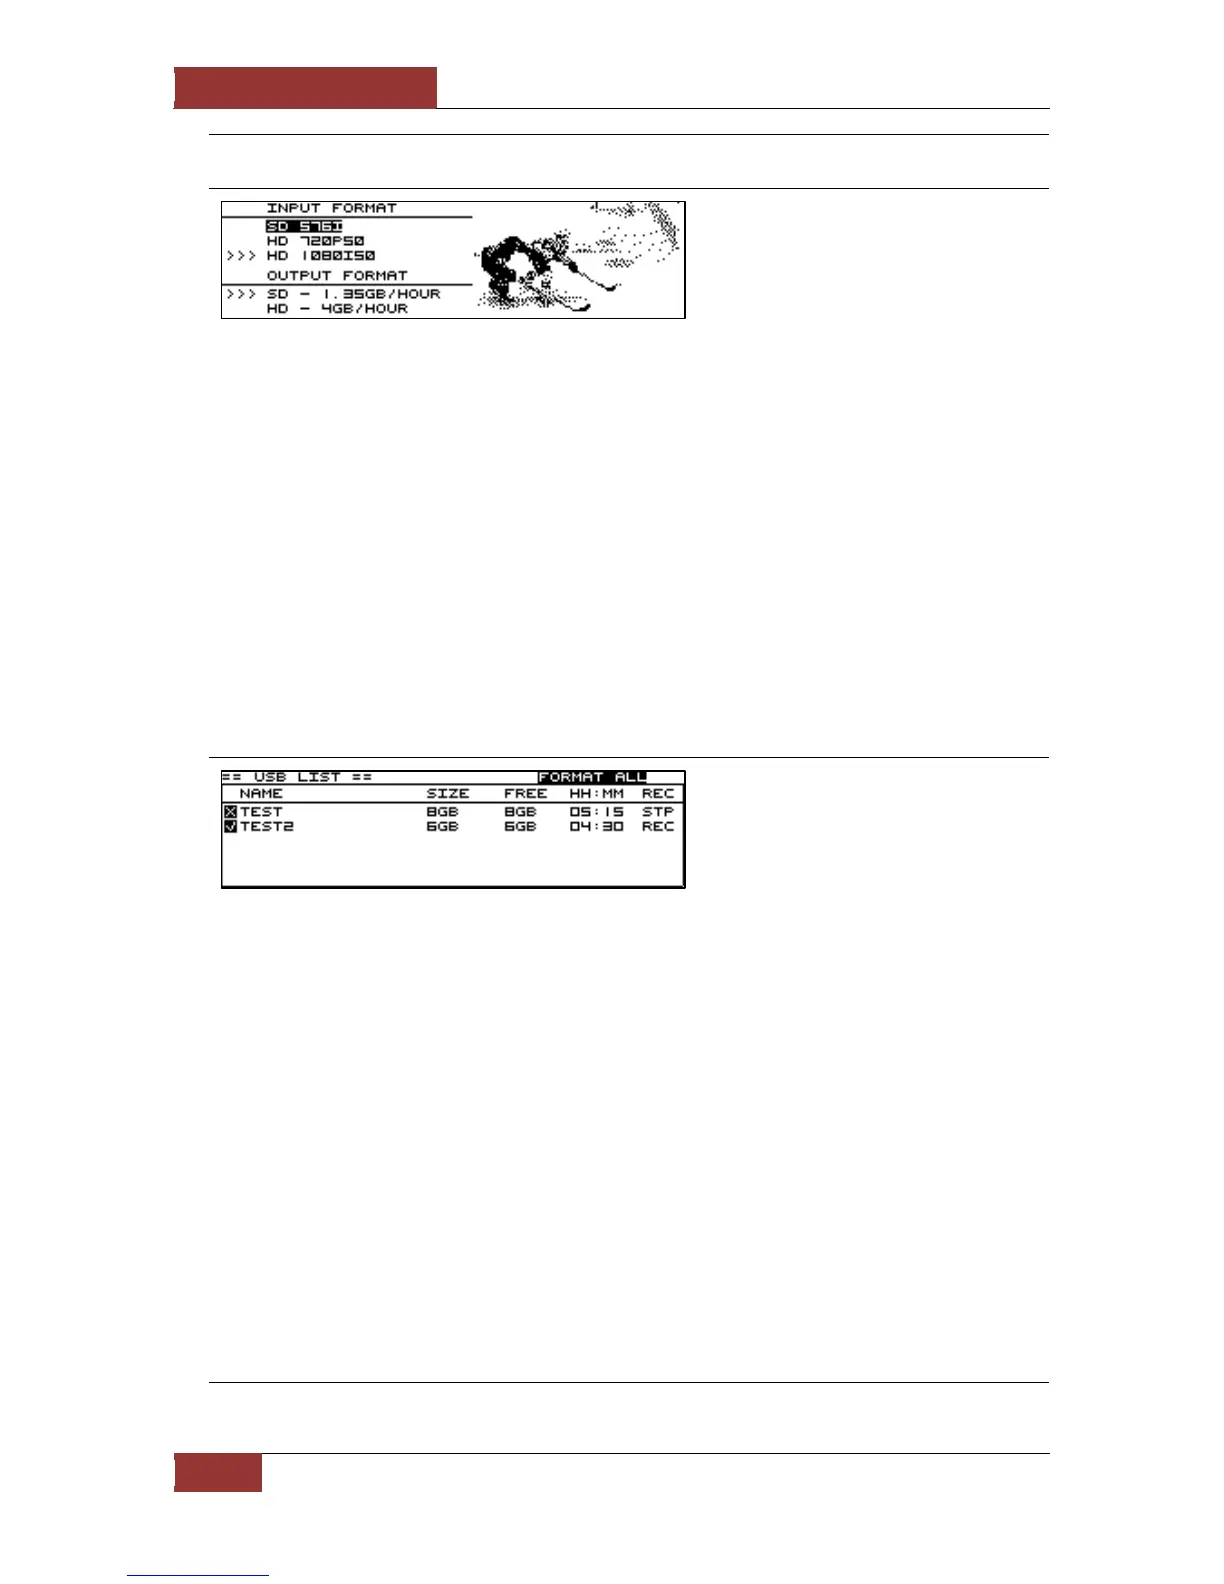
USB List (picture 4)
This list shows information on
currently connected USB drives. Allow
up to 10 seconds for it to update when
plugging/unplugging drives.
You can plug in up to 8 USB drives/sticks into the devices. Just scroll down with the arrows to see
the bottom 3 if you have 8 plugged in.
In this list you can see to the left hand side in front of the name of each device either a cross or a
check sign. If there is a cross the device isn’t formatted in the right standard. To work properly
the USB drives must be formatted in NTFS. If a device shows a check sign, it has the correct
format and you can start recording on it safely.
You can then from left to right see the devices name, its original size in GB. The available size in
GB rounded down to the closest integer, the available record time left on it in Hours and Minutes
(with the selected output) and if that USB device is currently idle (STP) or currently recording
(REC).
By pressing OK when the FORMAT ALL button is highlighted you will be taken to a control
window (picture 5).
Press OK to enter each specific USB device and see its settings (see picture 6).