4
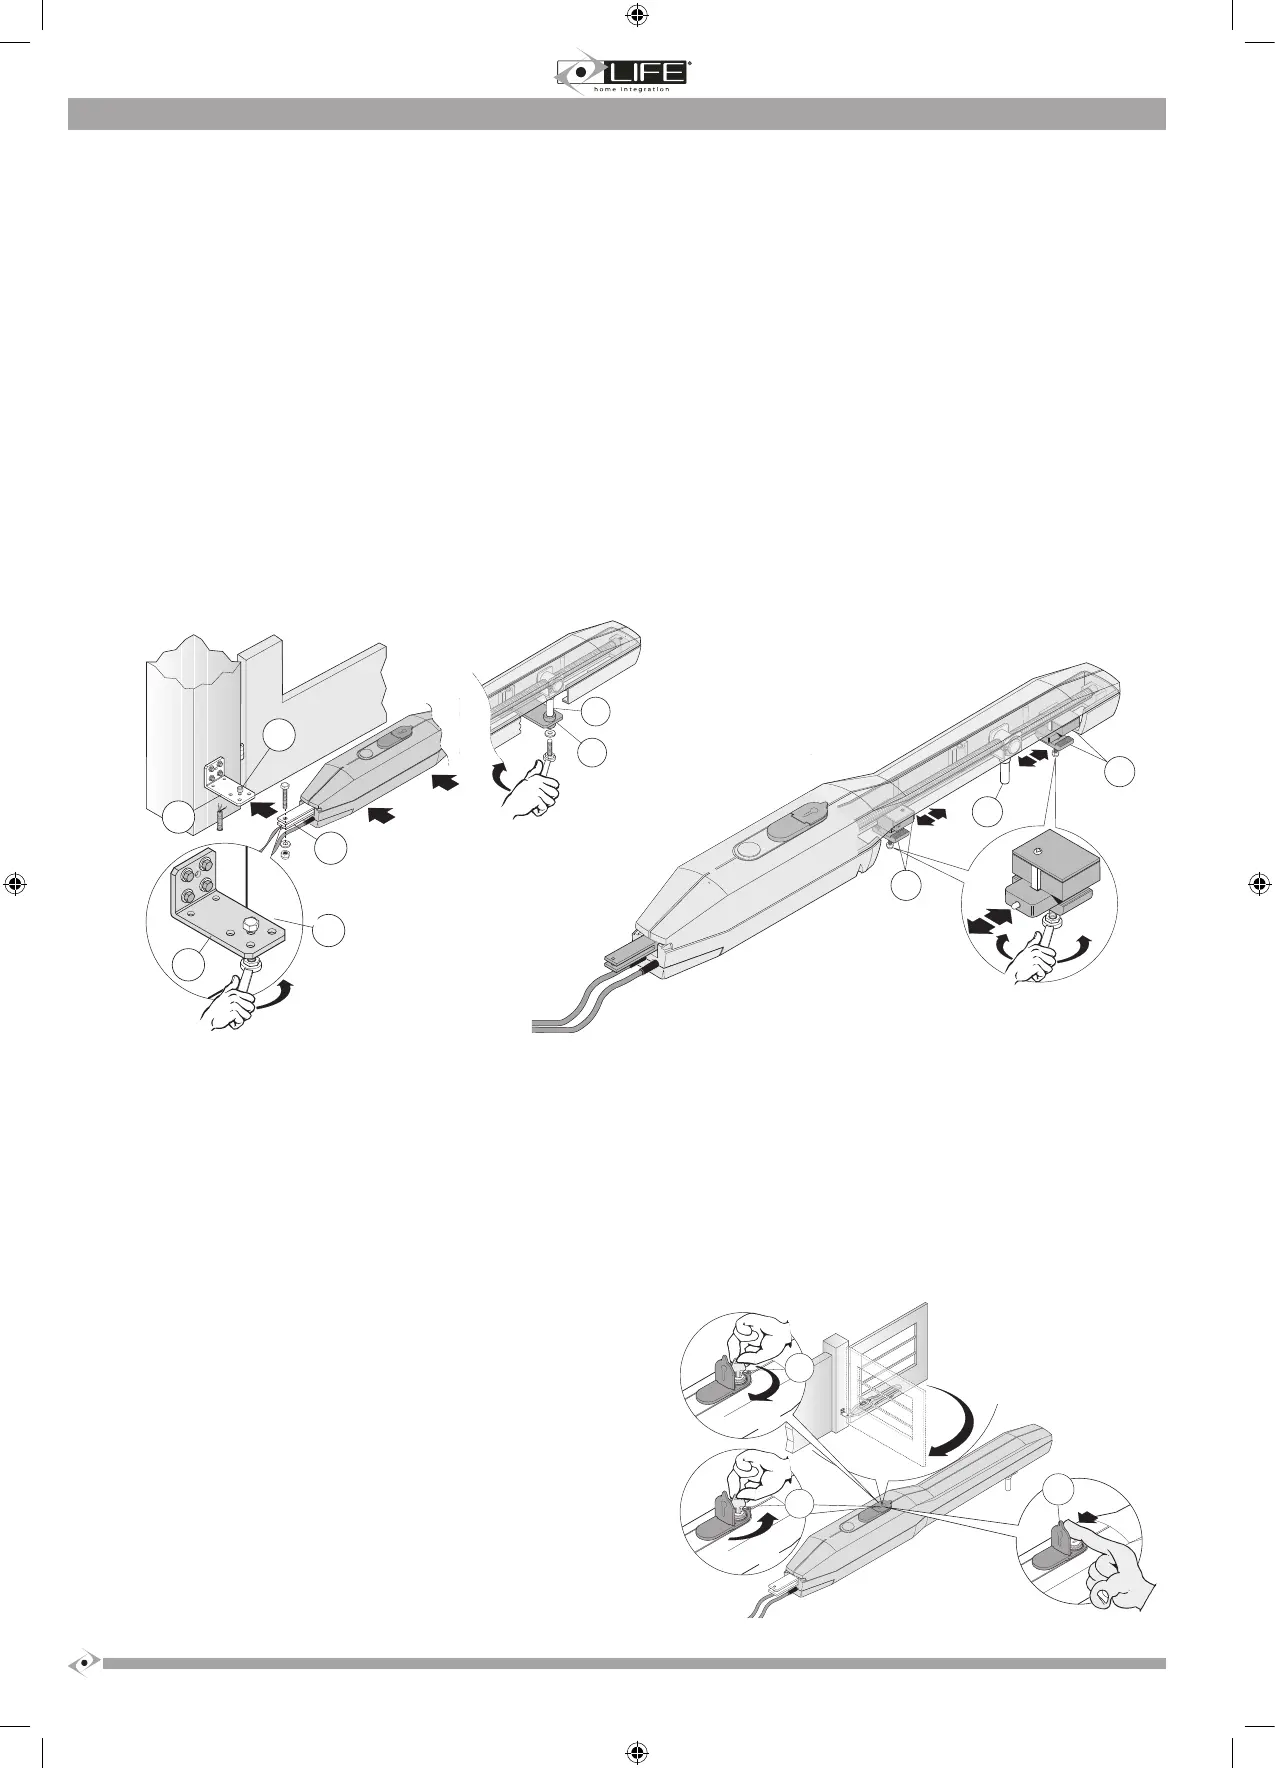
2.4 Positioning the operator and stop plate adjustment
1. Release the operator as indicated in the RELEASING THE OPERATOR chapter.
2. Lift the operator and insert the nut screw bushing support pin (3) into the hole on the front bracket (2).
3. Insert the bushing
bushing. Fix the whole set with a screw, washer and self-locking nut and tighten.
4. Fix the operator to the front bracket (2) using a screw and washer, and tighten.
5. Manually open and
to the gate’s plane of movement.
6. Check that the nut s
5 mm between the nut screw bushing support (3) and the closure (6) and opening (7) stop plates.
7. If necessary, use a different hole on the rear bracket and repeat the operations indicated in points 3 and 4. .
8. Dene with precision the opening and closure positions of the stop plates on the operator’s internal slider, as follows:
• take the gate to a closed position, abutting against the stop plate.
• loosen the suppor
lock again by tightening.
• Take the gate leaf to the desired opening position;
• loosen the suppor
lock again by tightening.
9. Denitively x the front bracket (2) of the operator, to the leaf of the gate, choosing the clamping means to suit the material of the leaf (with screws
or by welding).
10. Release the operator as indicated in the RELEASING THE OPERATOR chapter.
2.5 Releasing the operator
ATTENTION:
• The tter must permanently x the label describing the manual release operation close to the manual release key.
•
mechanical unbalance conditions.
• Before performing the manoeuvre, switch off the electricity supply to the automation.
• To avoid breaking the key, do not apply excessive force.
This command makes it possible to release the operator transmission and to perform leaf movement manually. It can be used in the case of a blackout or
system malfunction.
The release is activated using a wrench, which must be kept in a safe place.
a) Lift the lock protection cover (1).
b) Insert the key (2) into the lock and turn clockwise through 360°.
c) The leaf is now free and can be moved manually.
d) To relock the leaf, insert the key (2) and turn anticlockwise through 360°.