EasyManua.ls Logo

Lifetime 1221 User Manual

Lifetime 1221
36 pages
To Next Page IconTo Next Page
Page #1 background imageLoading...
Page #1 background image
Icon Legend................................4
Warnings and Notices..................5
Pole Assembly............................6
Pole to Base Assembly...............11
Backboard to Rim Assembly.......15
Parts Identifi er..........................i-iv
Final Assembly..........................20
Maintenance Instructions..........26
Warning Sticker........................27
Registration........................28
Warranty................................29
TOOLS REQUIRED TABLE OF CONTENTS
Pour le français, voir la page 2. Para el español, ver la página 3.
ASSEMBLY INSTRUCTIONS
(2)
(1)
(1)
(1) (1)
(2, included)
280 lb (127 kg)
1/2” (≈13 mm)
3/16” (≈5 mm)
(1)
(2)
3/8”
(≈10 mm)
CONTACT LIFETIME CUSTOMER SERVICE:
Call: 1-800-225-3865
7:00 am–5:00 pm (Monday–Friday) MST
and 9:00 am–1:00 pm Saturday MST
QUESTIONS?
Model Number: 1221
Product ID:
For Customer Service in Mainland
Europe and the United Kingdom,
E-mail: cs@lifetimeproducts.eu
Live Chat:
www.lifetime.com/customerservice
Requires 1–2 hours to complete assembly steps
2+ people recommended for setup
PROCOURT
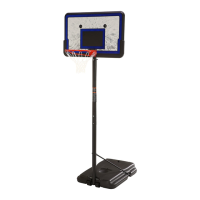
BASKETBALL SYSTEM
MODEL 1221
BEFORE ASSEMBLY:
Scan the code, or visit go.lifetime.com/1221playlist
Save this instruction in the
event that the manufacturer
has to be contacted for
replacement parts.
ADDITIONAL ASSEMBLY HELP
ASSEMBLE IT WITH THE FREE BILT INTELLIGENT
INSTRUCTIONS APP
WATCH THE INSTRUCTIONAL VIDEOS ON YOUTUBE
IN THE APP, SCAN OR SEARCH #1207343
COPY
Question and Answer IconNeed help?

Do you have a question about the Lifetime 1221 and is the answer not in the manual?

Lifetime 1221 Specifications

General IconGeneral
BrandLifetime
Model1221
CategorySports & Outdoors
LanguageEnglish

Summary

Safety Warnings

Pole Assembly

Step 1.6: Seat Pole Sections Securely

Strike pole assembly end on a hard surface to seat sections; this step cannot be reversed.

Pole to Base Assembly

Step 2.4: Position Pole Assembly on Base

Place pole on ground, align large axle on base slots, step on base, then snap small axle into upper slots.

Step 2.6: Rest Pole and Tighten Hardware

Tip system forward, rest pole on ground, tighten hardware; do not stand until base is filled.

Backboard to Rim Assembly

Step 3.3: Mount Rim and Backboard to Pole

Attach rim and backboard to pole using U-bolt, washers, nuts, hex bolts, and washers.

Final Assembly and Setup

Step 4.2A: Fill Base with Sand

Fill the base with sand via the large hole, then cap securely; sand is recommended for stability.

Step 4.2B: Fill Base with Water

Fill base with water and bleach, then cap securely; sand is preferred for safety reasons.

Step 4.3: Operating Height Adjustment

Instructions for safely adjusting the system height, requiring two adults and specific steps.

Related product manuals