22
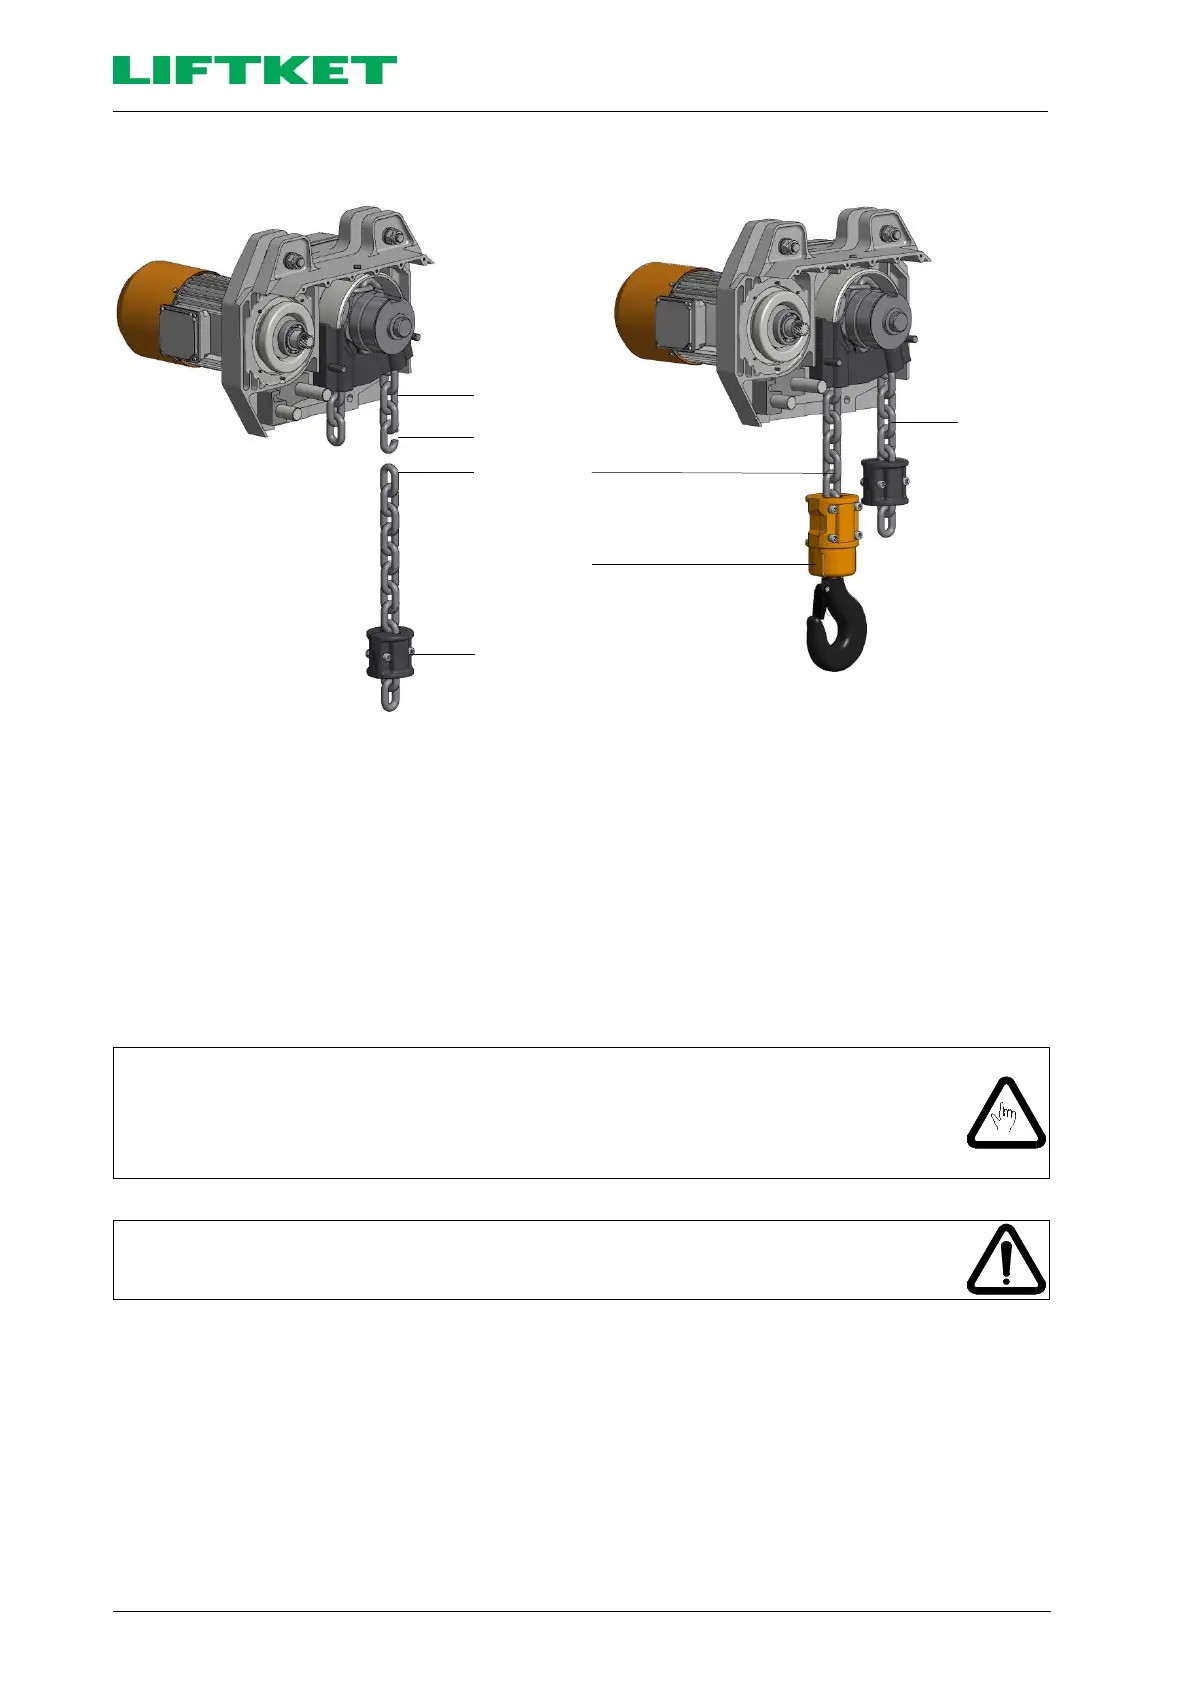
4.1.8 Schematic sketch of the load chain configuration - single fall version
Pre-assembled
chain piece
Open chain link
Load chain
Hook tackle
Lift limiter
Diagram No 22: Schematic sketch of the load chain configuration - single fall version
1. Upon delivery there is a short pre-assembled chain piece on the chain driving sprocket.
2. Always hang the provided slotted connecting chain link onto the pre-assembled chain piece on the side of the
chain box and hook on the load chain that you intend to run in.
3. Run in the load chain by actuating the pendant switch.
4. Remove the pre-assembled chain piece and the slotted connecting chain link.
5. Fit the hook tackle to the end of the loaded chain side.
6. Lower the load hook to its lowest position.
7. Fasten the lift limiter on the dead end of the chain.
8. Mount the chain box.
9. Run the chain into the chain box while lubricating the entire length of the chain.
When feeding the load chain or changing the number of chain falls, never let the old
chain to run out entirely from the hoist casing, but immediately hook on the new load
chain or the pre-assembled chain piece using the slotted connecting chain link.
After feeding in the new load chain, remove the pre-assembled chain piece with the
slotted connecting chain link.
In order for the chain to have an orderly position within the chain box, the dead end of
the chain should be allowed to run into the chain box by itself while the hoist is in lifting
mode, and should not be placed in manually afterwards.
 Loading...