13
1. Overview 2. Setup & Use
3. Optional
Accessories
4. Troubleshooting
5. Warranty, Safety
& Specifications
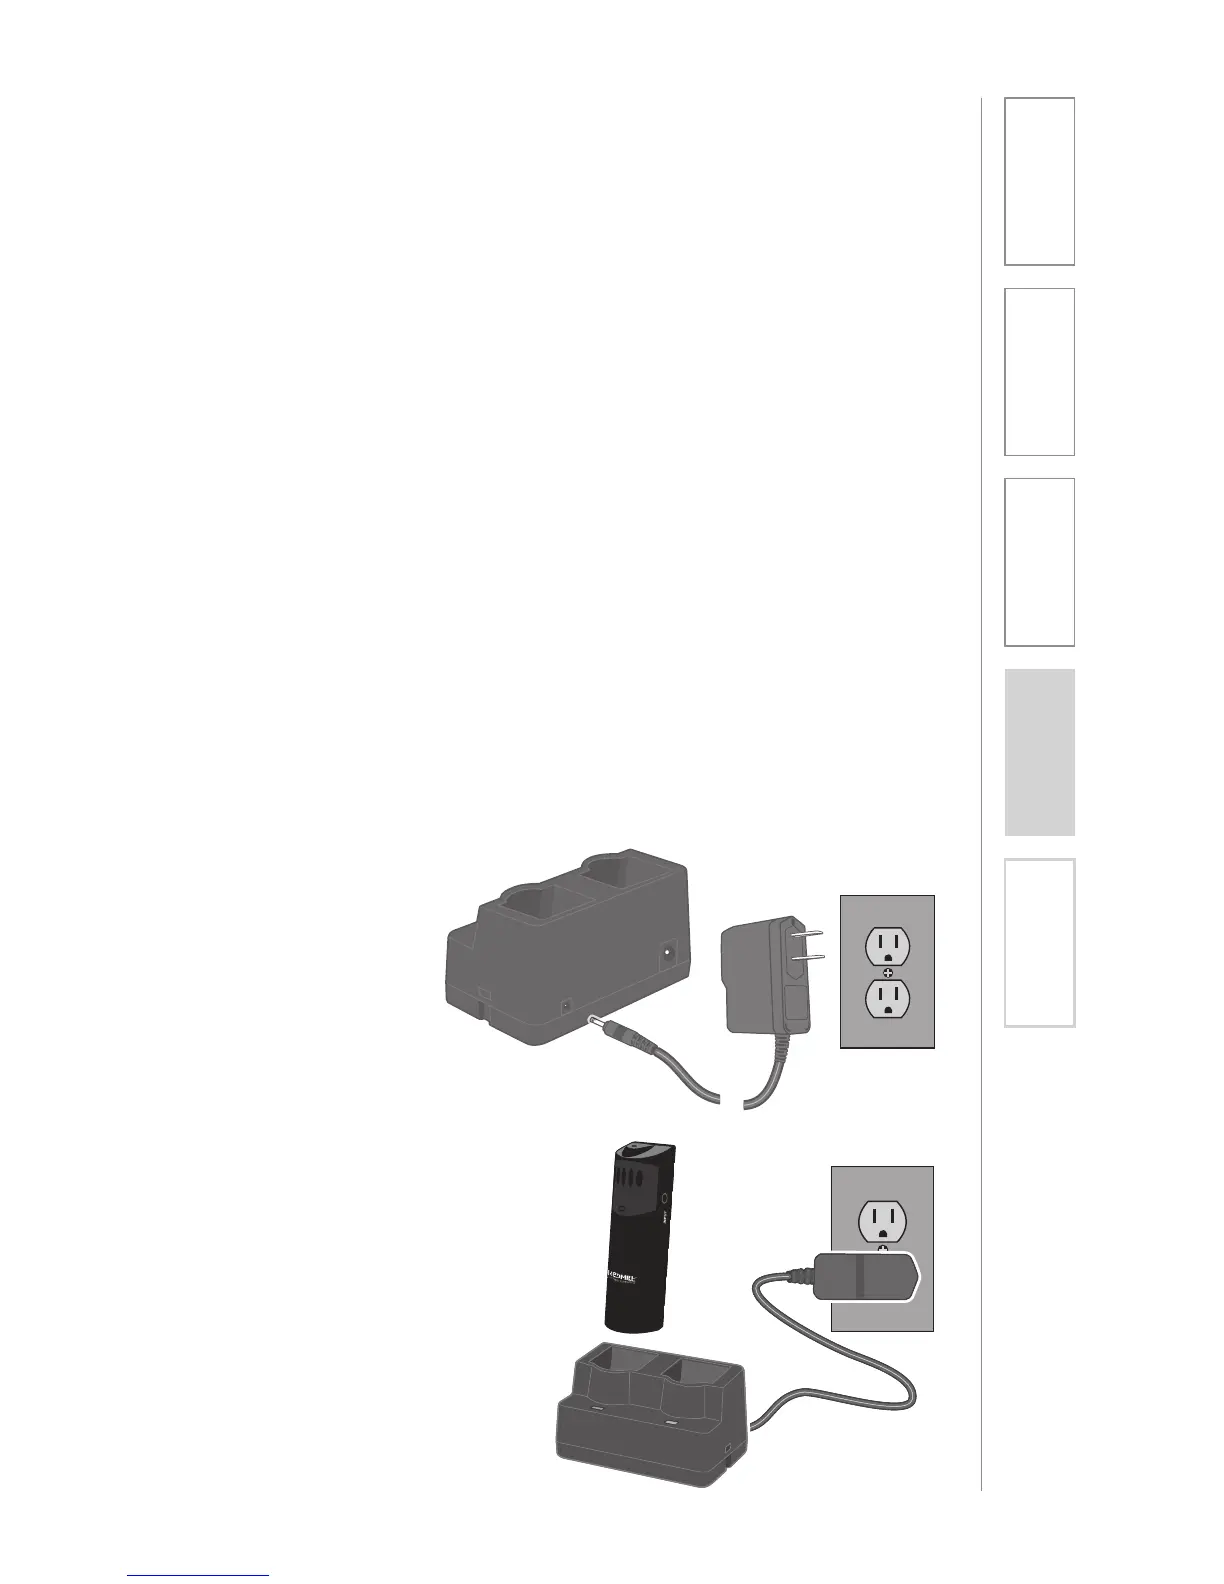
3. CHARGING THE REDMIKE
Before use, the REDMIKE should be charged. It will take 8-9 hours for the
REDMIKE to obtain a full charge. A fully charged REDMIKE will last for over 7
hours of use. If microphones are used daily, they should be kept in the cradle –
microphones can be left in a charging cradle constantly for up to 2 weeks without
causing degradation to battery life.
A red light on the charging cradle indicates the REDMIKE is charging. A green
light indicates that charging is complete and a full charge has been reached. A
blinking light indicates a charging or sensing error. See Troubleshooting section
for more information.
REDMIKE incorporates alkaline protection into the microphone design. Always
use a Lightspeed rechargeable sensing battery. Replacement AA NiMH batteries
may only be purchased through Lightspeed Technologies (part # NH2A27). Do
not attempt to charge alkaline batteries. They can overheat and expand creating
a significant hazard and damaging the microphone (this is not covered by
warranty).
CAUTION: Discharging NiMH batteries until no charge remains can reduce
battery life and, with continued discharging, to fail. Recharging the NiMH
batteries in this product every day will extend their life.
1. Plug power cord into the cradle
charger and then plug the AC end
into an electrical outlet.
2. Place the REDMIKE into the
cradle. The REDMIKE will
automatically turn off. The LED on
the cradle will glow red indicating
charging has started. When the
REDMIKE is fully charged the LED
on the cradle charger will change
to green.