17
2. Setup & Use
3. Optional
Accessories
1. Overview
5. Warranty, Safety
& Specifications
4. Troubleshooting
SECTION 3:
OPTIONAL ACCESSORIES
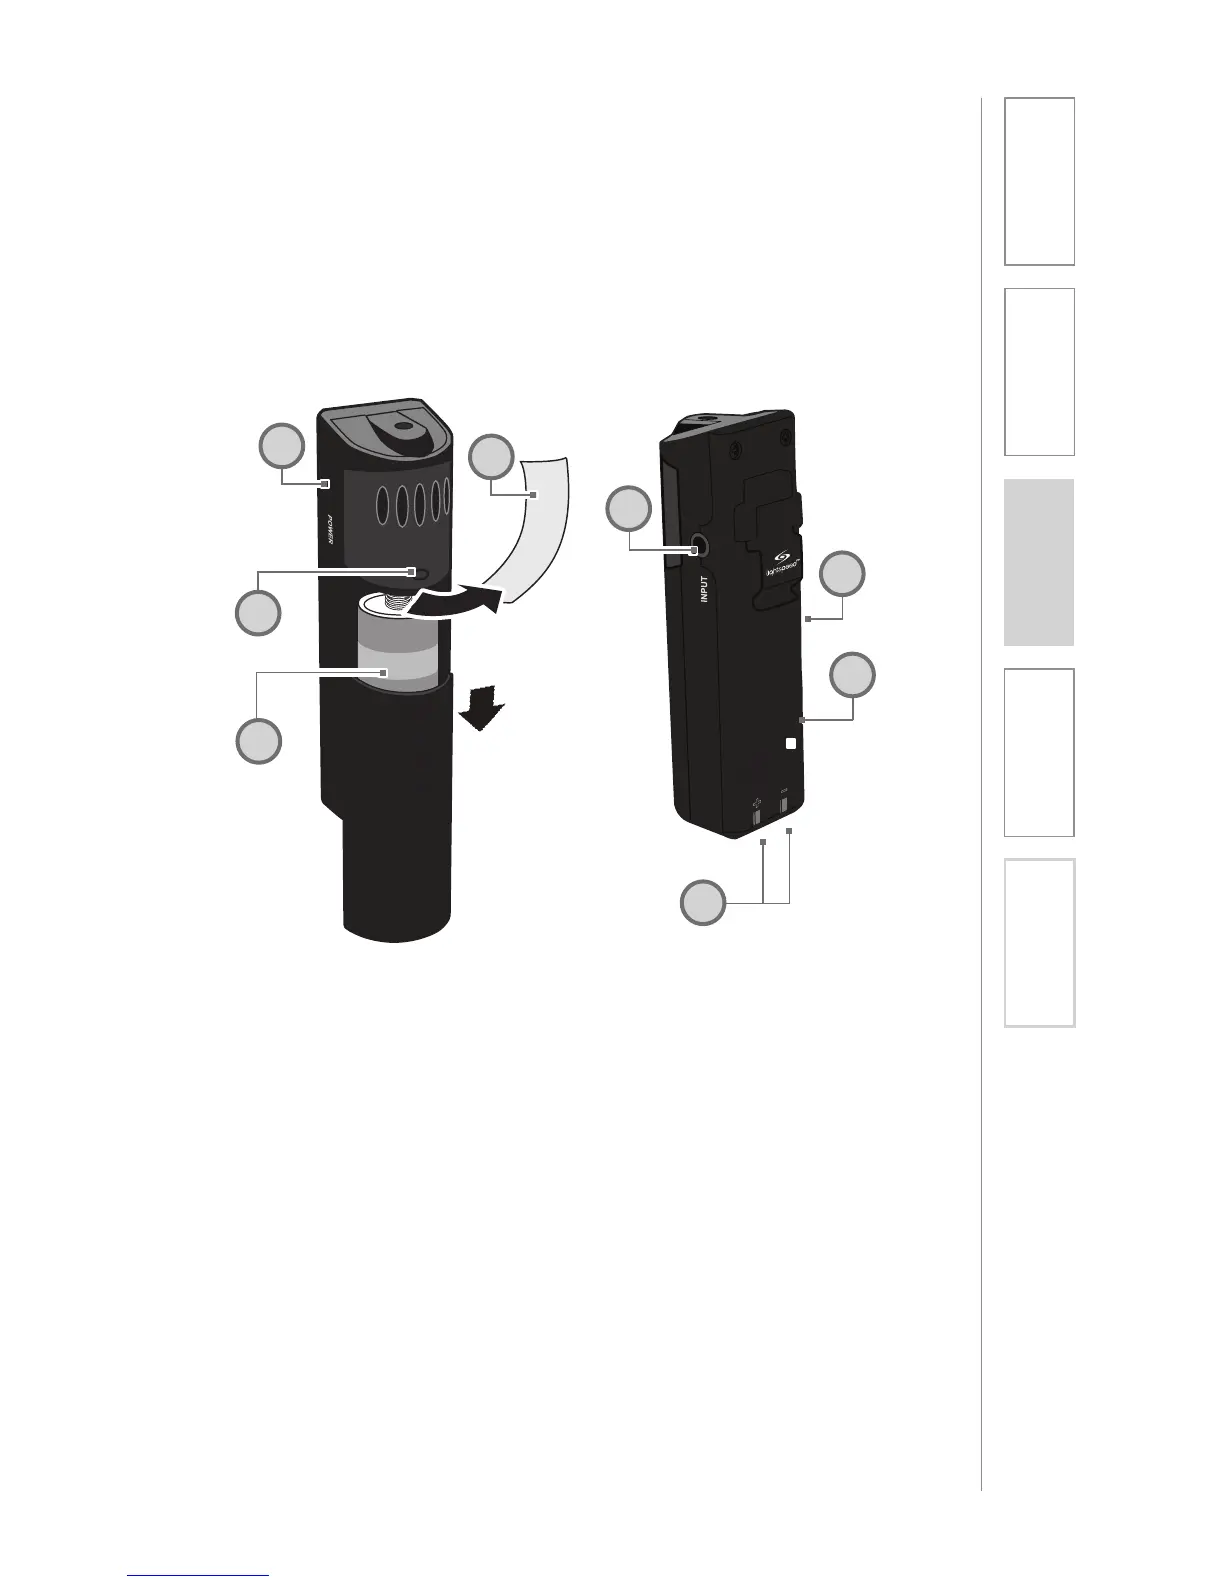
OPTIONAL REDMIKE VC (Volume Control)
Controls and Connections
5
6
7
8
1
2
3
S
l
i
d
e
b
a
t
t
e
r
y
d
o
o
r
o
p
e
n
R
e
m
o
v
e
t
a
b
b
e
f
o
r
e
u
s
e
4
1. POWER /MUTE BUTTON
2. POWER/LOW BATTERY
INDICATOR: A blue light indicates
the REDMIKE VC is on and fully
charged. A red light indicates a
charge is needed.
3. BATTERY COMPARTMENT: To
open, slide the door downward.
The battery should only be
replaced by a Lightspeed AA
rechargeable sensing battery
(part # NH2A27).
4. YELLOW PROTECTIVE TAB:
Slide the battery compartment
door and remove this disposable
protective tab before use.
5. AUDIO/MICROPHONE INPUT:
Use this input to plug in a laptop,
MP3 player or other audio
source to wirelessly transmit
audio to be played through the
system. Alternatively, an external
microphone can be connected.
6. CHANNEL SELECT SWITCH (CH
A/B): Use this to choose channel
A or B. If you are using a single
microphone, we recommend using
channel A.
7. VOLUME CONTROLS (UP -
DOWN)
8. CHARGER CONTACTS (+ -):
These contacts interface with the
charging tabs when the REDMIKE
VC is placed in the RMCC cradle
charger.