Special Techniques
December 2008 Special Techniques | 19
Working With Two-Framed Side Windows Or Obstructions
As you become more experienced at using the Lil Buddy you may have to vary the position of
the Base Pivot Cup on the side door glass to avoid potential obstructions to the working of the
units.
In these cases, the Sliding Rod Cup placement also has to be adjusted accordingly.
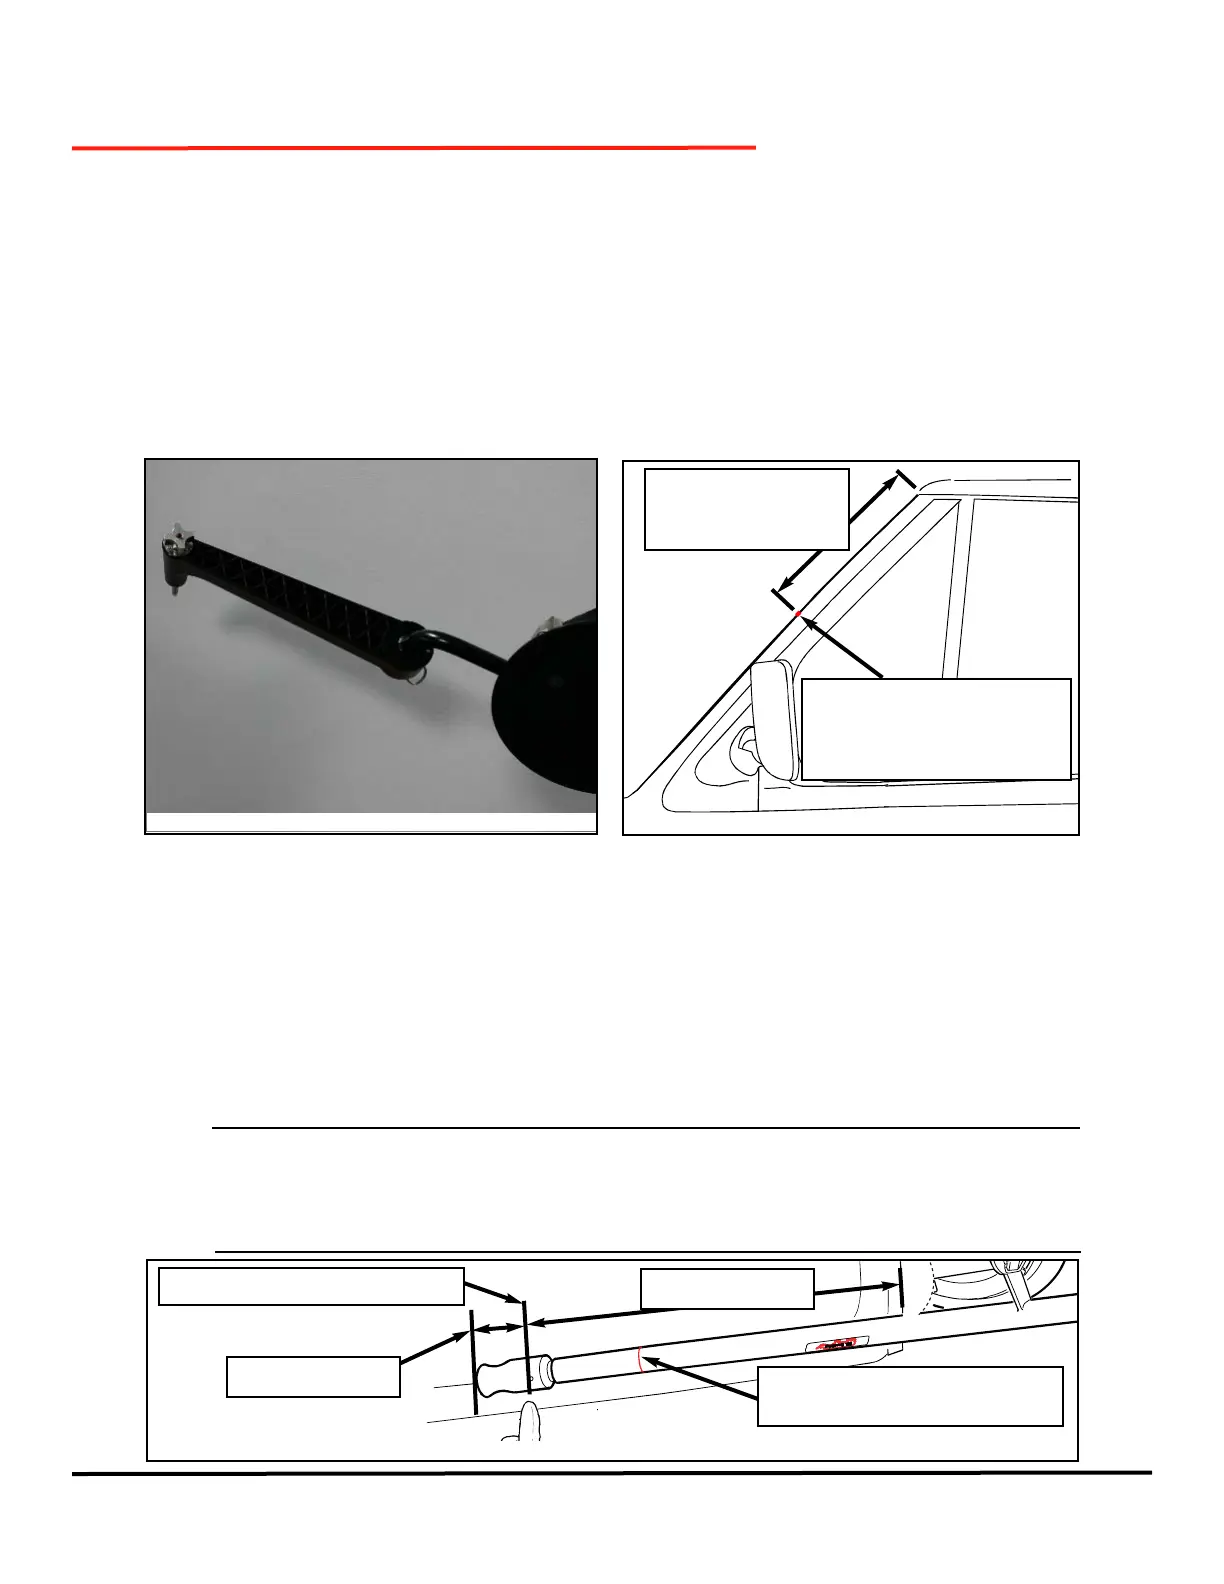
1. Attach the Base Pivot Cup (see page 5) in the standard way; except with the Swing
Arm pinned into its fully extended position, placing the red dot anywhere along the
windshield pillar as required. See figures 27 and 28.
2. Measure the distance from the top of the windshield pillar down the side pillar to the red
dot mark. Be sure your sight line is in line with both side pillars and the red dot when
taking this measurement. Example 16 inches, See figure 28.
This is used for the placement of the Sliding Rod Cup on the new windshield.
3. Follow the standard procedure (see page 8) for positioning the Sliding Rod Cup on the
new windshield, except:
• Instead of measuring 7 inches from the top, measure the amount you have just
noted, less 2 inches. Example 14 inches, See figure 29.
• Use the red line on Sliding Rod when placing Sliding Rod Cup. See figure 9.
Tip: The easiest way of completing the last two steps is to use the Sliding Rod Cup to
measure the distance down the side pillar on the vehicle - essentially, place the rod at
the top of the pillar to red dot mark on the side pillar. Then when you place the Sliding
Rod Cup on the new windshield, use the rod length, less 2 inches, for the required
measurement. See figure 29.
Line up red dot on Swing Arm
anywhere along windshield
pillar when mounting Base
Pivot Cup.
Example: Red dot
positioned 16 inches
down windshield pillar.
FIGURE 27 - SWING ARM PINNED FULLY EXTENDED
FIGURE 28 - ALTERNATE BASE PIVOT CUP MOUNT
FIGURE 29 - USING SLIDING ROD TO OBTAIN MEASUREMENT
14 inches
less 2 inches
Mark for Sliding Rod placement
Use red line when placing Sliding
Rod Cup onto windshield



 To Next Page