6
LINCE ITALIA S.p.A.
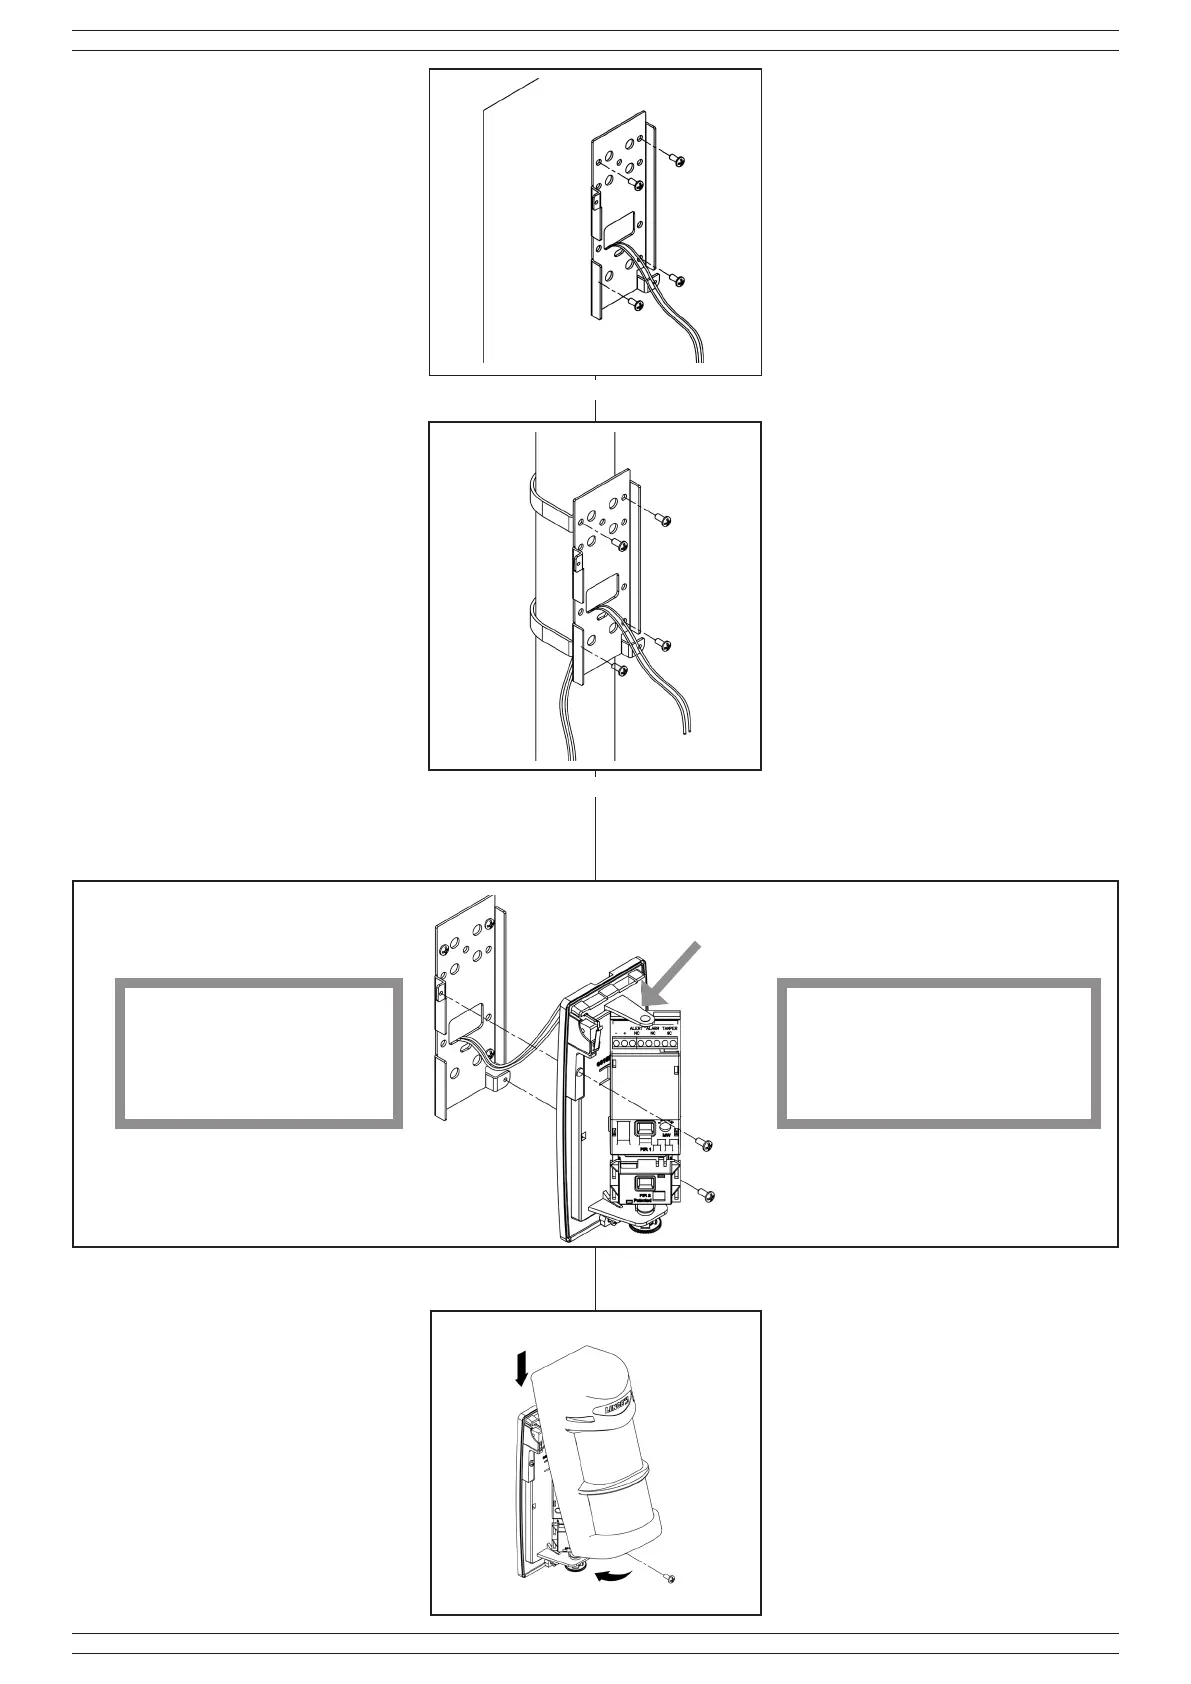
Fig. 4
Fig. 5
Fig. 6
Fig. 7
• Effettuare 4 fori nel muro ed inserire
i tasselli
• Passare i cavi attraverso il foro della
staffa
• Fissare ora la staffa al muro o, se su
palo, seguire le indicazioni di g. 5.
Nel ssare la staffa al muro fare attenzione
alla perpendicolarità rispetto al terreno.
Nel caso di ssaggio su palo procedere
come illustrato in gura ssando la staffa
metallica principale alle due staffe da palo
(opzionali)
Per ottenere il passaggio
cavo, forare l’apposito
pretaglio utilizzando un
oggetto appuntito di adeguato
diametro, giravite o simile.
• Poggiare il corpo del rilevatore sulla staffa e farlo scendere
no in fondo per far coincidere i fori di ssaggio del corpo
con quelli della staffa
Dopo aver effettuato le regolazioni del
PIR 2, chiudere il rilevatore inserendo il
coperchio dall’alto verso il basso come
illustrato, quindi avvitarlo tramite la vite
metrica in acciaio inox in dotazione.
Fix the support onto the mounting support
with supplied screws.
Place the brackets (not included) around
the pole and fasten using the pole locking
screws.
• Make four holes on the wall and
insert the plugs.
• Pass the wires through the support
slot and x the metallic support on
the wall.
• To x the metallic support on the
pole, please see g. 5.
Fix the metallic support on the wall
perpendicularly to the ground
In order to obtain a passage
for the cables, break the plastic
pre-cut using a pointed object of
appropriate diameter, screwdriver
or similar.
• Locate the detector body on the metallic support and slide it
down, then x it using the supplied screws.
Adjust PIR2, close the detector inserting
downwards the coverage as shown in
gure.
Fix the cover using the metric screw.