8
Configuring & Managing Snapshots
It is possible to congure up to 8 snapshots within a preset, allowing you to recall a
customized set of options for your current blocks instantly, without the brief lag time
associated with changing presets! A snapshot is capable of storing the bypass state
of any amp or eects block, up to 64 assigned parameter values, tempo settings and
more (please see the Helix User Manual for specics).
To congure a snapshot within the Helix app, click on the Snapshots combo-box and
select the numbered snapshot you want as your destination, then congure all desired
options for this snapshot.*
Snapshots
Camera Icon
Snapshots
Combo-box
*NOTE: You can use your device's Global Settings > Preferences > Snapshot
Edits to choose between Recall (automatically stores your changes to the
current snapshot) versus Discard (does not store changes to the current
snapshot). The camera icon is displayed in red when set to Discard.
Copying, Pasting & Renaming Snapshots
Click directly on the camera icon to access these snapshot commands. Also note that
you can utilize the keyboard shortcuts for these commands, as displayed in the menu
(also see page 16).
To Copy & Paste a Snapshot - Select and load the snapshot you wish to copy
from the Snapshots combo-box and select Copy Snapshot from the camera icon
menu to copy it to the clipboard. Then select and load the snapshot you wish to
overwrite from the Snapshots combo-box and choose Paste Snapshot from the
camera icon menu to paste the clipboard contents into the loaded snapshot.
To Rename a Snapshot - Click the desired snapshot from the Snapshots combo-
box and select Rename Snapshot from the camera icon menu to type in your new
name, then press Enter/Return on your keyboard. Alternatively, you can "long-
click" (left-click and hold mouse button down for about 2 seconds) directly on the
current Snapshot's name in the combo-box to edit it.
Snapshots Camera Icon
and Expanded Menu
NOTE: Remember that you'll need to Save before switching to another preset to
retain your edited snapshot settings within the current preset! The snapshot that
is in use when you save your preset is the one that is recalled when the preset is
loaded again.
Saving the Preset
Whenever you see your preset's title appearing in italicized text and with an aster-
isk (e.g. - GuitArmageddon*) at the top of the EDITOR window, it is telling you the
preset has been edited from its last-saved state. The Save button at the top right of the
EDITOR window (or using the Cmd-S/Ctrl-S shortcut) can be used to instantly save the
currently-loaded preset to the Helix hardware's internal memory. As covered in "Pre-
sets Panel" on page 4, there are also the LIBRARIAN window options, Copy and
Export, to create & store copies of your presets.
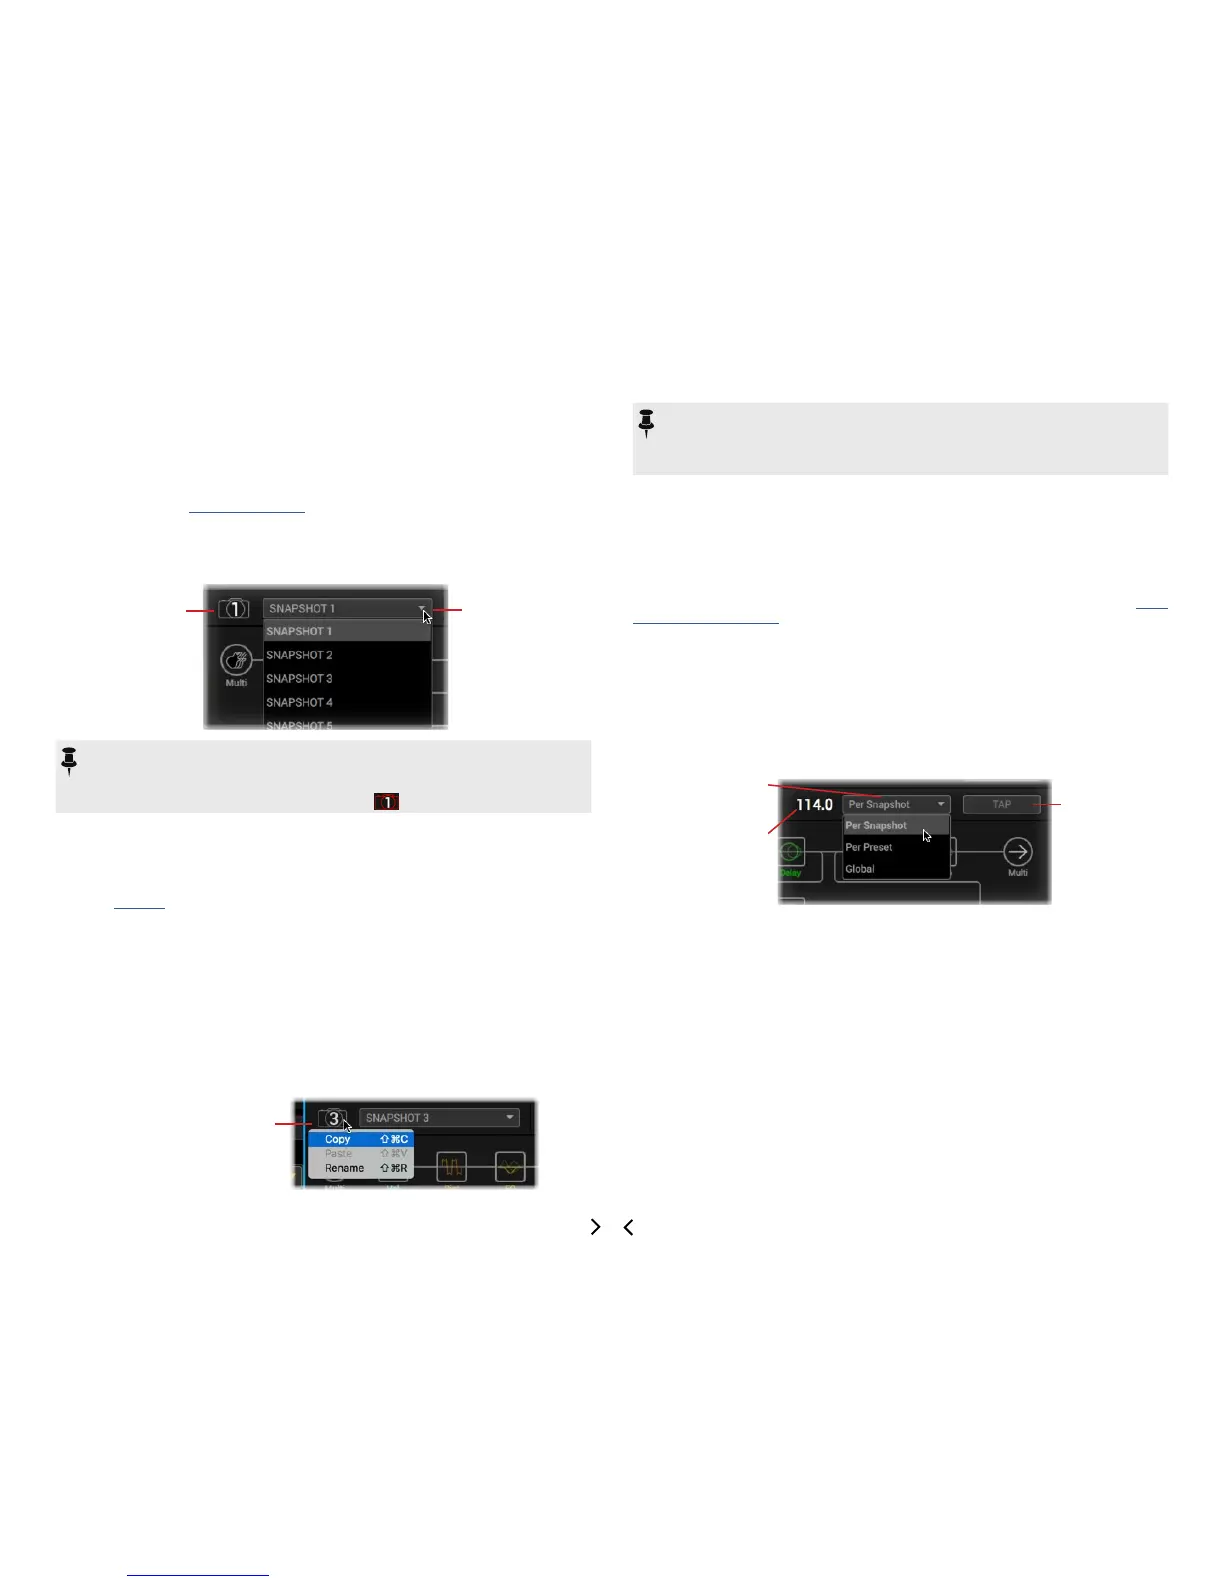
Editing the Tap Tempo
There are a few options available for conguring the tempo, accessible from the con-
trols at the top of the EDITOR. Any of the current preset’s eect models set to note
division values (time sync mode is available for most delay and modulation eects) will
follow this Tap Tempo value.
Numerical Tempo
Field
Tempo Select
Menu
Tap Tempo
Button
How the Tempo Value is Recalled
Use the Tempo Select Menu to select how the tempo value is saved and recalled (this
is the same option found in your Helix hardware's Global Settings > MIDI/Tempo
screen):
• Per Snapshot - The tempo value will be stored and recalled individually per
snapshot for this preset.
• Per Preset - The tempo value will be stored and recalled individually with this
preset.
• Global - The tempo value is used for all presets whenever set to Global.
Entering a Tempo Value
To enter a value, click on the Tap button (or tap the T shortcut) rhythmically. Or, click
directly within the Numerical Tempo Field and edit the value with your precise number.
 Loading...

