11
Stomp Footswitch Mode
While in Stomp mode, the middle eight footswitches can do a number of things:
• Toggle one or more blocks on and o
• Toggle between two values of one or more parameters
• Generate a MIDI, External Amp Control, or CV/Expression message
• All of the above, even simultaneously
If not already there, press FS6 (MODE) to select Stomp mode.
The middle eight footswitches display blocks' model names, parameter names, Com-
mand Center messages, and/or customized labels:
Ubiquitous VibeMystery Filter
Harmony Delay
BANK
BANK
LooperMULTIPLE (3)OctoverbTriangle Fuzz
TAP
H O L D F O R T U N E R
MODE
H O L D T O E D I T
NOTE: If a switch is assigned to multiple blocks or items, its scribble strip reads
"MULTIPLE (X)," where X is the number of assignments, and stepping on the
switch turns them all on and o. If some blocks are on and some are bypassed,
stepping on the switch toggles each block's bypass state.
NOTE: While in Stomp mode, stepping on BANK or BANK temporar-
ily enters Preset mode. Once you’ve selected a preset, Helix returns to Stomp
mode.
Looper Footswitch Mode
A third footswitch mode—Looper mode—is only available if a Looper block has been
assigned to a footswitch in Stomp mode. Nearly all factory presets in Helix have a
Looper block assigned to a footswitch, but your custom presets may not.
Looper Type Max. Loop Length (1/2 Speed) Max. Loop Length (Full Speed)
Mono
120 seconds 60 seconds
Stereo
60 seconds 30 seconds
1. From Stomp mode, press the footswitch labeled “Looper” (if
available).
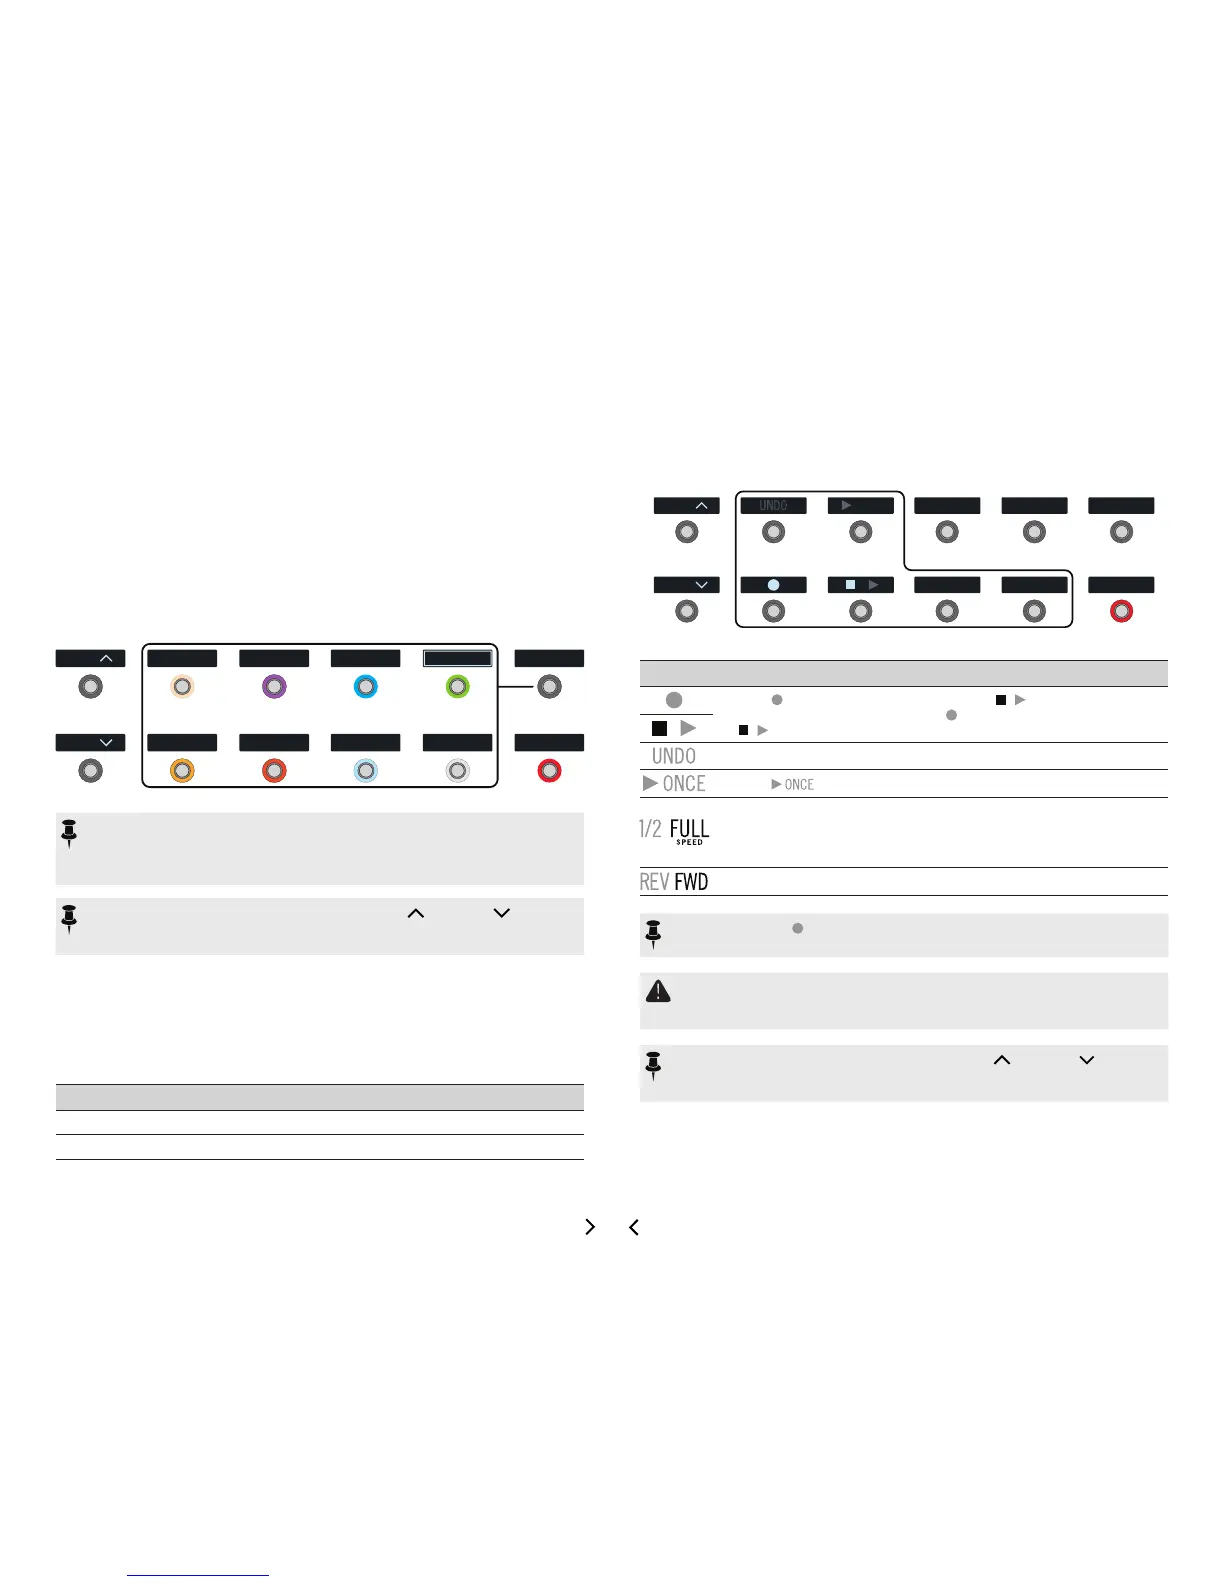
Looper mode appears:
BANK
BANK
TAP
H O L D F O R T U N E R
Switch Description
Step on to start recording a loop. Step on to end the loop and
immediately start playback. Step on to overdub additional parts. Step
on again to stop playback.
If you make a mistake on your last overdub, step on UNDO to erase it.
Step on to play the recorded loop once through.
Recording at full speed and then switching to 1/2 speed will also drop
the loop down one octave. Recording at 1/2 speed will double your
looping memory and switching to full speed will cause the loop to play
at double speed (up an octave).
Step on REV/FWD to hear your loop backwards.
NOTE: If you press while loop playback is stopped, this will always record a
new loop, and any previous recording will be discarded.
IMPORTANT! You may change presets while looping, but loop playback will
stop unless the preset you select includes the same type of looper block (mono
or stereo) on the same path (1 or 2) and is assigned to a footswitch.
NOTE: While in Looper mode, stepping on BANK or BANK temporar-
ily enters Preset mode. Once you’ve selected a preset, Helix returns to Looper
mode.
2. To return to the previous mode, press FS6 (EXIT).
 Loading...

