13
Selecting Blocks/Adjusting Parameters
Blocks are objects that represent various elements of a preset, such as amps, cabs,
eects, splits, loopers, and even inputs and outputs.
1. From Stomp footswitch mode, briey touch (but don’t press)
the footswitch assigned to the desired block.
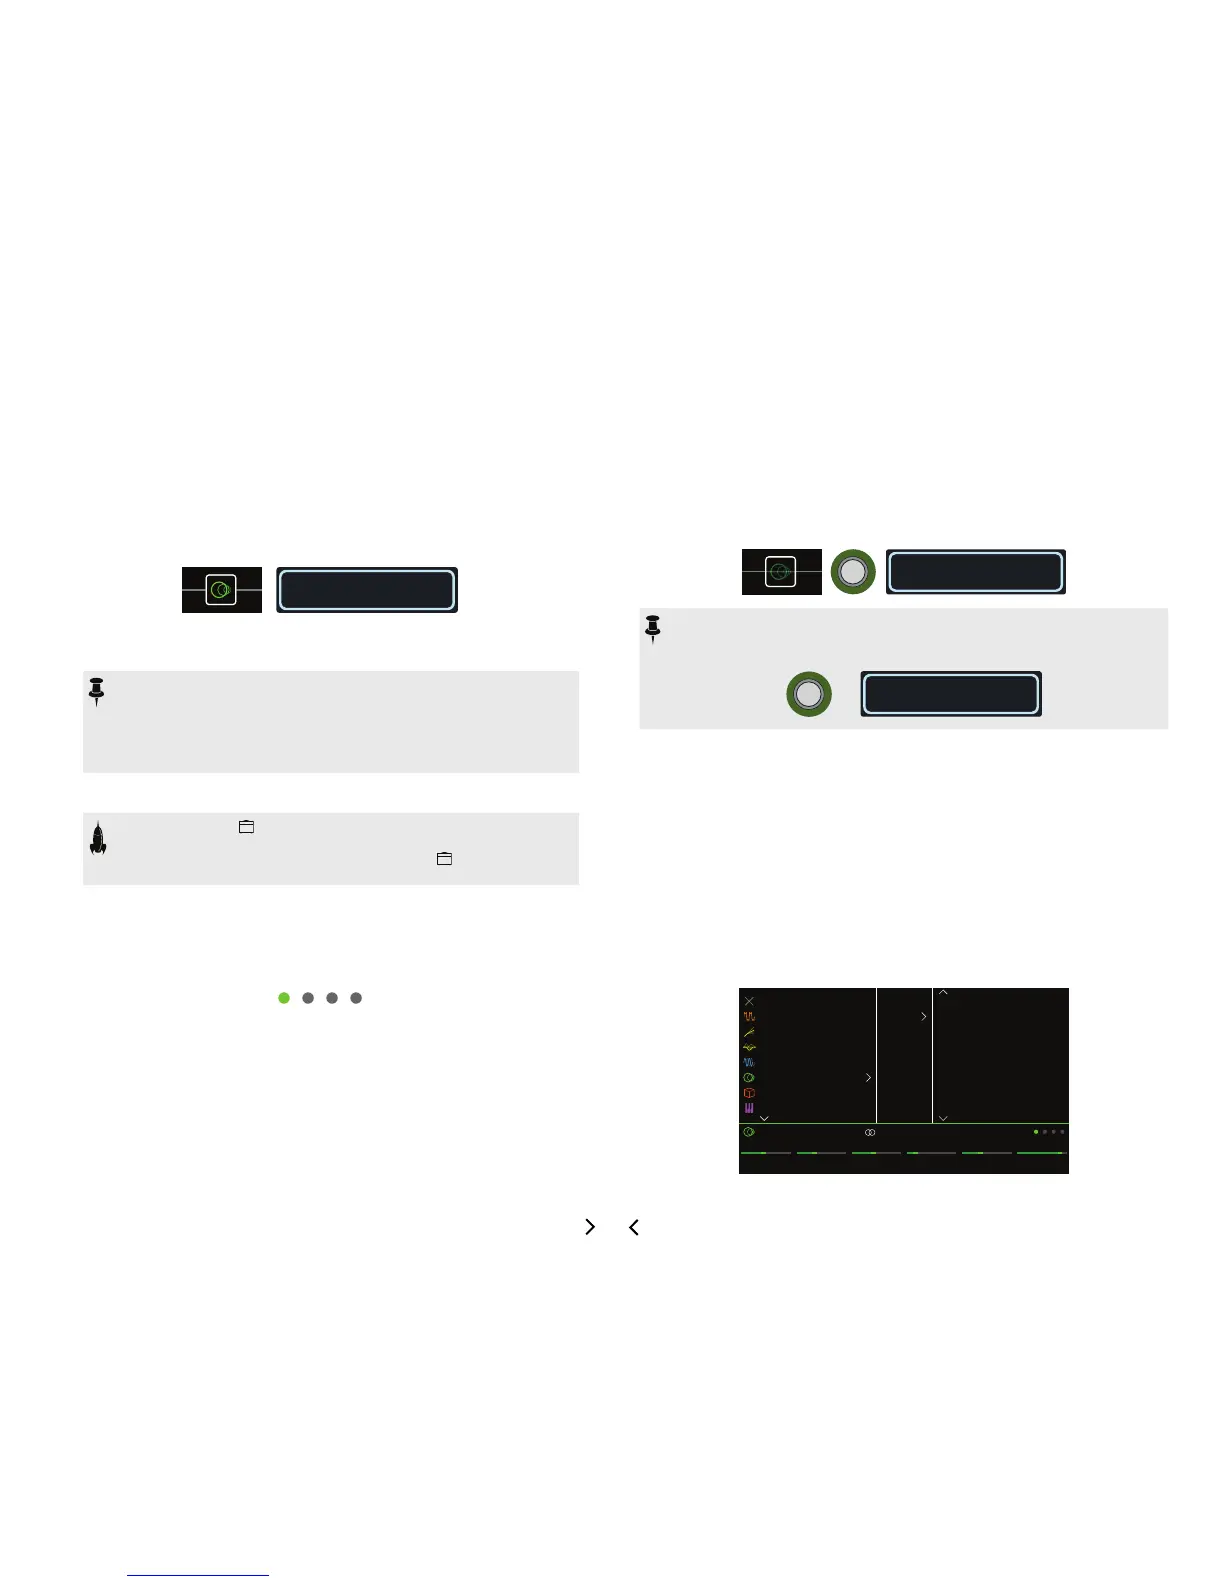
The selected block appears with a white box on both the main LCD and the
scribble strip:
Harmony Delay
If multiple blocks are assigned to a footswitch, its scribble strip reads “MULTIPLE
(X).” Touch the top of the switch repeatedly until the desired block is selected.
NOTE: Repeatedly touching a "MULTIPLE (X)" switch may jump to com-
pletely dierent screens, depending on its assignments. For example, if a
switch is assigned to an eect block, an eect parameter, and a Command
Center MIDI message, repeated touches will cycle through all three items on
the Home, Controller Assign, and Command Center screens, respectively.
Basically, anything on the switch is only a touch away.
Alternatively, move the joystick to select a block.
SHORTCUT: Press to quickly select the Amp+Cab, Amp, or Preamp
block and its tonestack parameters (Gain, Bass, Mid, Treble, etc.) appear.
If a preset has more than one of these blocks, press repeatedly to cycle
through all tonestacks.
2. Turn Knobs 1-6 below the screen.
Some blocks have more than one page of parameters, in which case dots on the
right side of the inspector indicate the current page. For example, the dots below
indicate that page 1 parameters are visible (the colored dot) and a total of four
pages of parameters are available:
3. Press <PAGE/PAGE> to access more parameters (if available).
Bypassing a Block
If a footswitch is assigned to the block, press the switch.
Alternatively, select the block and press BYPASS to toggle the
block on and off.
Bypassed blocks appear semitransparent and, if assigned to a footswitch, its LED ring
dims and scribble strip label grays out:
Choosing a Block's Model
To change an existing block’s model, select the block and turn the
joystick.
To create a new block, select an empty location and turn the joy-
stick.
Selecting models within the same category can be very quick. However, as Helix has
hundreds of items to choose from, using this method to, say, change a mono distor-
tion block (beginning of the list) into a stereo FX Loop block (end of the list) is very
slow. Instead, you should open the model list:
1. Press the joystick to open the model list:
FeedbackTime
[37%]
Delay Harmony Delay
LevelMixKey Scale
0.0dB40%MinorD1/8
Mono
Stereo
None
Distortion
Dynamics
EQ
Modulation
Delay
Reverb
Pitch/Synth
Digital Delay
Multitap 3
Multitap 6
Ping Pong
Sweep Echo
Ducked Delay
Transistor Tape
Harmony Delay
 Loading...

