7
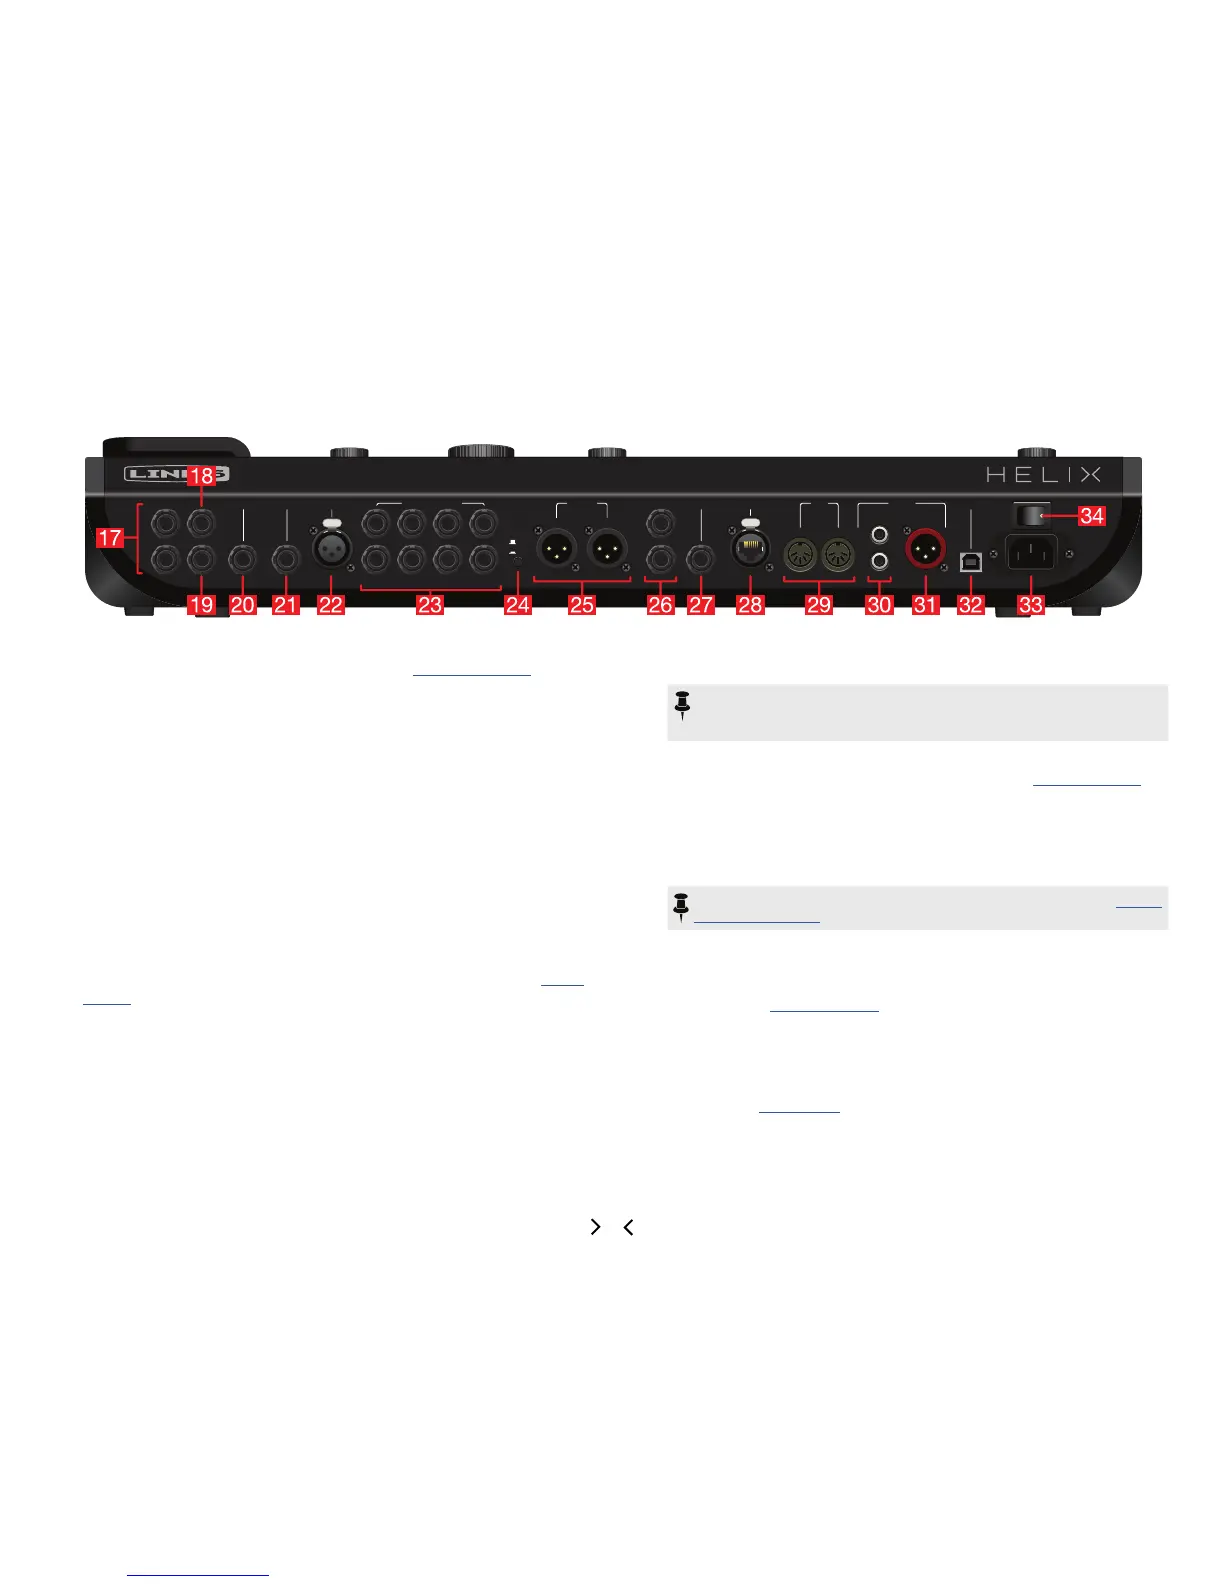
Back Panel
17. EXP 2 and 3 Two additional expression pedals can be connected to Helix and
assigned to adjust a wide variety of parameters. See "Controller Assign"
18. EXT AMP 1/2 Connect to your traditional guitar amp to switch its channels
or turn its reverb on and o. Use a TRS cable for dual operation (1=tip, 2=ring).
19. CV/Expression Out Connect to the expression pedal input on stompboxes
or CV (Control Voltage) input on vintage pedals or synths.
20. GUITAR IN Connect your primary guitar or bass guitar here. This jack provides
impedance selection and a switchable pad.
21. AUX IN (10MΩ) Connect a secondary, active-pickup equipped guitar or bass
here.
22. MIC IN Plug your microphone in here for processing your vocals or recording
to your computer via USB. This XLR jack provides 48V phantom power for studio
condenser mics and a variable low cut lter.
23. SENDS/RETURNS 1-4 These 1/4” ins and outs can be used as FX loops for
inserting external stompboxes into your tone or as additional inputs and outputs
for connecting keyboards, drum machines, mixers, and other gear. See "Send/
Return"
24. Ground Lift Switch If you are experiencing hums and buzzes, press this
button in to eliminate ground loops between your equipment.
25. XLR OUT Use balanced XLR cables to connect to your studio gear or the
house mixer, PA or FRFR speaker(s) when playing live. When using a mono play-
back system, connect only the LEFT/MONO XLR jack.
26. 1/4” OUT Use unbalanced 1/4" TS cables to connect to your guitar amp, FRFR
speaker(s), studio monitors, or other playback system. When using a single amp
or speaker, connect only the LEFT/MONO 1/4” jack.
27. PHONES Out (12Ω) Connect stereo headphones here; turn the top panel
PHONES knob to adjust volume.
NOTE: Helix provides plenty of gain for high impedance headphones. With
lower impedance headphones, you may notice a bit of distortion if the
PHONES knob is turned all the way up. This is normal.
28. VARIAX Input This input provides power, digital audio, eects control, and
instant recall between Helix and a Line 6 Variax guitar. See "What is Variax?"
29. MIDI IN, OUT/THRU Connect Helix to your MIDI gear for sending and re-
ceiving program changes, continuous controllers, and other MIDI messages.
30. S/PDIF IN/OUT Digitally connect Helix to your studio equipment via S/PDIF
(75-ohm RCA) cables.
NOTE: S/PDIF and AES/EBU cannot be active at the same time. See "Global
Settings > Ins/Outs"
31. AES/EBU, L6 LINK L6 LINK provides easy digital audio connectivity be-
tween Helix and Line 6 StageSource monitors and/or DT-Series ampliers. Alter-
natively, digitally connect Helix to your studio equipment via an AES/EBU (110Ω
XLR) cable. See "L6 LINK Output"
32. USB Helix also functions as a high quality, multi-in/out, 24-bit/96kHz audio
interface for Mac
®
and Windows
®
computers, with DI, Re-amping and MIDI func-
tionality built right in. Helix can also record to an Apple
®
iPad
®
(with optional Ap-
ple
®
camera kit). Use of a USB 2.0 or 3.0 port is required - Do not use an external
USB hub. See "USB Audio"
33. AC In Connect Helix to a grounded AC power outlet.
34. POWER switch It’s alive!
 Loading...

