11
Preset List
1. If not already there, press VIEW to select Play view.
2. Press the Upper Knob to open the Preset list:
Pastor of Muppets
Stolarskyvision
Not Adorable
Reorder
Turn the Upper Knob to select a preset.
Turn Knob 1 (Reorder Preset) to move the selected preset up and down the
list.
Turn Knob 2 (Snapshot) to select Snapshot 1, 2, or 3 without having to be in
Snapshot footswitch mode. See "Snapshots" for more information.
TIP: The grayed out numbers above Knob 3 represent the messages re-
quiredtorecallthecurrentpreset(PC:XXX)andsnapshot(CC69:XXX)from
an external MIDI controller or sequencing software.
Edit View
HX Stomp has two main views—Play view and Edit view. Edit view is used for creating
or tweaking your tones.
Press VIEW to select Edit view.
Coloredblocksrepresentingamps,cabs,eects,andotheritemsappearontheupper
half of the display and the selected block's parameters appear on the lower half:
Harmony Delay
FeedbkTime
37%
Mix
35%1/8
Selecting Blocks/Adjusting Parameters
Each preset in HX Stomp can accommodate up to six blocks. Blocks are objects
thatrepresentvariouselementsofapreset,suchasamps,cabs,eects,orevena
1 Switch Looper. In addition to the six processing blocks, each preset has an Input
block, Output block, and for presets with two parallel paths, Split and Mixer blocks.
1. While in Edit view, from Stomp footswitch mode, briey touch
(but don’t press) the footswitch assigned to the block (if any).
If multiple blocks are assigned to a footswitch, touch the top of the switch re-
peatedly until the desired block is selected.
Alternatively, turn the Upper Knob to select blocks.
The selected block appears with a white outline:
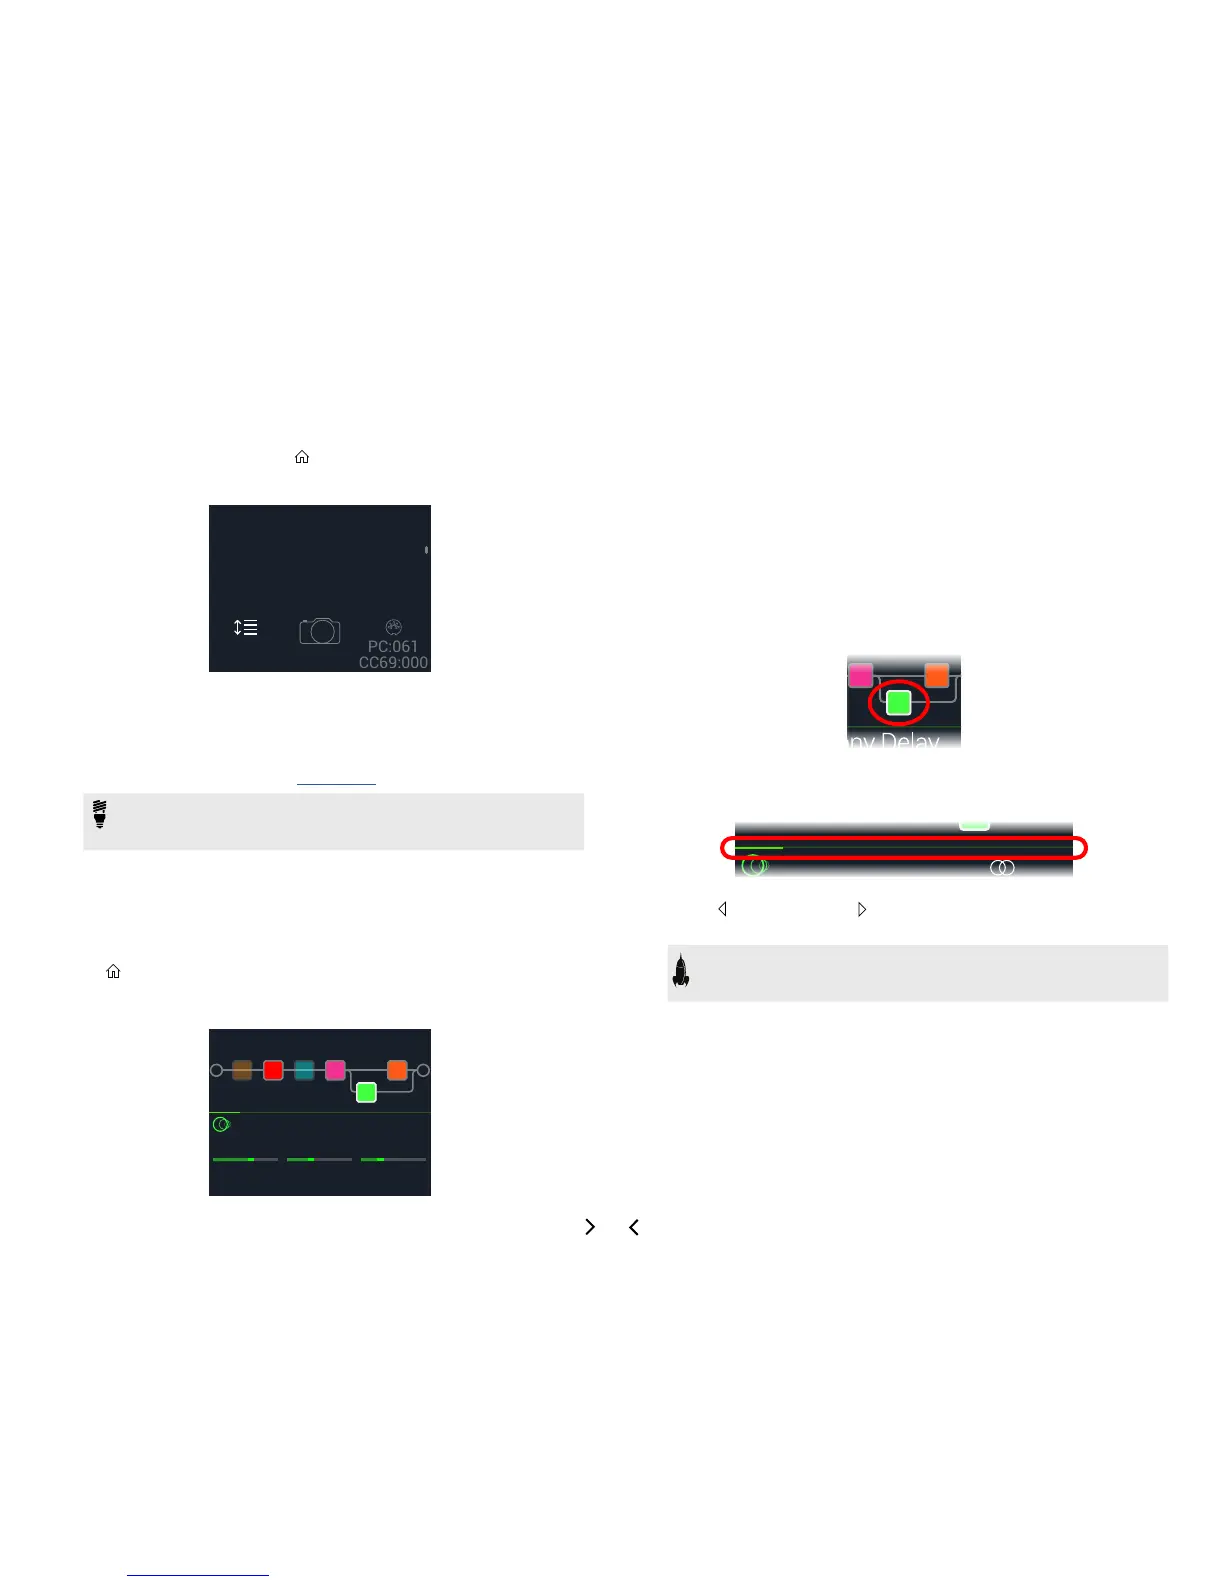
2. Turn Knobs 1-3 below the screen.
Some blocks have more than one page of parameters. In this case, the center
inspector line will display a thin colored scroll bar:
3. Press PAGE or PAGE to access more parameters (if avail-
able).
SHORTCUT: For most time-based parameters such as delay time or modu-
lation speed, press the knob to toggle between setting the value in ms or Hz
and note divisions (1/4-note, dotted 1/8-note, etc.).
 Loading...