12
Bypassing a Block
1. If not already there, press VIEW to select Edit view.
2. Turn the Upper Knob to select a block and then press it to tog-
gle the block on and o.
A bypassed block appears semi-transparent and, if assigned to a Stomp mode
footswitch, its LED ring dims:
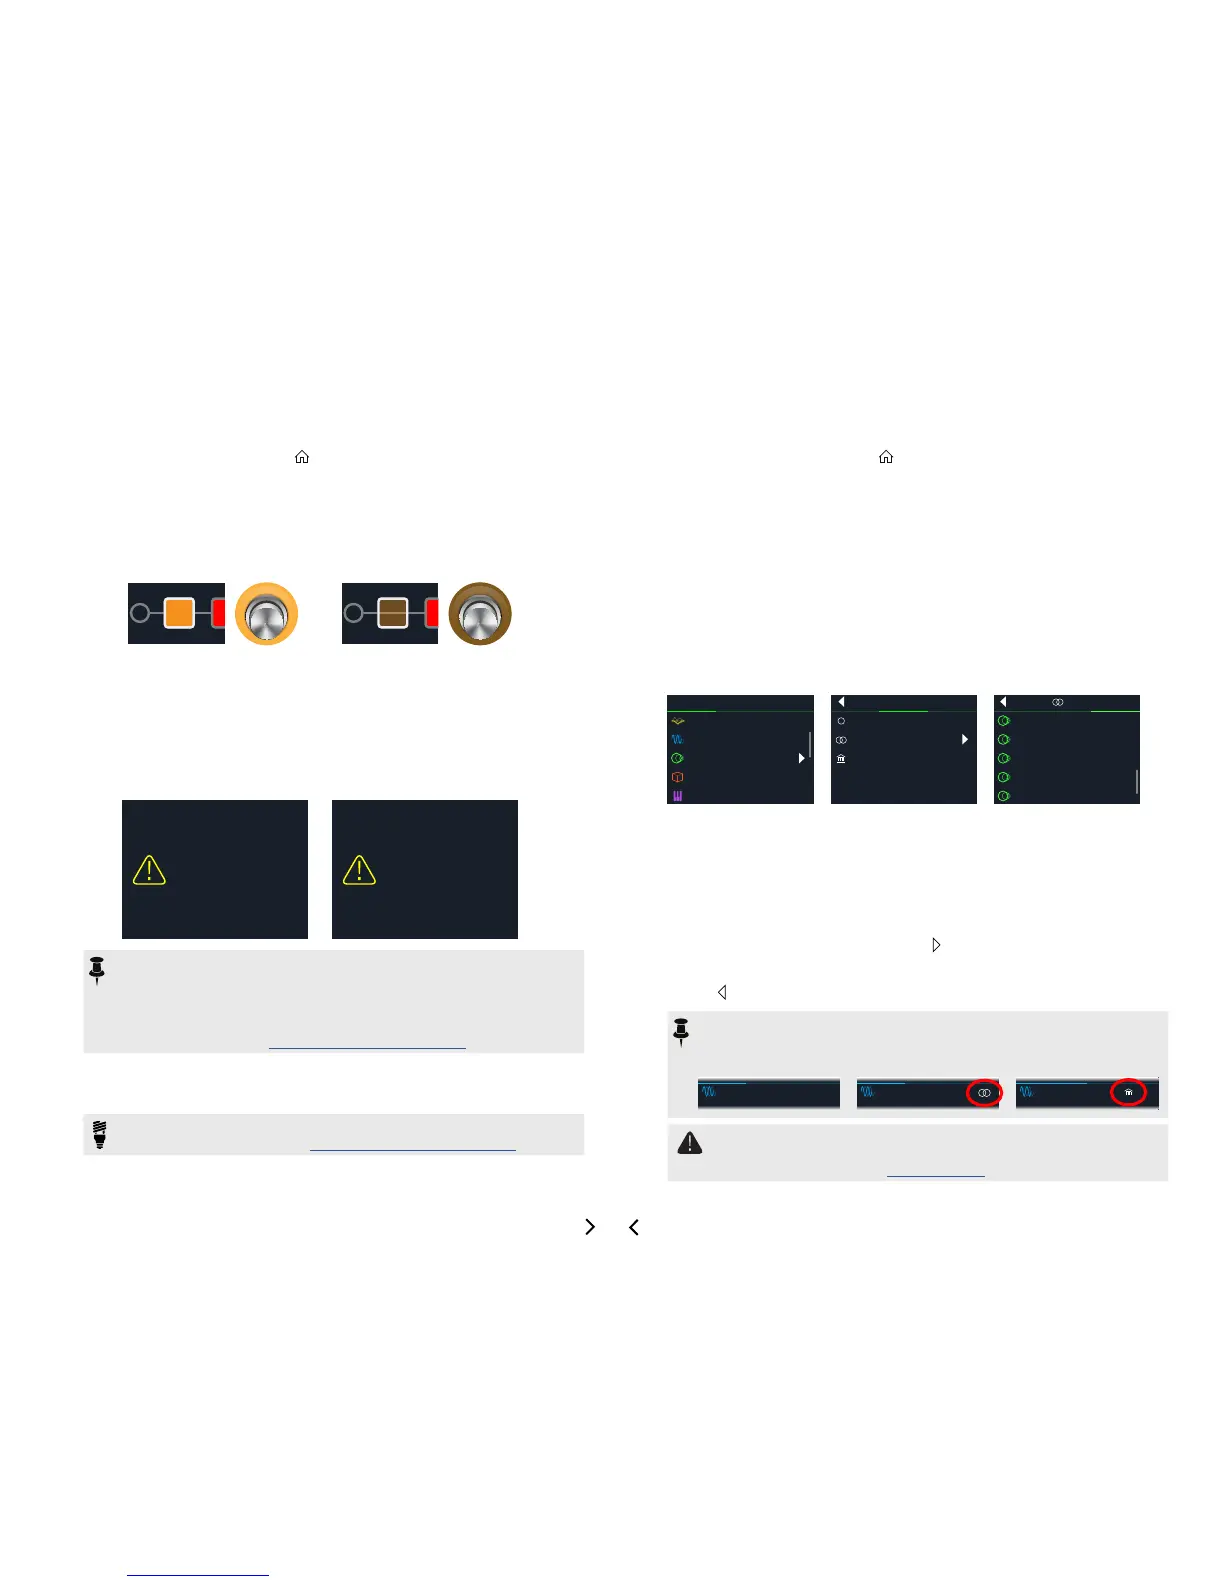
BLOCK ON BLOCK BYPASSED
Bypassing HX Stomp Completely
1. Press the Upper Knob and Lower Knob together.
While HX Stomp is completely bypassed, the inspector displays the following:
Analog Bypass!
Press any switch
DSP Bypass!
Press any switch
ANALOG BYPASS DSP BYPASS
NOTE: There are two types of All Bypass in HX Stomp: Analog bypass
(sometimes called "true bypass"), where mechanically switching relays route
your signal directly from the inputs to the outputs with no processing or
A/D/A conversion, and DSP bypass, where any delay echoes and reverb
tails decay naturally. By default, HX Stomp is set for Analog bypass, but this
behavior can be set from "Global Settings > Preferences".
2. Press any footswitch.
HX Stomp returns to normal operation.
TIP: You can also re-purpose the TAP/TUNER switch (or external footswitch
FS4 or FS5) to All Bypass. See "Global Settings > Footswitches".
Choosing a Block's Model
1. If not already there, press VIEW to select Edit view.
2. Turn the Upper Knob to select the desired block, then turn the
Lower Knob to change its model.
To create a new block, turn the Upper Knob to select an empty
location and then turn the Lower Knob.
Selecting models within the same category can be very quick. However, as HX
Stomp has hundreds of items to choose from, using this method to, say, change
a mono distortion block (beginning of the list) into a 1 Switch Looper block (end of
the list) is very slow. Instead, you should open the model list:
3. Press the Lower Knob to open the model list:
CATEGORY SUBCATEGORY MODEL
Mostmodelcategoriesincludesubcategories.Forexample,eectsinthe"Mono"
and"Stereo"subcategoriesareHX(Helix)models.Eectsinthe"Legacy"sub-
category are taken from the classic Line 6 M13
®
, M9
®
, M5
®
, DL4™, MM4™,
FM4™, and DM4™ pedals. Amp+Cab and Amp models have Guitar and Bass
subcategories. Cab models have Single and Dual subcategories.
Turn the Lower Knob to select items in a list.
Press the Lower Knob (or PAGE ) to view a category or sub-
category’s contents.
Press PAGE to go back one level.
NOTE:Eectsblockswithstereoorlegacymodelsdisplaysmalliconsto
the right of the model name:
MONO STEREO LEGACY
Courtesan Flange
 Loading...