Check Your Equipment
By the time you read this you have probably already
unpacked and examined your Lionel outfit. It's a good idea
to save the boxes and the corrugated board packing. They
h~ve been .carefully designed to protect the equipment and
wIll come III handy for storing or transporting your outfit.
Check and examine the equipment to see that is is in
good condition and that nothing has been broken or
damaged in shipment. Spin all the car wheels to see that
they turn freely. Put a very small dab of Lionel lubricant
on the ends of the axles.
If your locomotive is one of those where the motor can
be seen from the side (See sketch on page 27), you should
lubricate the ends of the armature shaft before you run
the locomotive. Your outfit may have been stored on the
dealer's shelves for several months and the lubricant put
on in the factory may have been absorbed ,by the packing.
Those Lionel locomotives where the motor is concealed are
lubricated from an internal lubricant reservoir or oil wick
which do not require any attention for a long time.
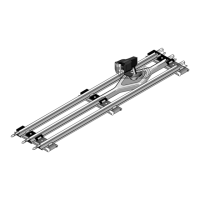
Assemble the Track
After you have examined your equipment, the next step
is to assemble the track. While many model railroaders
eventually build a permanent railroad on a train board or
table, Lionel track and all other equipment is designed so
that it can be assembled and operated right on the floor.
If you are like most beginners in the model railroading
hobby you will be too impatient to run your train to wait
for a train table-at least at first. So we will reserve the
discussion of train tables to a later chapter and start by
telling you how to assemble the very simplest kind of a
layout which you can make with your train outfit.
Most Lionel train outfits include enough curved and
straight track to make a simple ovaL If you want to make
a. more complicated layout you will have to buy more track,
switches and crossings. Many additional types of layouts
are illustrated further on in this instruction booklet.
"027" "0"
1~:,9
?i ~
Ii , .--:
t
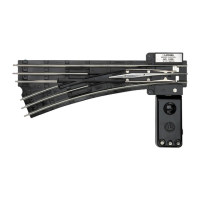
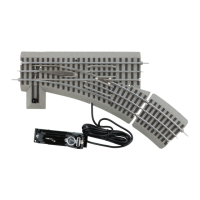
Various! Kinds of Track
Lionel makes three kinds of track: "0"
"027"
and "Super-G." If you have the "Super-O';
track see page 2. If you have either
"0"
or
"027"
simply
push the pins of one track section tightly into the rail open-
ings of the next section. The track should fit together tightly
for good electrical contact. If you have occasion to remove
or replace the pins make sure they fit tightly.
r:,
;<----/'---,-~
$f==:C"<~'\~
',J' . ',.-/'~'" \"," \ ,'"
,fP
'i:"~ '~~\",' ,':
Push the pins of one trock section tightly
into the rail openings of the next section.
Attach the
Lockon to Track
After track is assembled, attach a lockon to one of the
st~'aight track sections. Lockons are used for connecting
WIres from the track to the transformer. One CTC Lockon is
supplied with each outfit. To dress up your outfit you can
~:~r~
~ Hook this on
outside roi I.
use LTC Illuminated Lockons available at your dealer.
Insulated connecting wires, or leads, are supplied coiled
for convenience. You can straighten them out if you like.
Before making connections remove the insulating covering.
Trick here is not to cut
the wire. Wrap the wire
around your index finger.
Rest the wire on a solid
surface. P loce a dull knife
blade firmly on the wire.
Pull the wire toward you.
Connect Lockon
t
Transformer
The two lockon clips are now connected to a pair of trans-
former binding .posts. See next page for the correct posts.
Push the spnngy upper half of _the clip down until the
metal loop in the lower part projects through the slot in
the top. Insert the bare wire end through the loop and
relea,'>e the clip. Repeat with the other clip. Connect the
other ends of the wires to transformer. Wrap the bare end
of the wire around the post clockwise. Then the wire will
not slip out as you tighten the thumb nut.
1. Push the dip down.
2. Insert wire into Ipop.