7
lippert.com 432-LIPPERT (432-547-7378) Rev: 08.29.22
Quick Drop Stabilizer
Installation and Owner’s Manual
(For Aftermarket Applications)
CCD-0004455
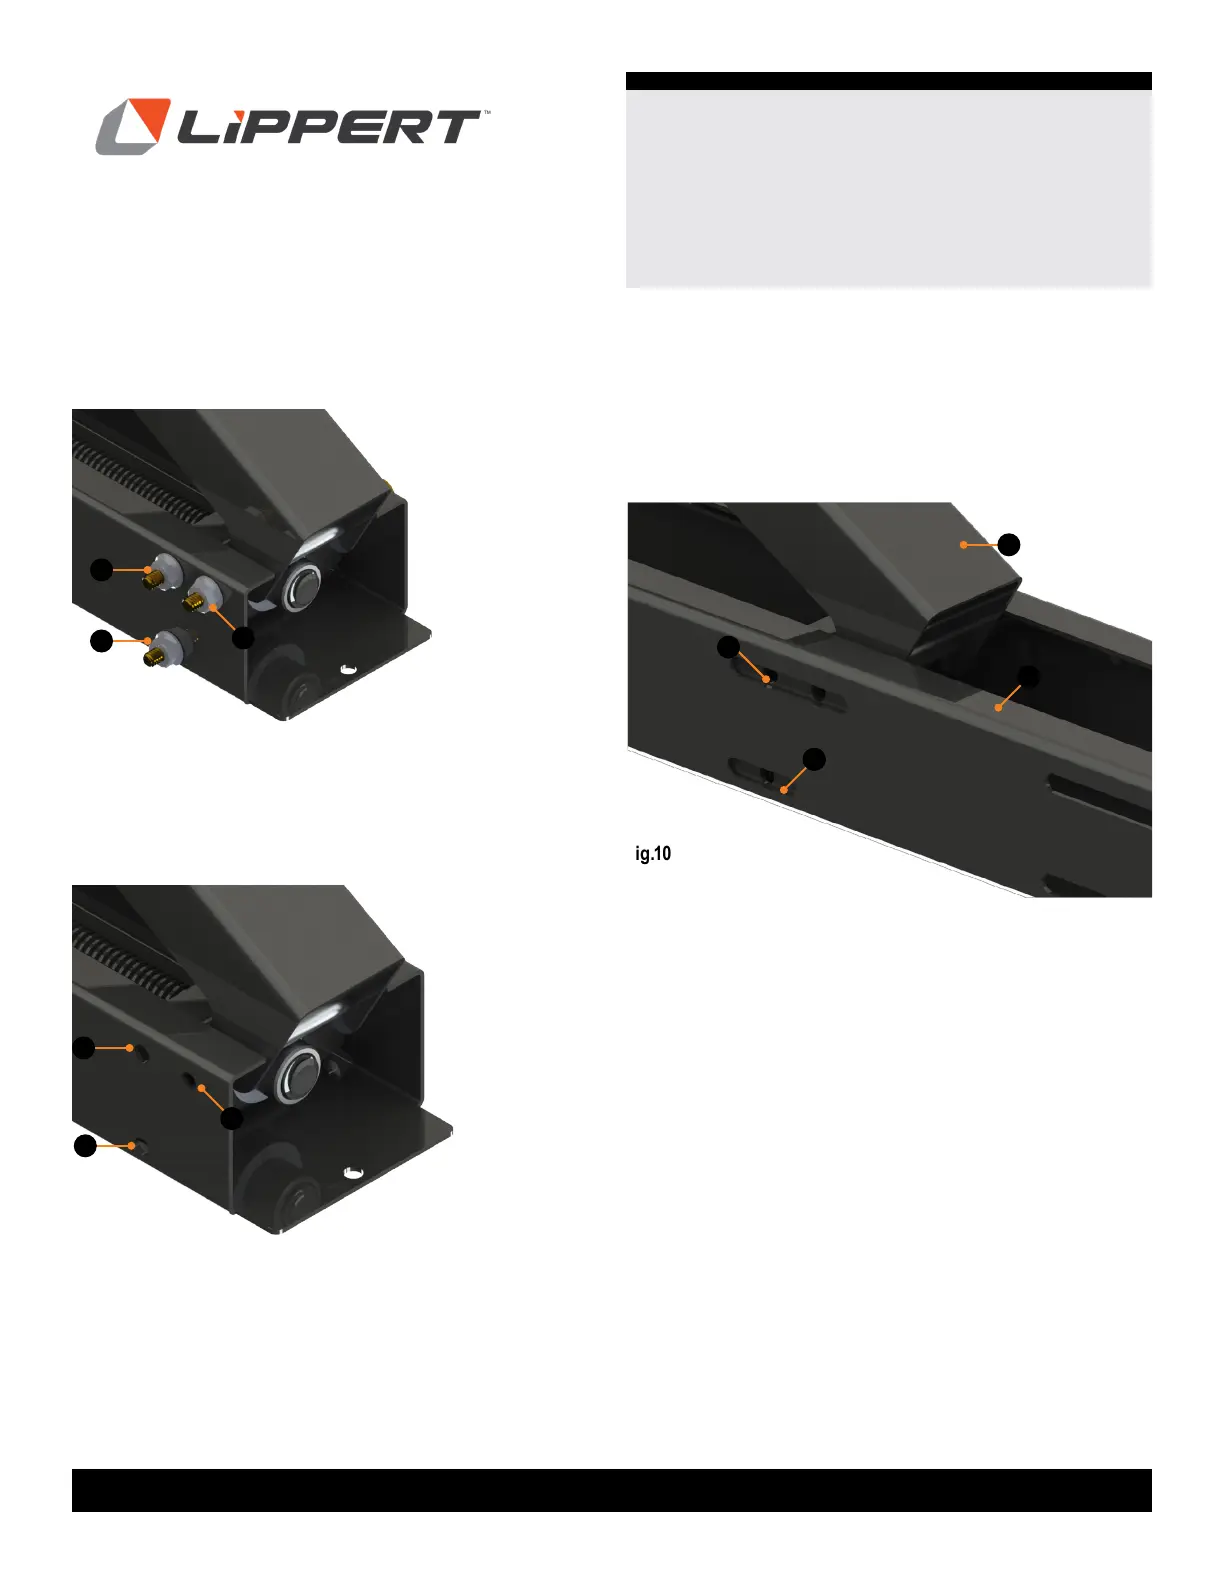
6. Remove nuts (Fig. 8A) and discard.
A
A
A
Fig.8
A
A
A
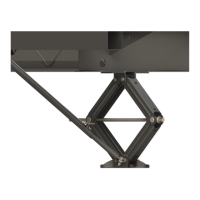
7. Remove bolts by pushing the T.A.R. (Temporary
Alignment Rod) into the shaft (Fig. 9A) with the bolts;
pushing out the bolts on the other side. Retain bolts.
Fig.10
NOTE: The T.A.R.s are just wide enough to hold the
components in place, and allow the end of the stabilizer to
slide into the center piece. Leave the T.A.R.s in place until
stabilizer is slid into center piece.
Fig.9
C
C
A
8. Slide the end of assembly body (Fig. 10A) into center
piece (Fig. 10B) and position in place (Fig. 10C) to
approximate width chosen.
B