8
To maintain your deadzones
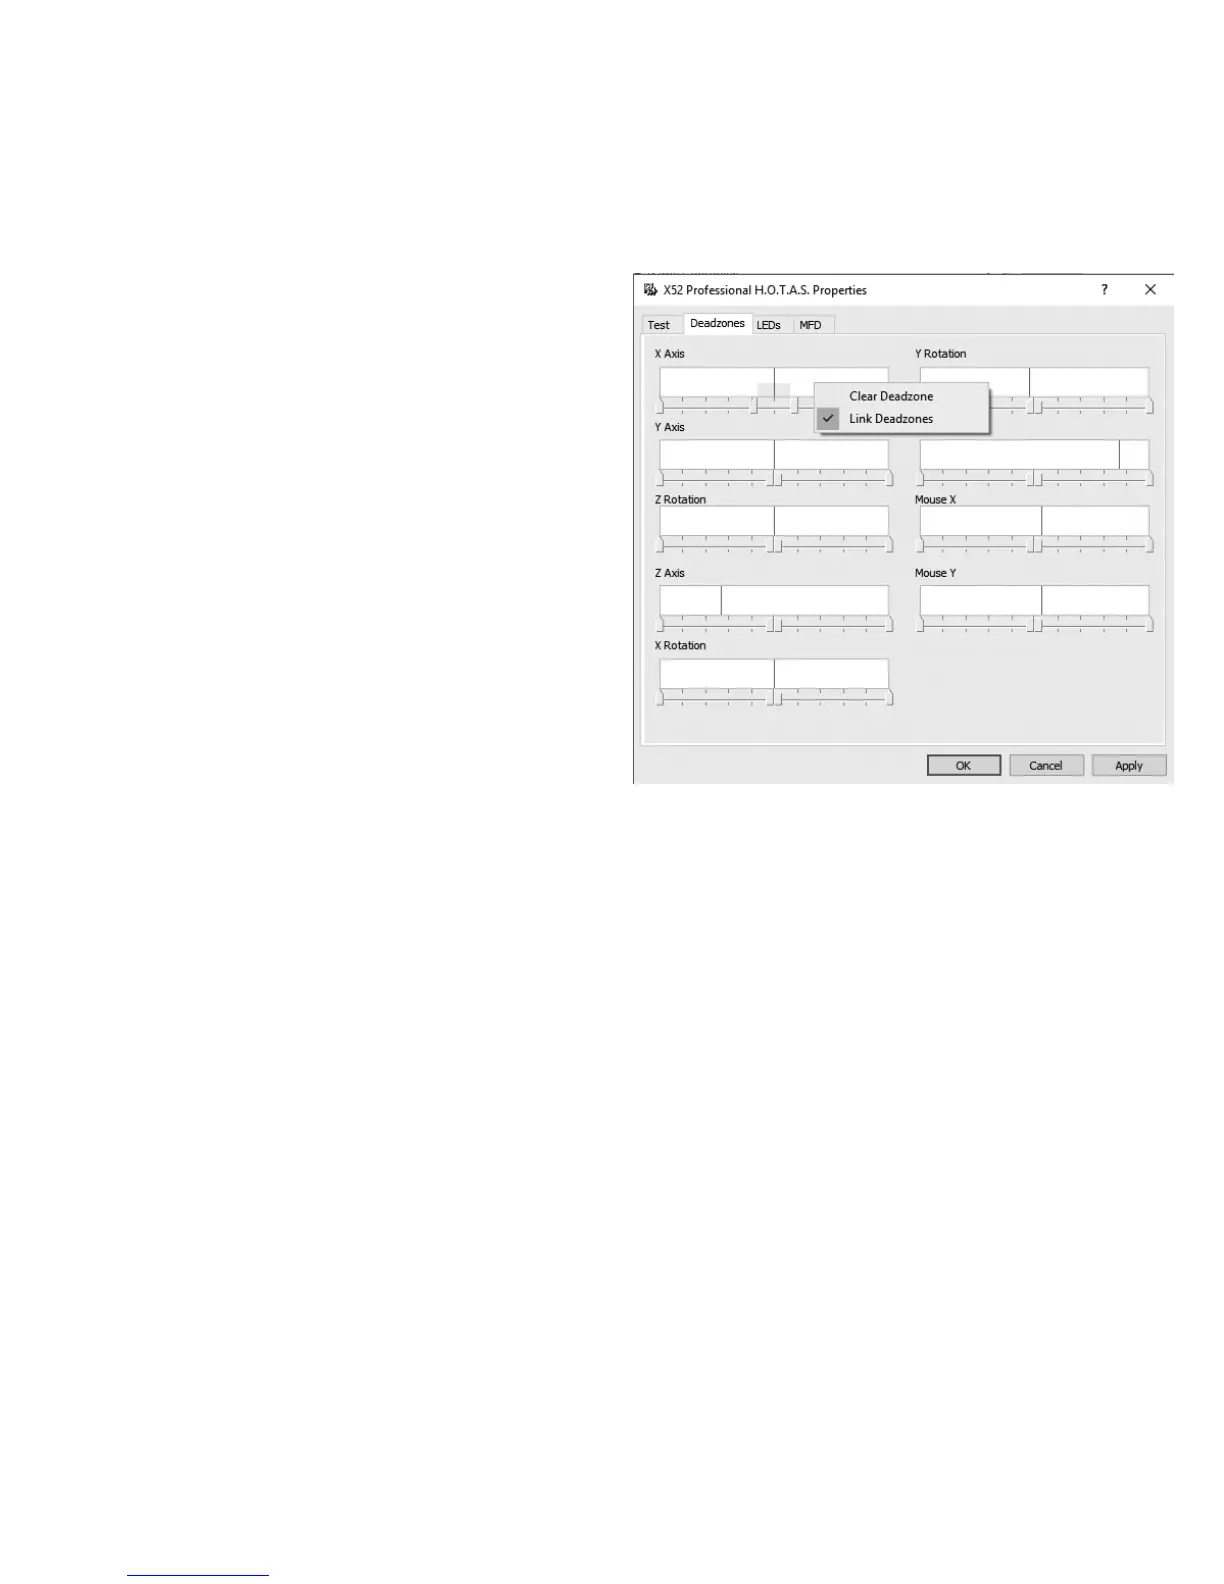
1. Click the Deadzone tab.
The controls you can create deadzones
forare shown, as follows:
Each axis is represented by a white box
thatcontains a red line that represents
where the control is currently sitting.
Movingthe corresponding control moves
thered line. Use this line to determine exactly
where yourdeadzone must begin and end.
Beneatheach box is a sliding scale. You use
this to specify the size of each deadzone.
2. Click on a slider on the sliding scale and
drag it to where you want the deadzone
to end. The area that represents
thedeadzone is shaded gray.
3. Use the center sliders to maintain
thedeadzone around the center point of
an axis. Use the sliders at either end to
create deadzones at either end of the axis.
Tips: By default, clicking on either the right or the left slider in the pair moves both sliders.
You can change this if you just want to adjust one side of the deadzone. To dothis,
right-click anywhere in the white box and select Link Deadzones from the popup list
ofoptions displayed. Repeat this to link the pairs of sliders again.
You can clear existing deadzones for an axis by right-clicking anywhere in the white box
andselecting Clear Deadzone.