EasyManuals Logo

Logitech HARMONY 700 Setup Guide

Logitech HARMONY 700
20 pages
To Next Page IconTo Next Page
To Previous Page IconTo Previous Page
Page #6 background imageLoading...
Page #6 background image
6 English
What to expect
Set aside at least 45 minutes to set up your Harmony remote.
1. Collect your manufacturer and model numbers of all the devices
in your entertainment system.
2. Visit setup.myharmony.com on your computer and download
the MyHarmony desktop software, create your account, and set up
your devices and Activities.
3. Test your remote.
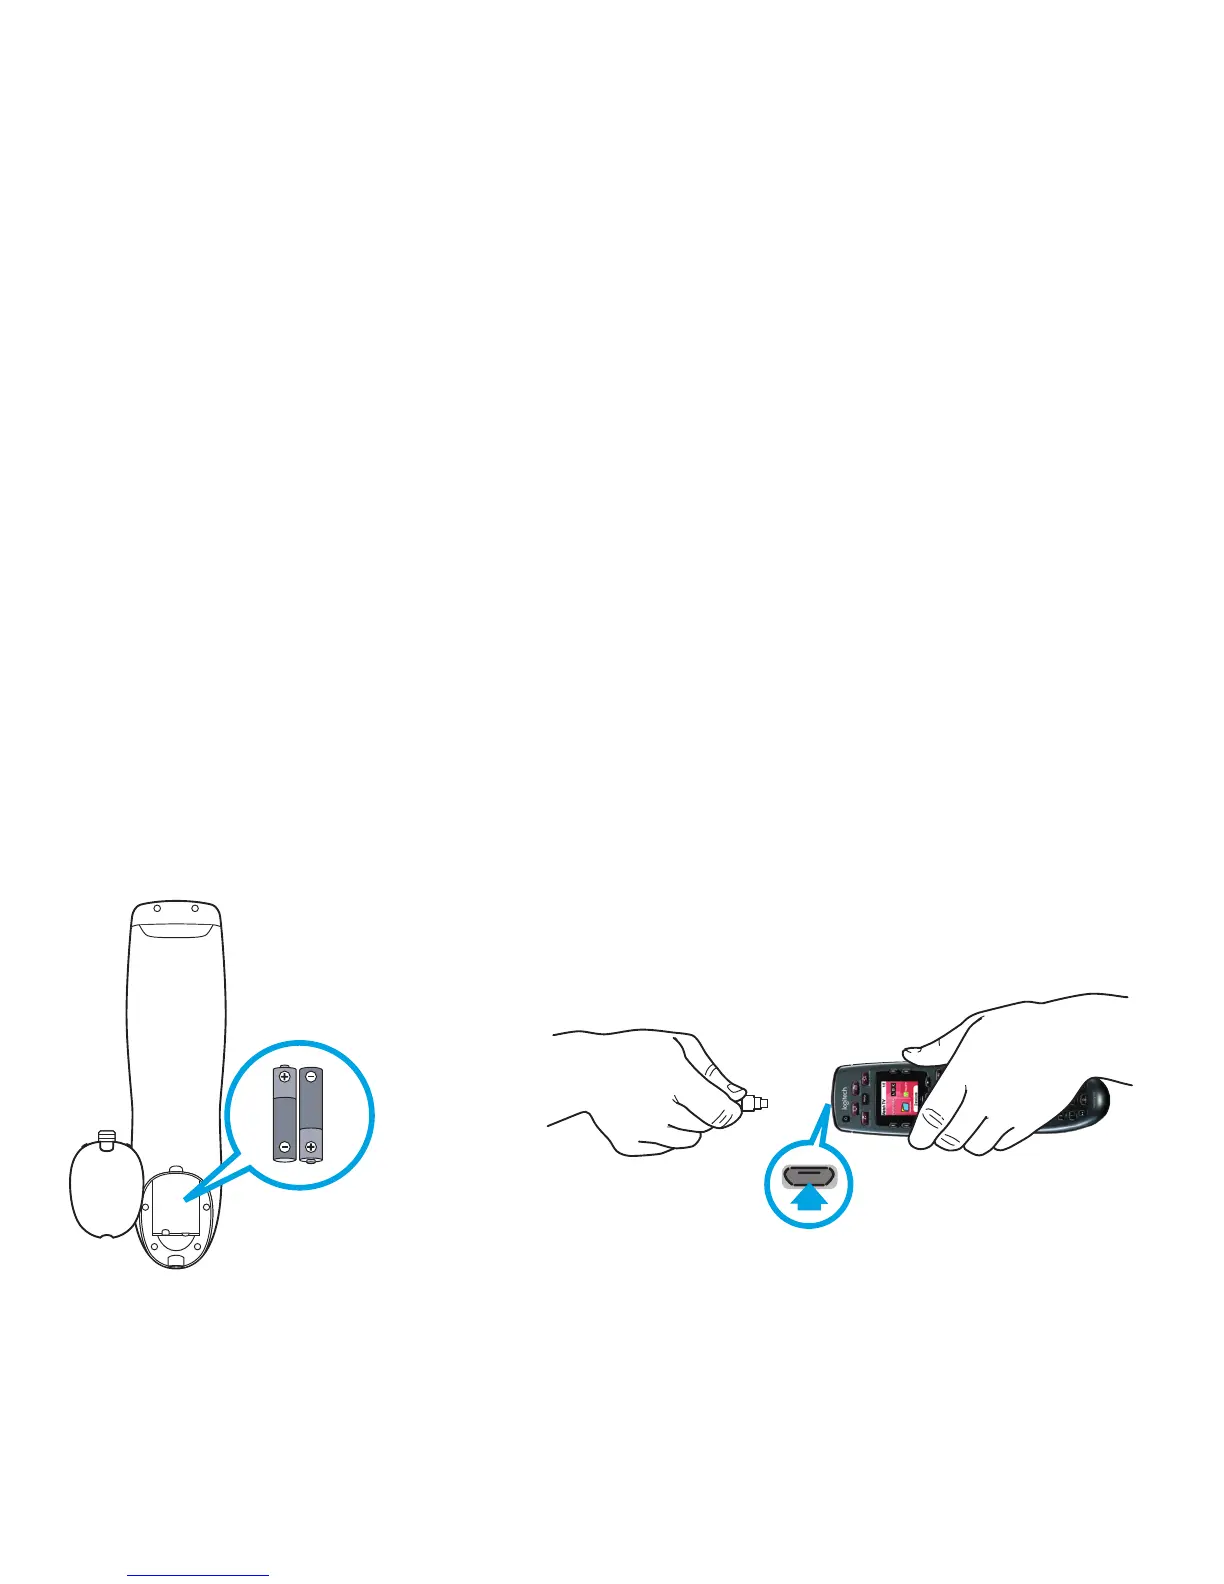
Charging your remote
Charge the batteries before using the remote.
1. Insert the batteries into the remote.
2. Insert the USB cable into the top of the remote.
3. Plug the USB cable into an AC adapter (not included).
4. Plug the AC adapter into an outlet and charge.
Note: Connecting your remote to your PC will not charge the remote’s batteries.

Other manuals for Logitech HARMONY 700

Questions and Answers:

Question and Answer IconNeed help?

Do you have a question about the Logitech HARMONY 700 and is the answer not in the manual?

Logitech HARMONY 700 Specifications

General IconGeneral
LCD Size1.5" Diagonal
LCD Resolution128 x 128
LCD Screen65, 000 Color
Backlit keypadYes
Backlight ColorWhite
Power SourceRechargeable
Power TypeNiMH AA
Brands Supported5, 000+
Devices Supported200, 000+
Maximum number of devices per account6
IR LearningYes (Up to 200 Khz)
Learning CapabilitiesAny IR Device
IR Transmitters2
IR Transmission RangeUp to 50 ft
Warranty2 Years
Memory TypeFlash
Memory Amount2MB
Supported PlatformsWindows 2000/XP/Vista MAC OS X 10.3 +
Weight and Dimensions IconWeight and Dimensions
Weight6 oz (with battery installed)
Dimensions8.75” x 2.3” x 1.3”

Related product manuals