EasyManua.ls Logo

Lorex N841A82 - User Manual

Lorex N841A82
2 pages
Print Icon
To Next Page IconTo Next Page
Loading...
N841_QSG_EN_R3
Test your cameras prior to selecting a permanent mounting location by temporarily
connecting the cameras and cables to your NVR using one of the following 2 methods:
a. Connect cameras directly to the recorder (recommended).
N841 Series
Quick Setup Guide
Physical setup of recorder and essential system settings
b. Connect cameras to a PoE switch or router on your network (not included).
1 / 2
Connect the recorder to your router using the included Ethernet cable.
NOTES:
It may take up to 1 minute for cameras to start up and transmit video to your recorder.
This guide covers connecting IP cameras to your security recorder only. For full instructions on
installing your cameras, please refer to your cameras documentation at lorex.com.
Connecting cameras to a router, or a network switch without PoE, requires a power adapter for
each camera. Refer to your cameras documentation at lorex.com for the correct power adapter
model number.
OR
NOTES:
If you are using a PoE switch, ensure the switch is connected to the same network as your
recorder.
To receive automatic rmware updates and enable remote viewing with mobile apps, a high
speed Internet connection is required (minimum upload speed of 5Mbps required for 4K viewing;
3.5Mbps for lower resolutions). All other system features can be used without an Internet
connection.
Copyright © 2020 Lorex Corporation
As our products are subject to continuous improvement, Lorex reserves the right to modify product design, specications
and prices, without notice and without incurring any obligation. E&OE. All rights reserved.
Need Help?
Visit us online for up-to-date software
and complete instruction manuals
Click on the Downloads tab
4
Visit lorex.com
Search for the model
number of your product
Click on your product
in the search results
3
2
1
See the steps below (expanded instructions to the right) to complete initial setup of the
recorder:
Lorex Fusion supports connectivity with select wireless devices to the NVR. To learn more
about fusion connectivity and which Lorex devices are compatible with this feature, visit
lorex.com/pages/fusion.
* Not included / sold separately.
For camera compatibility information, visit lorex.com/compatibility.
STEP 1:
Connect cameras*
STEP 2:
Connect router*
STEP 3:
Connect mouse
STEP 5:
Connect power
STEP 4:
Connect monitor*
Overview of extra ports:
NOTE: For full instructions on using the extra ports, please refer to your security recorder’s instruction
manual at lorex.com.
Audio In/Out
Connect microphone / speaker*
Setting Up Your Recorder
USB MouseEthernet CablePower Adapter HDMI Cable
4K Ultra HD Security NVR
12.8” / 324mm
9.8” / 249mm
2.4”
60mm
Package Contents
Dimensions
Lorex Fusion
s
STEP 1: Connect cameras*
Connect the recorder to a monitor using the included HDMI cable or a VGA cable (not
included). The HDMI port supports up to 4K resolution, and VGA supports up to 1080p.
Connect the included mouse to a USB port on the recorder.
Use the included power adapter to connect the recorder to a nearby outlet.
OR
IMPORTANT: To optimize picture quality, set the recorder’s video output to match the resolution of your
monitor. See the section Changing the Recorder’s Output Resolution on the rear for details.
Back panels shown below are for illustration only. Your recorder’s back panel
may appear different, with all the same ports in different locations.
STEP 2: Connect router*
STEP 3: Connect mouse
STEP 4: Connect monitor*
STEP 5: Connect power
To quickly open a window that displays vital system information such as device ID, model
number, rmware version, and IP address:
Reference: Quick Access to System Information
Tap the button on the front panel of the recorder.
Right-click to open the Quick Menu and click Info.
OR
STEP 6:
Lorex Setup
Wizard
Record your password below and store in a secure place:
When you rst power up your recorder, the
Lorex Setup Wizard will begin. The Wizard will help you
congure core system settings.
You will also create a secure password. For future reference,
it is recommended that you record your password here:
STEP 6: Lorex Setup Wizard
Question and Answer IconNeed help?

Do you have a question about the Lorex N841A82 and is the answer not in the manual?

Summary

Connect Cameras

Direct Camera Connection

Connect cameras directly to the recorder for initial testing and setup.

PoE Switch;Router Connection

Connect cameras to a PoE switch or router on your network for setup.

Connect Router

Connect Mouse

Connect Monitor

Connect Power

Lorex Setup Wizard

Using the Mouse

Mouse Navigation Modes

Details on using the mouse for split-screen, menus, and live view operations.

Quick Menu Functions

Accessing and utilizing the Quick Menu for various recorder functions.

Adding Network Cameras

LAN Camera Connection

Steps to connect and add IP cameras from your local area network (LAN).

Camera Registration Process

Details on registering cameras and checking their connection status.

Playback and Recording Search

Playback Configuration

How to select dates, channels, and playback times for recorded video.

Backup Recordings

Backup Configuration

Steps to search, select, and back up recordings to a USB flash drive.

Advanced Detection Settings

Person;Vehicle Detection Setup

Configuring areas, schedules, and preferences for person/vehicle detection.

Active Deterrence Configuration

Setting up active deterrence with warning lights, sirens, and sensitivity.

Adjusting Video Output Resolution

Resolution Matching

Setting the recorder's output resolution to match your monitor's capabilities.

Overview

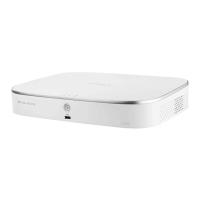
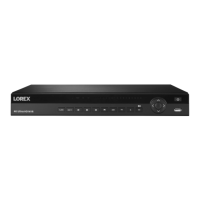
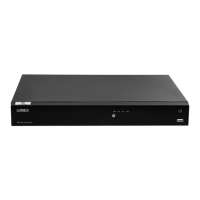
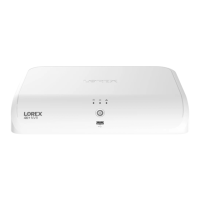
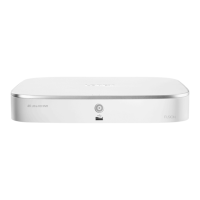
This document describes the setup, usage, and maintenance features of a Lorex N841 Series 4K Ultra HD Security NVR (Network Video Recorder).

Function Description

The Lorex N841 Series NVR is a security system designed for recording and managing video surveillance from IP cameras. It supports 4K Ultra HD resolution, allowing for high-quality video capture. The system is capable of connecting directly to IP cameras or through a PoE switch/router on a network. It offers advanced features such as person/vehicle detection, active deterrence with warning lights and sirens, and remote viewing via mobile apps when connected to the internet. The NVR stores recordings on an internal hard drive and allows for backup to external USB flash drives.

Usage Features

Initial Setup:

The Quick Setup Guide outlines a straightforward process for getting the NVR operational.

  1. Connect Cameras: Cameras can be connected directly to the NVR's PoE ports or to a PoE switch/router on the network. It's recommended to test cameras before permanent installation. The system may take up to a minute for cameras to start transmitting video.
  2. Connect Router: The NVR connects to a router via an Ethernet cable for internet access, enabling automatic firmware updates and remote viewing. A high-speed internet connection (minimum 5Mbps upload for 4K viewing) is recommended.
  3. Connect Mouse: A USB mouse is included and connects to a USB port on the recorder for navigation.
  4. Connect Monitor: The NVR connects to a monitor using an HDMI cable (up to 4K resolution) or a VGA cable (up to 1080p). It's important to match the NVR's video output resolution to the monitor's highest supported resolution for optimal picture quality.
  5. Connect Power: The included power adapter connects the NVR to a nearby electrical outlet.
  6. Lorex Setup Wizard: Upon first power-up, the Setup Wizard guides the user through configuring core system settings and creating a secure password. Users are advised to record this password for future reference.

General Operation (Using the Mouse):

  • Live View: In split-screen display mode, clicking an individual channel displays it in full-screen. Clicking again returns to split-screen. During live view, the scroll wheel can be used to zoom in/out. Hovering the mouse cursor over the top of the screen reveals the Navigation Bar.
  • Menus: Clicking anywhere on the screen in live view opens the Quick Menu. Clicking in menus exits them.

Quick Menu Functions:

The Quick Menu, accessible by right-clicking in live view, provides quick access to various functions:

  • Select camera/live display view.
  • Control PTZ (Pan-Tilt-Zoom) cameras (if applicable).
  • Control auto-focus cameras (if applicable).
  • Adjust camera color and image settings.
  • View system information.
  • Start/stop sequence mode.
  • Temporarily disable all audible warnings.
  • Search and play back recordings.
  • Search for and play back person/vehicle detection events.
  • Open manual recording controls.
  • Add IP cameras over the LAN.
  • Open the Main Menu.

Adding Cameras from the LAN:

For cameras not directly connected to the NVR's PoE ports, they can be added from the local area network.

  1. Connect the camera to a router or switch on the same network as the NVR.
  2. Access the "Device Search" function from the Quick Menu.
  3. Search for available cameras, select the desired ones, and click "Add." The status indicator will turn green upon successful connection. If red, there might be a password issue, and the "Reconnect IPC" option can be used.

Advanced Motion Detection & Deterrence Settings:

The NVR supports advanced person/vehicle detection and active deterrence features for compatible cameras.

  1. Access the "Main Menu," then "EVENT," and select the "Deterrence" tab.
  2. Person/Vehicle Detection:
    • Select the camera channel and enable person/vehicle detection.
    • Define active areas for detection using a grid overlay (Figure 1). For best results, set areas where objects will move within and into/out of the bounding box.
    • Set a weekly schedule for detection (Figure 2).
    • Configure preferences for warning lights and sirens.
  3. Active Deterrence:
    • Select the deterrence camera channel and enable deterrence.
    • Define active areas for deterrence (Figure 3). Motion within the green active area will trigger the warning light.
    • Set a weekly schedule for deterrence.
    • Configure preferences for warning lights and sirens, including strobe options.
    • Adjust sensitivity and threshold levels.
    • To manually activate all connected deterrence cameras' warning lights and sirens, press and hold the front panel button for 3 seconds.

Recordings stored on the hard drive can be searched and played back.

  1. From live view, right-click and select "Playback."
  2. Use the calendar to select the date.
  3. Check the desired channels and select video quality (Mainstream or Substream).
  4. Click inside the video bar to select the playback time, and playback will begin immediately.

Reference: Quick Access to System Information:

To quickly view system information (device ID, model number, firmware version, IP address), tap the button on the front panel of the recorder or right-click to open the Quick Menu and click "Info."

Lorex Fusion:

Lorex Fusion allows connectivity with select wireless devices to the NVR, expanding the system's capabilities. More information on compatible devices is available on the Lorex website.

Maintenance Features

Backup Recordings:

Recordings can be backed up from the NVR's hard drive to a USB flash drive.

  1. Insert a USB flash drive into a free USB port on the recorder.
  2. From live view, right-click and select "Main Menu," then "BACKUP."
  3. Configure the backup settings:
    • Select the type and quality of recordings.
    • Select the channel(s).
    • Set a start and end time for the search.
    • Choose a file format (e.g., AVI).
    • Click "Add" to find matching recordings.
    • Select the desired recordings and click "Start" to begin the backup, or use "Onekey Backup" to back up all matching files.

Changing the Recorder's Output Resolution:

To ensure optimal picture quality, the NVR's output resolution should match the monitor's highest supported resolution.

  1. From live view, right-click and select "Main Menu," then "Display."
  2. Set the "Resolution" to match the monitor (e.g., 3840x2160 for 4K, or 1920x1080 for 1080p).
  3. Click "OK." The recorder will restart for the changes to take effect. It's crucial to ensure the selected resolution is supported by the monitor before switching, especially if changing monitors.

The manual emphasizes that Lorex reserves the right to modify product design, specifications, and prices without notice, reflecting a commitment to continuous improvement. Users are encouraged to visit lorex.com for up-to-date software, complete instruction manuals, and compatibility information.

Lorex N841A82 Specifications

General IconGeneral
Video Channels8
Power Supply12V DC
Video OutputHDMI, VGA
Operating SystemEmbedded Linux
Motion DetectionYes
Storage CapacityUp to 10TB
Audio Channels1
Network InterfaceEthernet
Remote Viewing via AppYes (Lorex Home app)
Operating Temperature14°F to 131°F (-10°C to 55°C)
Video Resolution4K (3840 × 2160)
Max Resolution4K (3840 × 2160)
Compression FormatH.265/H.264

Related product manuals