How-To Document
Updated on:
11/13/2008
By:Christopher Ware
Page 11 of 13
c. With a T9 torque wrench turn the set screw on the base unit.
i. 1 turn clockwise will raise the machine head 0.5mm
ii. 1 turn counter-clockwise will lower the machine head 0.5mm
d. Repeat the directions stated in step 8 f through w.
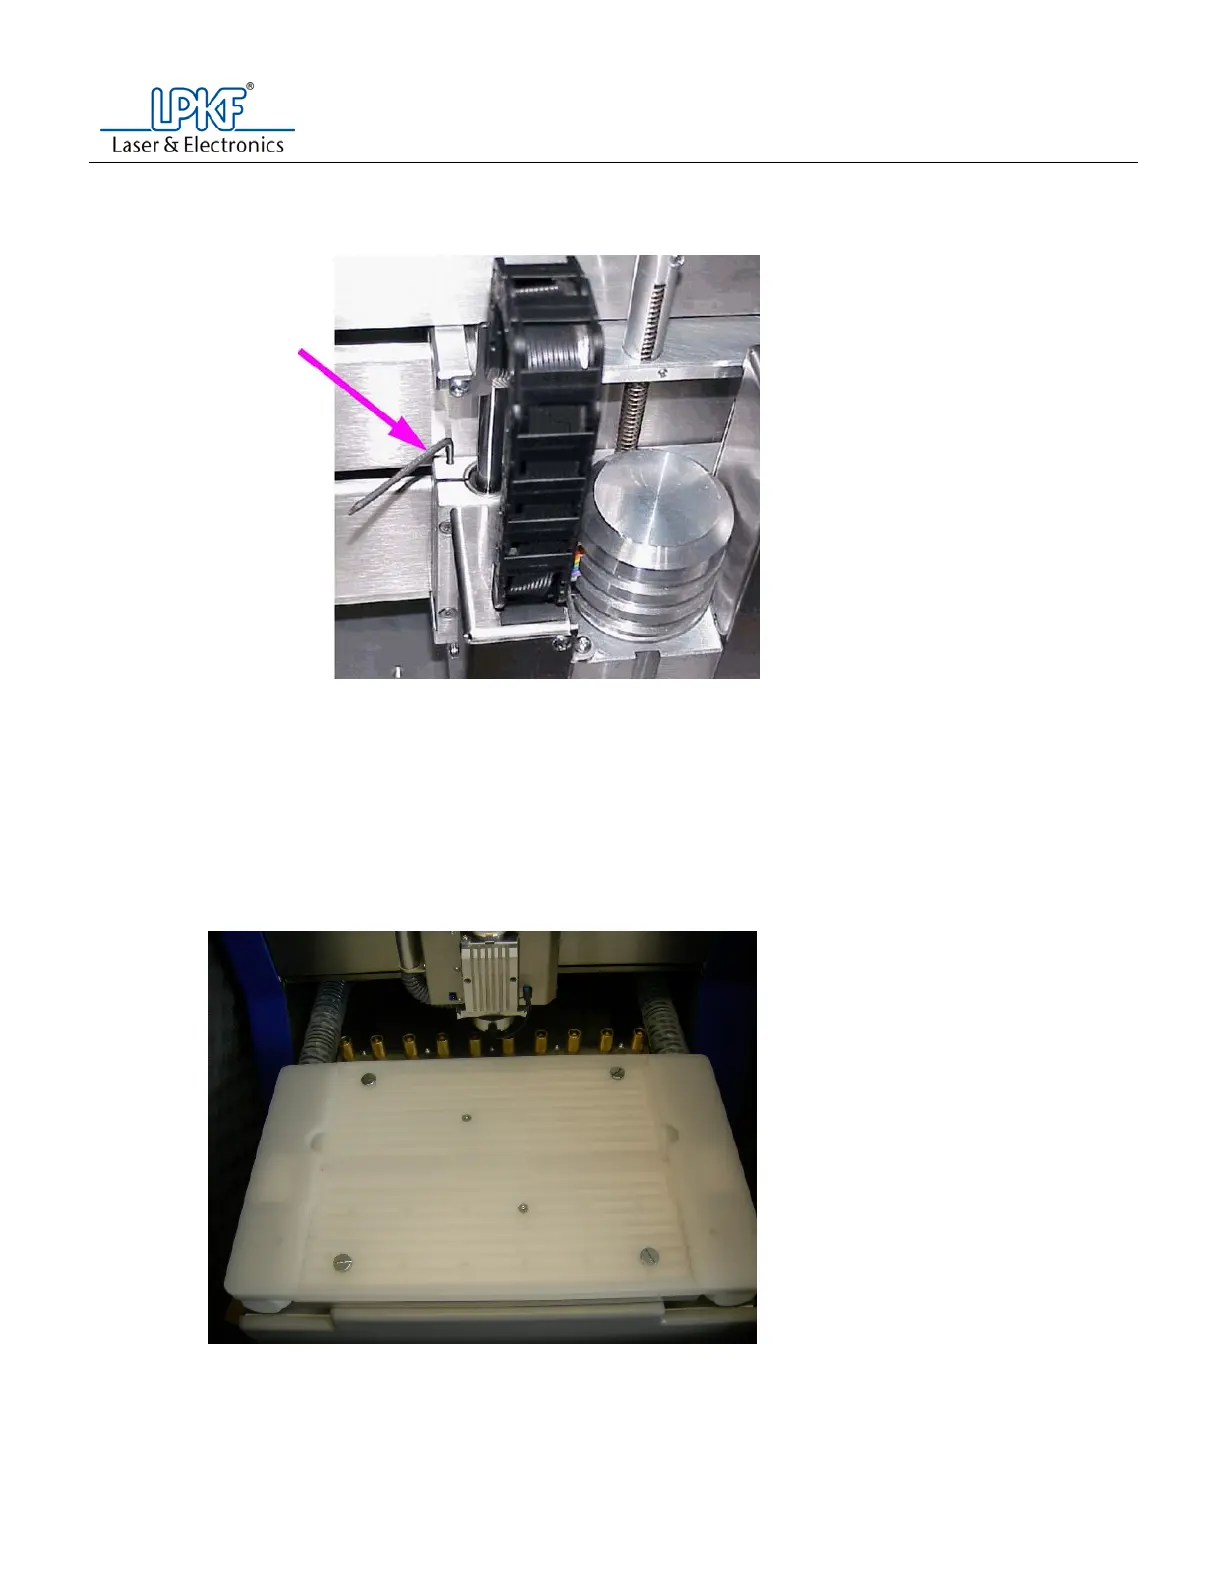
e. Place the vacuum hose holder into position.
f. Insert and tighten the two T10 torque screws on the vacuum hose holder.
g. Attach the bottom vacuum hose from the hose holder to the left side of the working depth limiter.
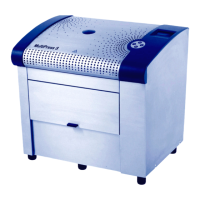
9. If previously installed, mount the vacuum table
a. Move the machine to the pause position
b. Re-attach the two (2) vacuum tubes to the vacuum table
c. Insert and hand tighten the two (2) T20 torque screws securing the vacuum table to the table top.
d. Insert and hand tighten the six (6) large tip flat head screws securing the vacuum table to the table
top.
e. Tighten all screws.
f. Place the white underlay material into the vacuum table bed.