LRAD 500X
13
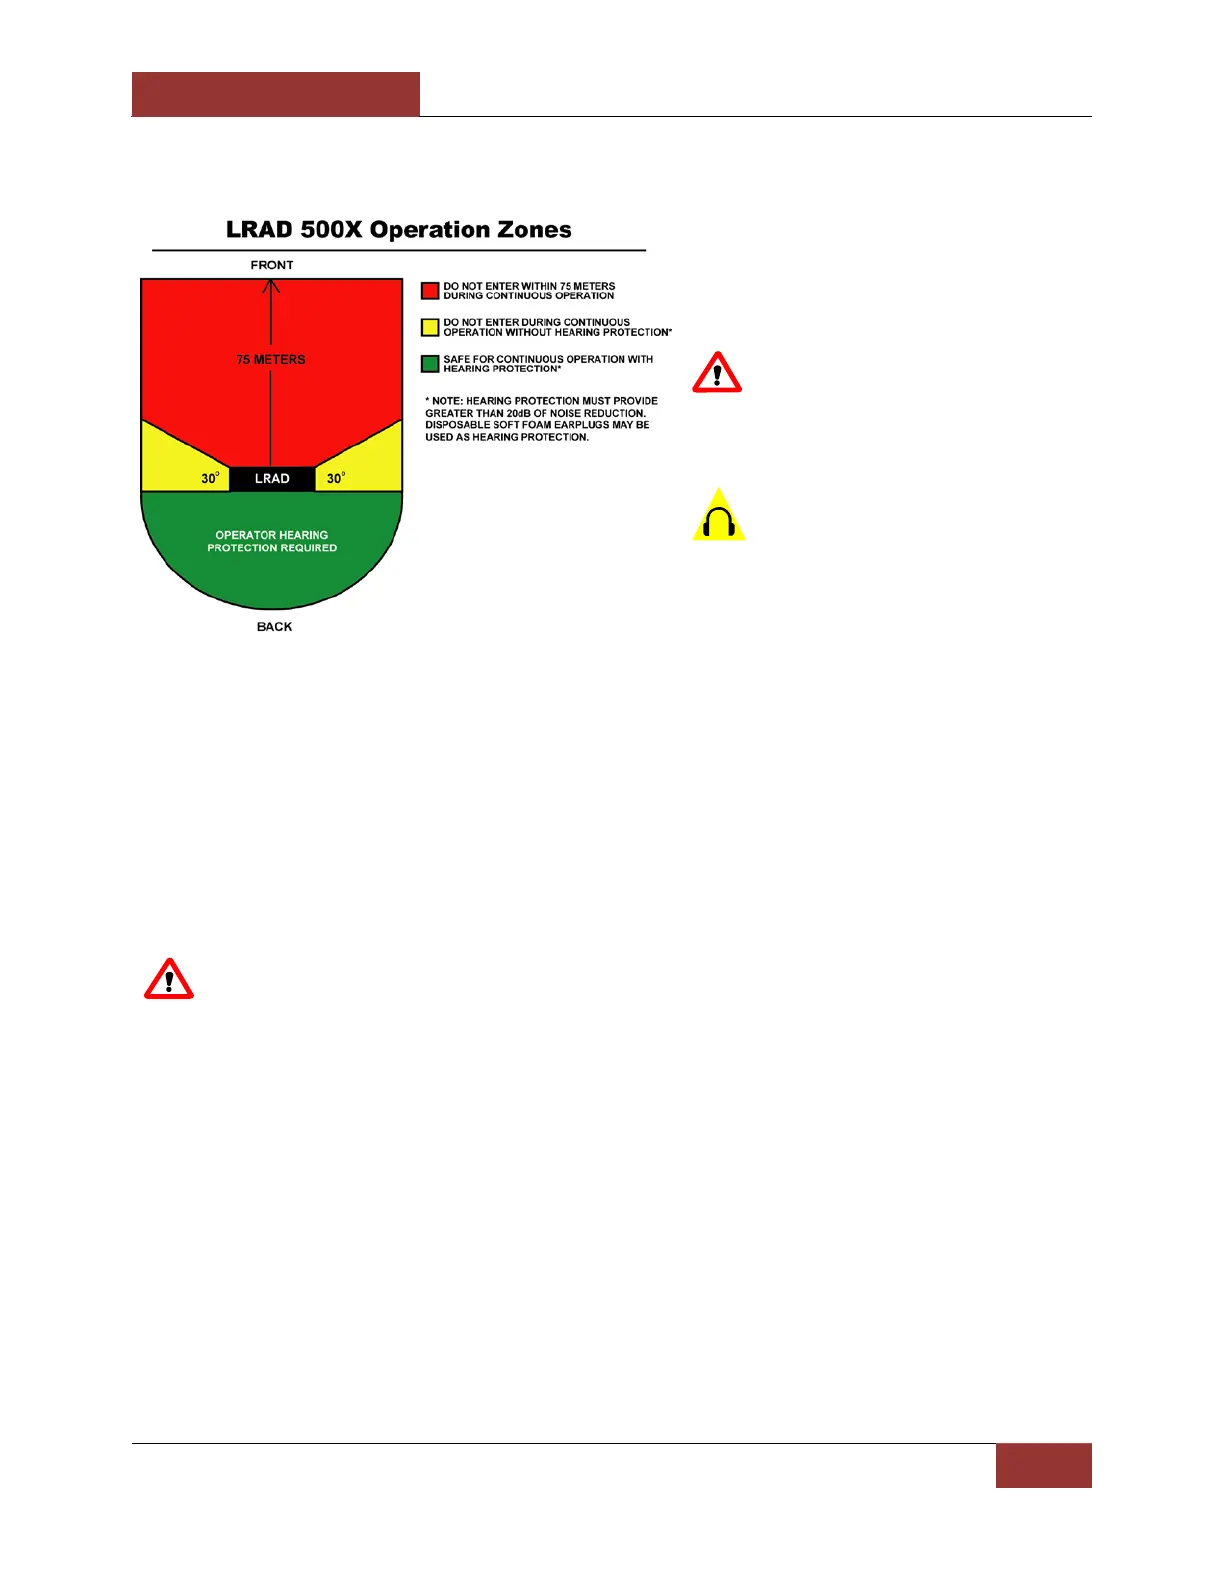
3. LRAD Safety Zones
Refer to the diagram on the left to
ensure nearby personnel are not
exposed to excessive sound pressure
levels.
WARNING: Be sure to clear
personnel from the area within 75
meters of the front of the unit prior to
activating high volume broadcasts.
The LRAD-500X is provided with
foam earplugs that provide the 20dB of
noise reduction required for operators
behind the unit and people in the 30
degree side-lobe areas shown in the
diagram.
4. Connect Power to the Unit
The LRAD-500X is provided with a 12’ power cord that mates with the input connector on the
LRAD and is un-terminated on the other end. Consult the wiring documentation specific to
your installation for instructions on how to terminate and protect the connection to the power
source. For turret-mounted applications, ATC recommends the use of breakaway connectors to
prevent damage due to entanglement with the power cables. These breakaway connectors are
included with the power cord supplied.
WARNING: Ensure the volume control is at the lowest setting before powering up the
unit.
The power supply to the LRAD-500X should be able to supply between 12 and 28VDC at 25 to
11 Amps.
Ensure that the power supply is switched off prior to making or breaking the power connection
to the LRAD-500X. When using a battery for power, the use of a battery switch is
recommended.
5. Power up and System Check
When power is connected, flip the main power switch to the on position.
Observe the indicator LEDs. The Power LED will illuminate green, and the Fault LED will flash
red momentarily while the amplifiers boot up and perform self-tests. When the amplifiers are
ready, the Fault LEDs should turn off, indicating that the unit is ready to operate.
6. MP3 Player
Not used Audio Out Aux in/USB