Original Instructions Lumedica OQ LabScope 1.2 | Page 15 of 26
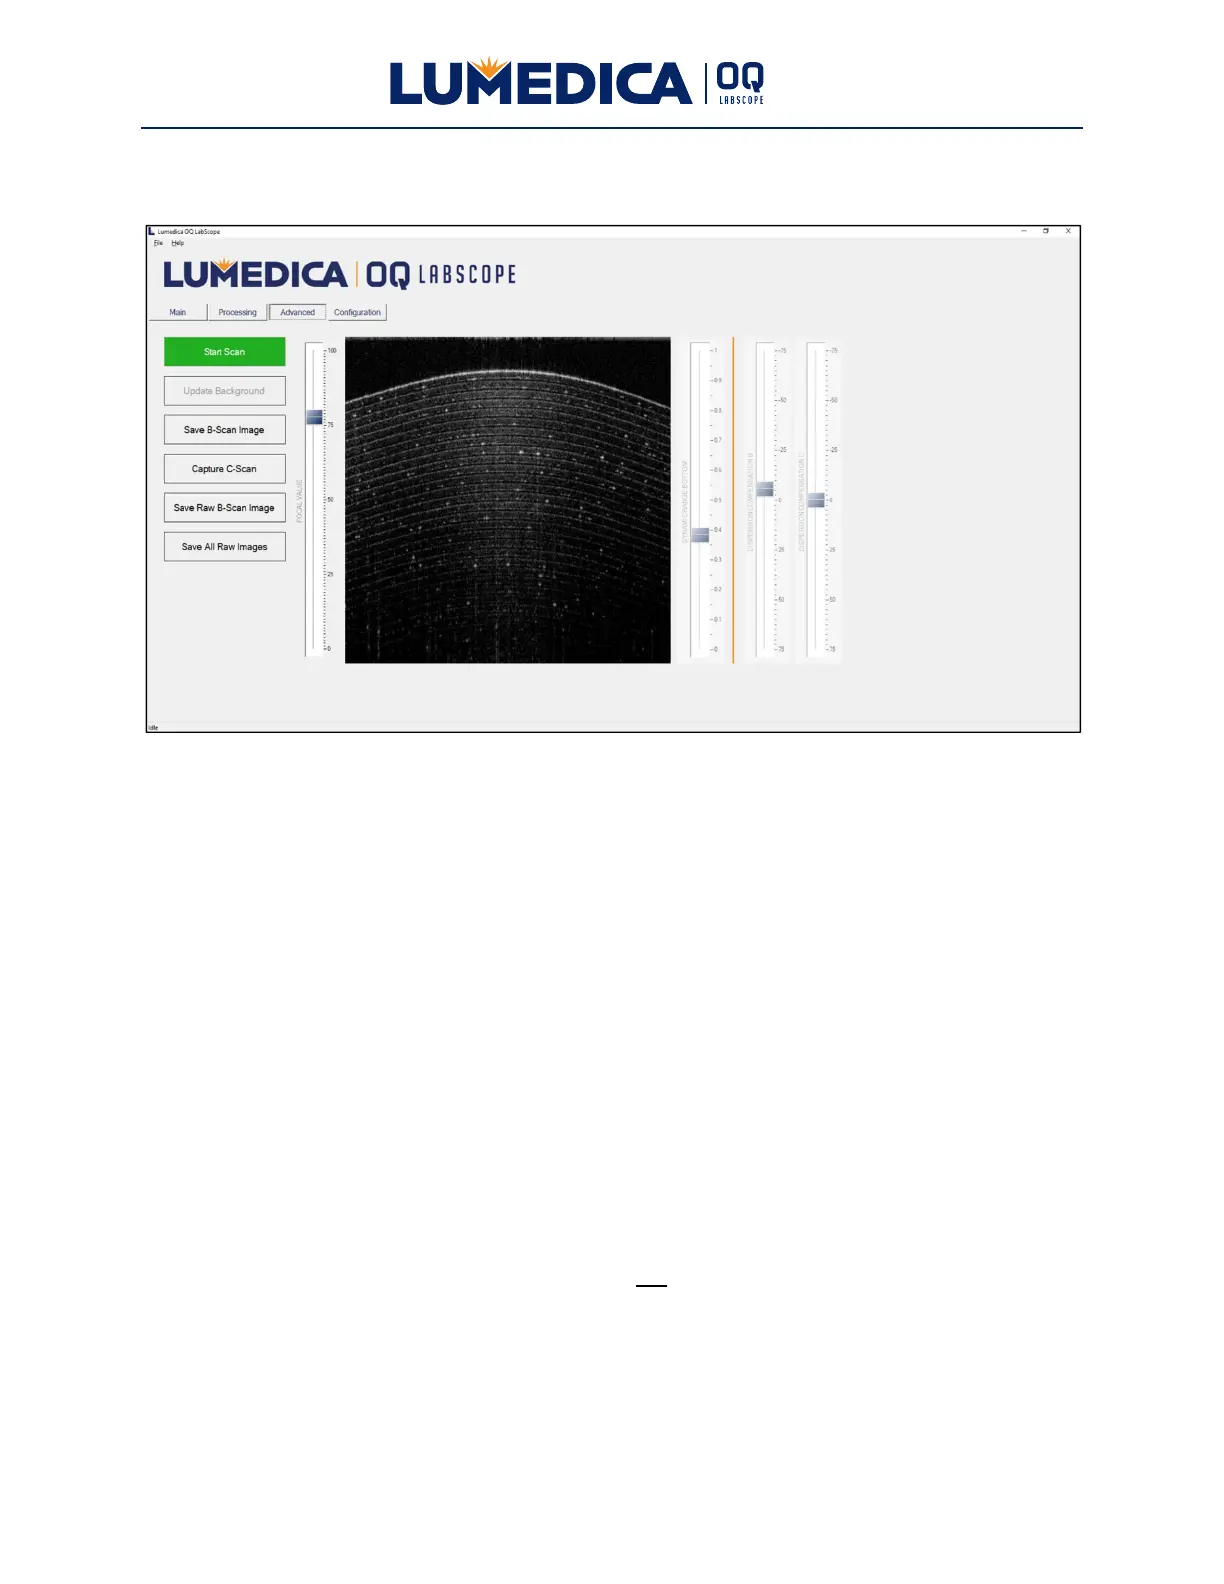
Advanced Tab
This tab provides additional control over how the OCT image is acquired and processed.
Buttons:
Start Scan/Stop Scan — Start and stop the acquisition of OCT images.
Update Background — Available when the system is acquiring OCT images, i.e. the
Start/Stop button says “Stop Scan”. When this button is pressed the system will acquire a
background frame which is then subtracted from all subsequent frames. As the system drifts
over time, horizontal lines will appear in the OCT image. Updating the background will
minimize these horizontal lines. Remove the sample before updating the background so that
the OCT image does not become part of the background.
Save B-Scan Image — Available when the system is not acquiring OCT images, i.e. the
Start/Stop button says “Start Scan”. When this button is pressed, the system will save the
displayed image in both .tif and .jpg formats. The directory where the files are saved is
C:\Users\Public\Documents\Lumedica\OctEngine\Data. The files are named “BSCAN-SGL-
#date#-#time#” where #date# is the current date and #time# is the time when the file was
saved.
Capture C-Scan — Available when the system is not acquiring B-scan OCT images, i.e. the
Start/Stop button says “Start Scan”. When this button is pressed, the system will initiate a
single C-Scan acquisition with the default value of 32 B-Scans per C-Scan. The number of B-
Scans per C-Scan is selectable on the Configuration tab. The images are stored in the image
buffer and can be saved to disk using the “Save All Images” button on the Processing tab.