9
Battery Connection
CAUTION: To safety operation and regulation compliance, it’s requested to install a separate DC over-current
protector or disconnect device between battery and inverter. It may not be requested to have a disconnect
device in some applications, however, it’s still requested to have over-current protection installed. Please refer
to typical amperage in below table as required fuse or beaker size.
WARNING! All wiring must be performed by a qualified personnel.
WARNING! It's very important for system safety and efficient operation to use appropriate cable for battery
connection. To reduce risk of injury, please use the proper recommended cable and terminal size as below.
Recommended battery cable and terminal size:
Please follow below steps to implement battery connection:
1. Assemble battery ring terminal based on recommended battery cable and terminal size.
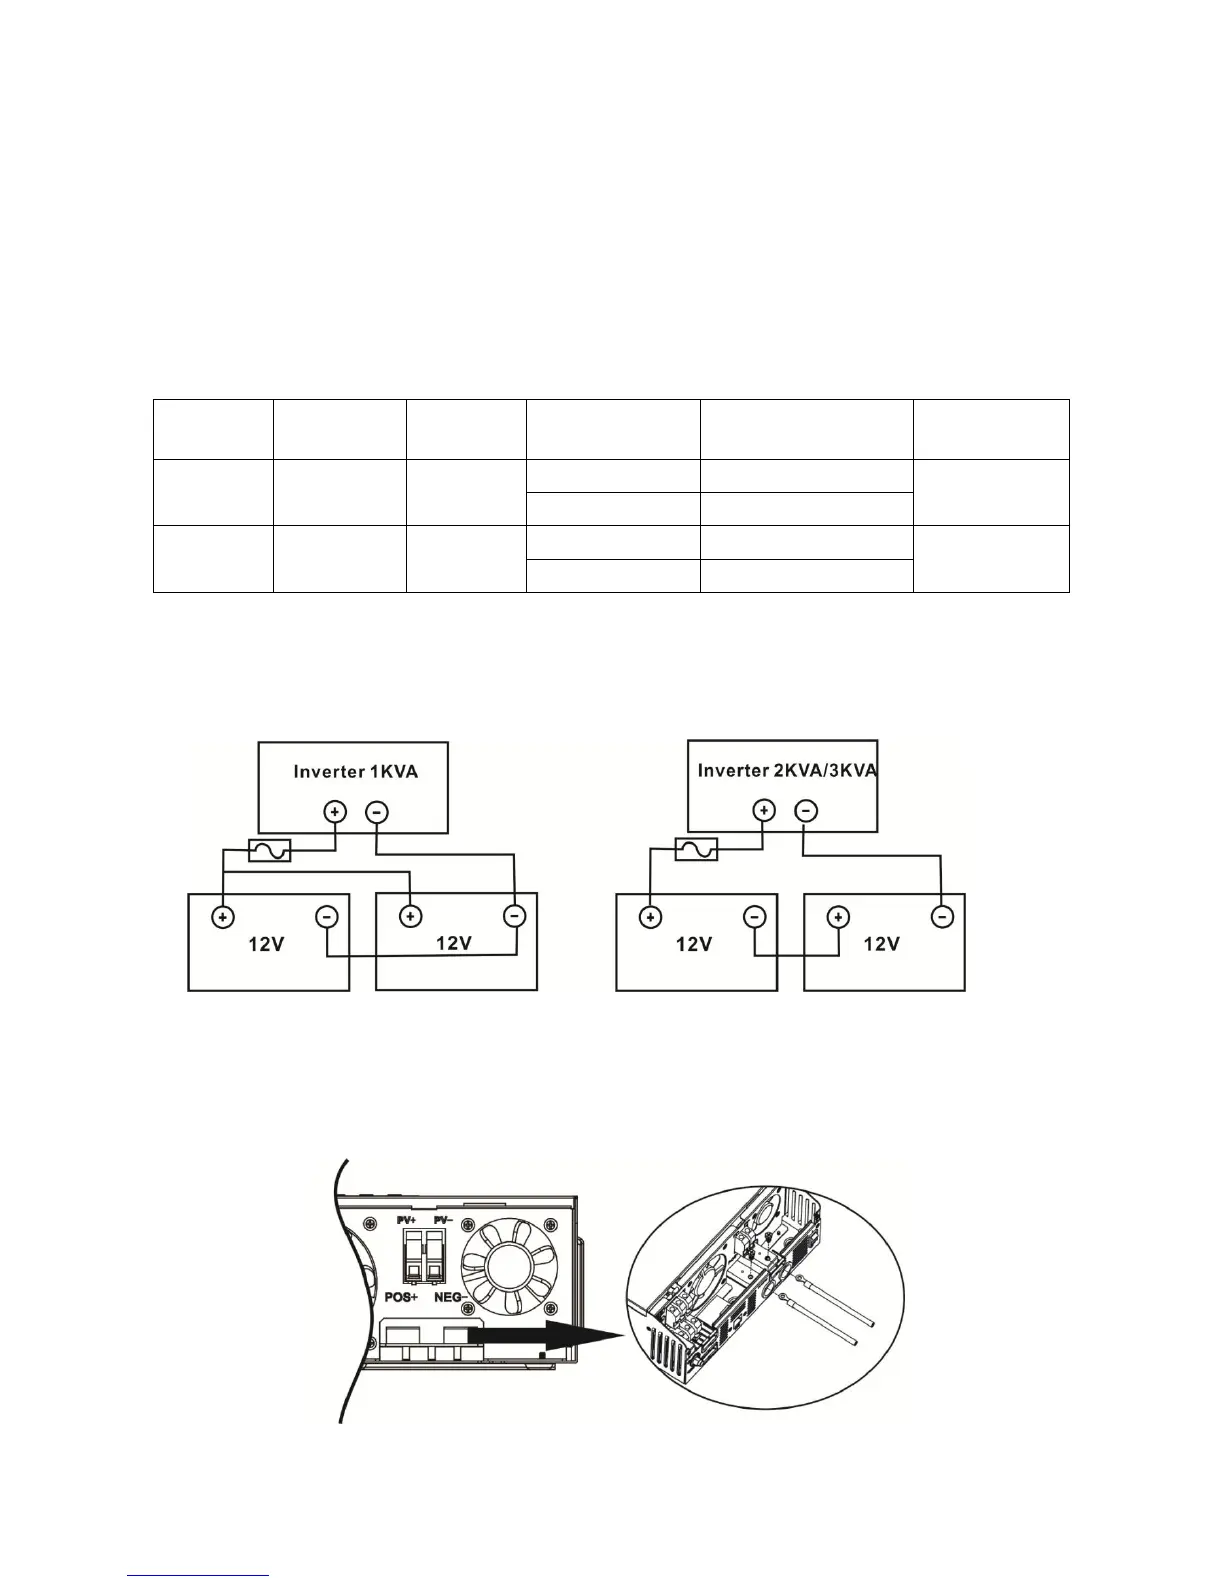
2. 1KVA model supports 12VDC system and 2KVA/3KVA model supports 24VDC system. Connect all battery
packs as below chart. It’s suggested to connect at least 100Ah capacity battery for each.
NOTE: Please only use sealed lead acid battery or sealed GEL/AGM lead-acid battery.
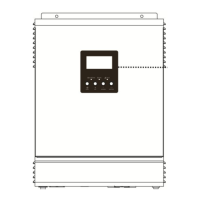
3. Insert the ring terminal of battery cable flatly into battery connector on the inverter and make sure the
bolts are tightened to a torque of 2-3 Nm. Make sure polarity at both the battery and the inverter/charge is
correctly connected and ring terminals are tightly screwed to the battery terminals.