Insert the regulator inlet into the cylinder valve and turn the
black coupler clockwise until the coupler is hand tight. Do
not over-tighten this connection.
To disconnect the coupler, first make sure the main cylinder
valve is turned off. Grasp the coupler and turn counter
clockwise. The inlet will then disengage.
Always leak-test the connection after refilling or exchanging
LP cylinders. (See INDEX: “Leak Test” for further details.)
GAS LINE PURGING
You should purge the gas line of air before attempting to
light the grill.
•Make sure all grill controls are in the “OFF” position.
•Slowly turn on the main gas supply.
•Push in the rotisserie knob and confirm that the igniter
is glowing. It is furthest from the fuel source and will
completely purge the lines. It will take several seconds for
the burner to light.
•Hold the knob ON for about 20 seconds to allow the air
in the system to purge and the burner to light
•Wait at least 5 minutes after shutting off the control
before attempting to light the burners.
GAS CONVERSION KITS
Gas conversion kits are available from Lynx Grills to allow
the grill to operate on either Natural gas or LPG. These kits
should be installed by a qualified technician.
The kits come with complete installation instructions.
These instructions should be read completely and fully
understood before installing the conversion kit.
BUILT-IN INSTALLATION
•Shut off the gas supply at the main valve.
•Disconnect all plumbing (if already attached) from the grill
and the gas supply valve.
•Remove all the fittings from the grill manifold.
•Install the side burner into the counter top cutout.
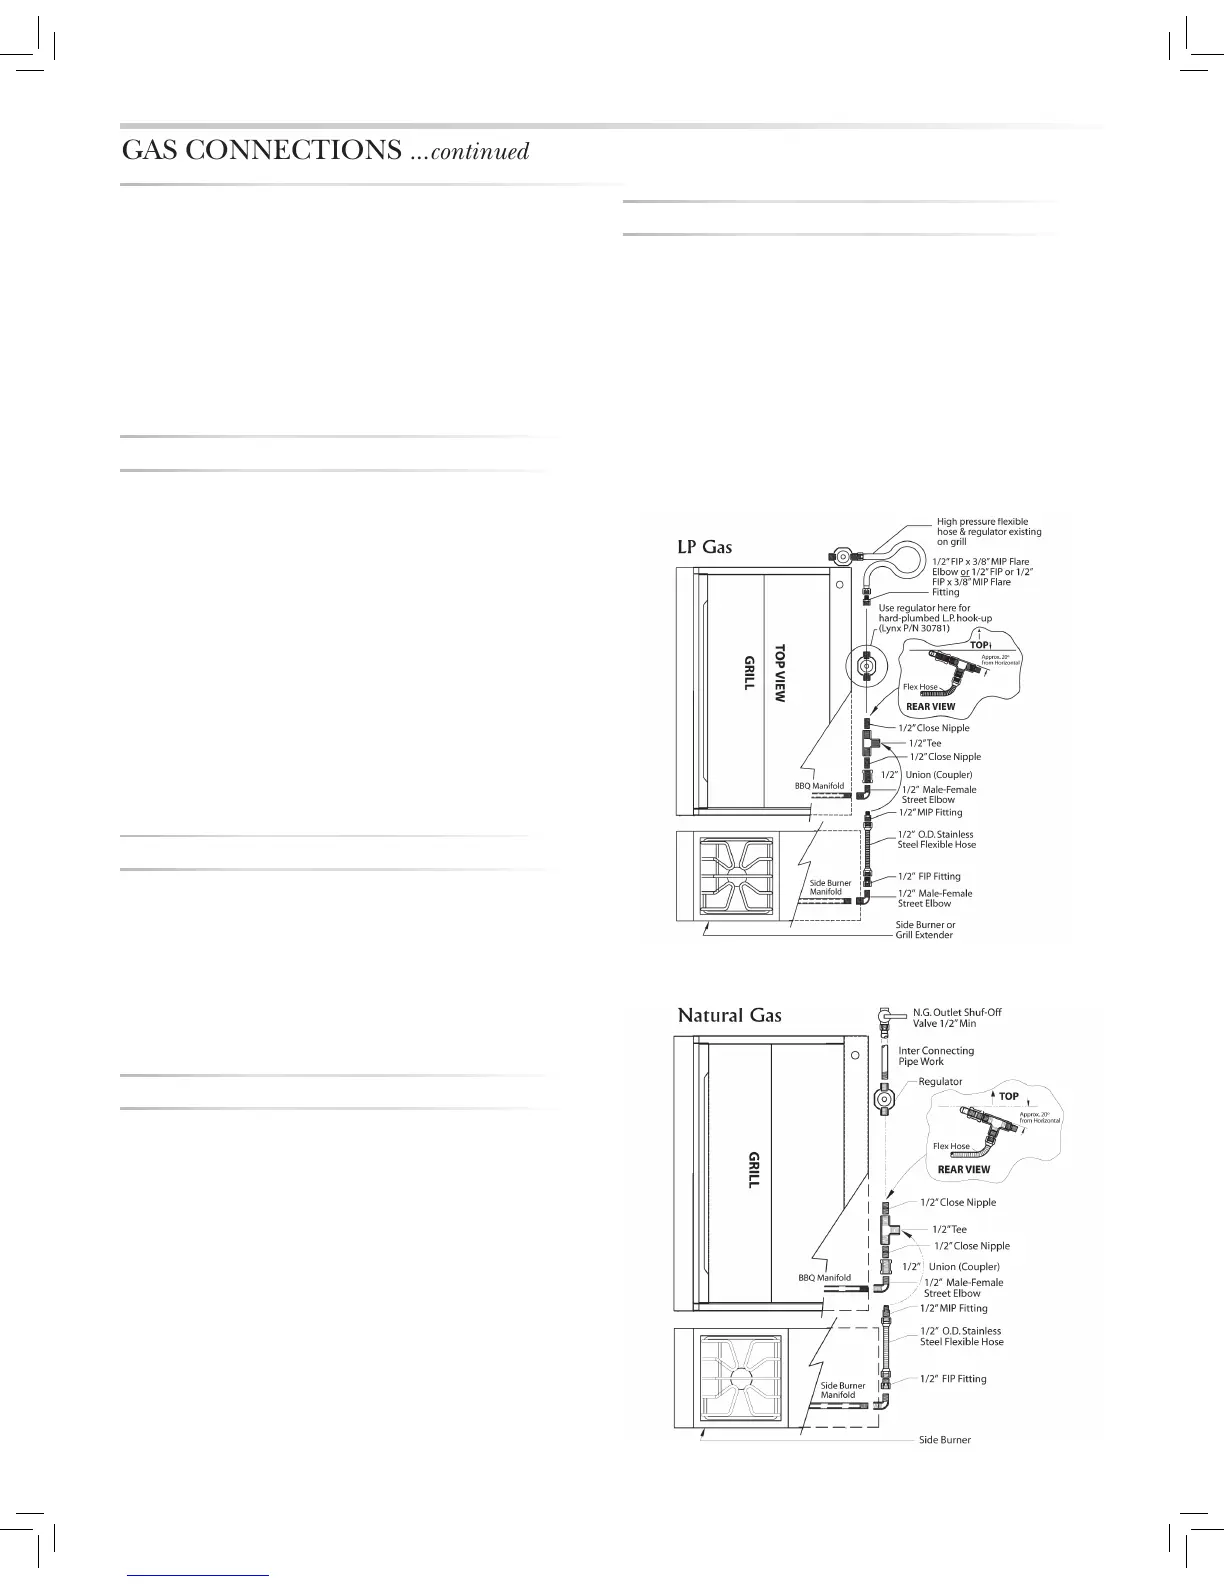
•Connect the gas supply to the grill and side burner as
shown in the two diagrams on this page.
•Turn the gas supply on and leak test all connections. (See
INDEX: “Leak Test” for further details.)
CART INSTALLATION
•Shut off the gas supply at the main valve.
•Disconnect all plumbing (if already attached) from the grill
and the gas supply valve.
•Remove all the fittings from the grill manifold.
•Install the side burner onto the cart according to the
directions supplied with the cart mounting kit.
•Connect the gas supply to the grill and the side burner as
shown in the diagrams on this page for your gas type.
•Turn the gas supply on and leak test all connections. (See
INDEX: “Leak Test” for further details.)
 Loading...